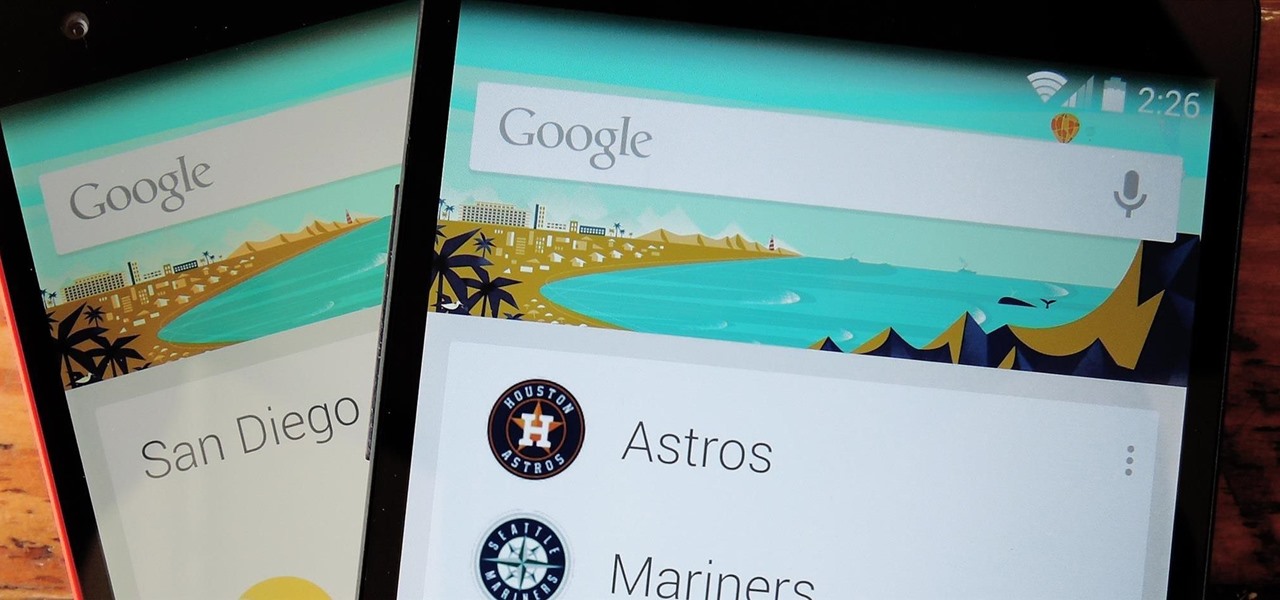

The Nexus 5 has a known issue with its display. Affecting all models from the first manufacturing run and most models thereafter, this display issue is easiest to notice on something with a white background. A yellowish tint, most noticeable when compared to other devices, seems to emanate from the Nexus 5's screen.
Thankfully, there's a fix for this issue. It's not an official one from Google, but it gets the job done quite well nonetheless. A combination of works done by developer Francisco Franco allows us to correct the screen—one a kernel, and the other a display calibrating app.
Prerequisites
Step 1: Download Franco Kernel
Franco's famous kernel provides the backbone to this softMod. A gamma control module is introduced by the kernel that allows color adjustments to be made by his app.
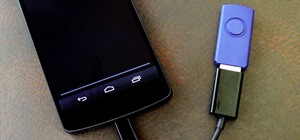
To download this kernel, tap this link from your Nexus 5. Alternatively, if you're reading this article on your computer, you can download the file and transfer it over to your Nexus 5's Download folder.
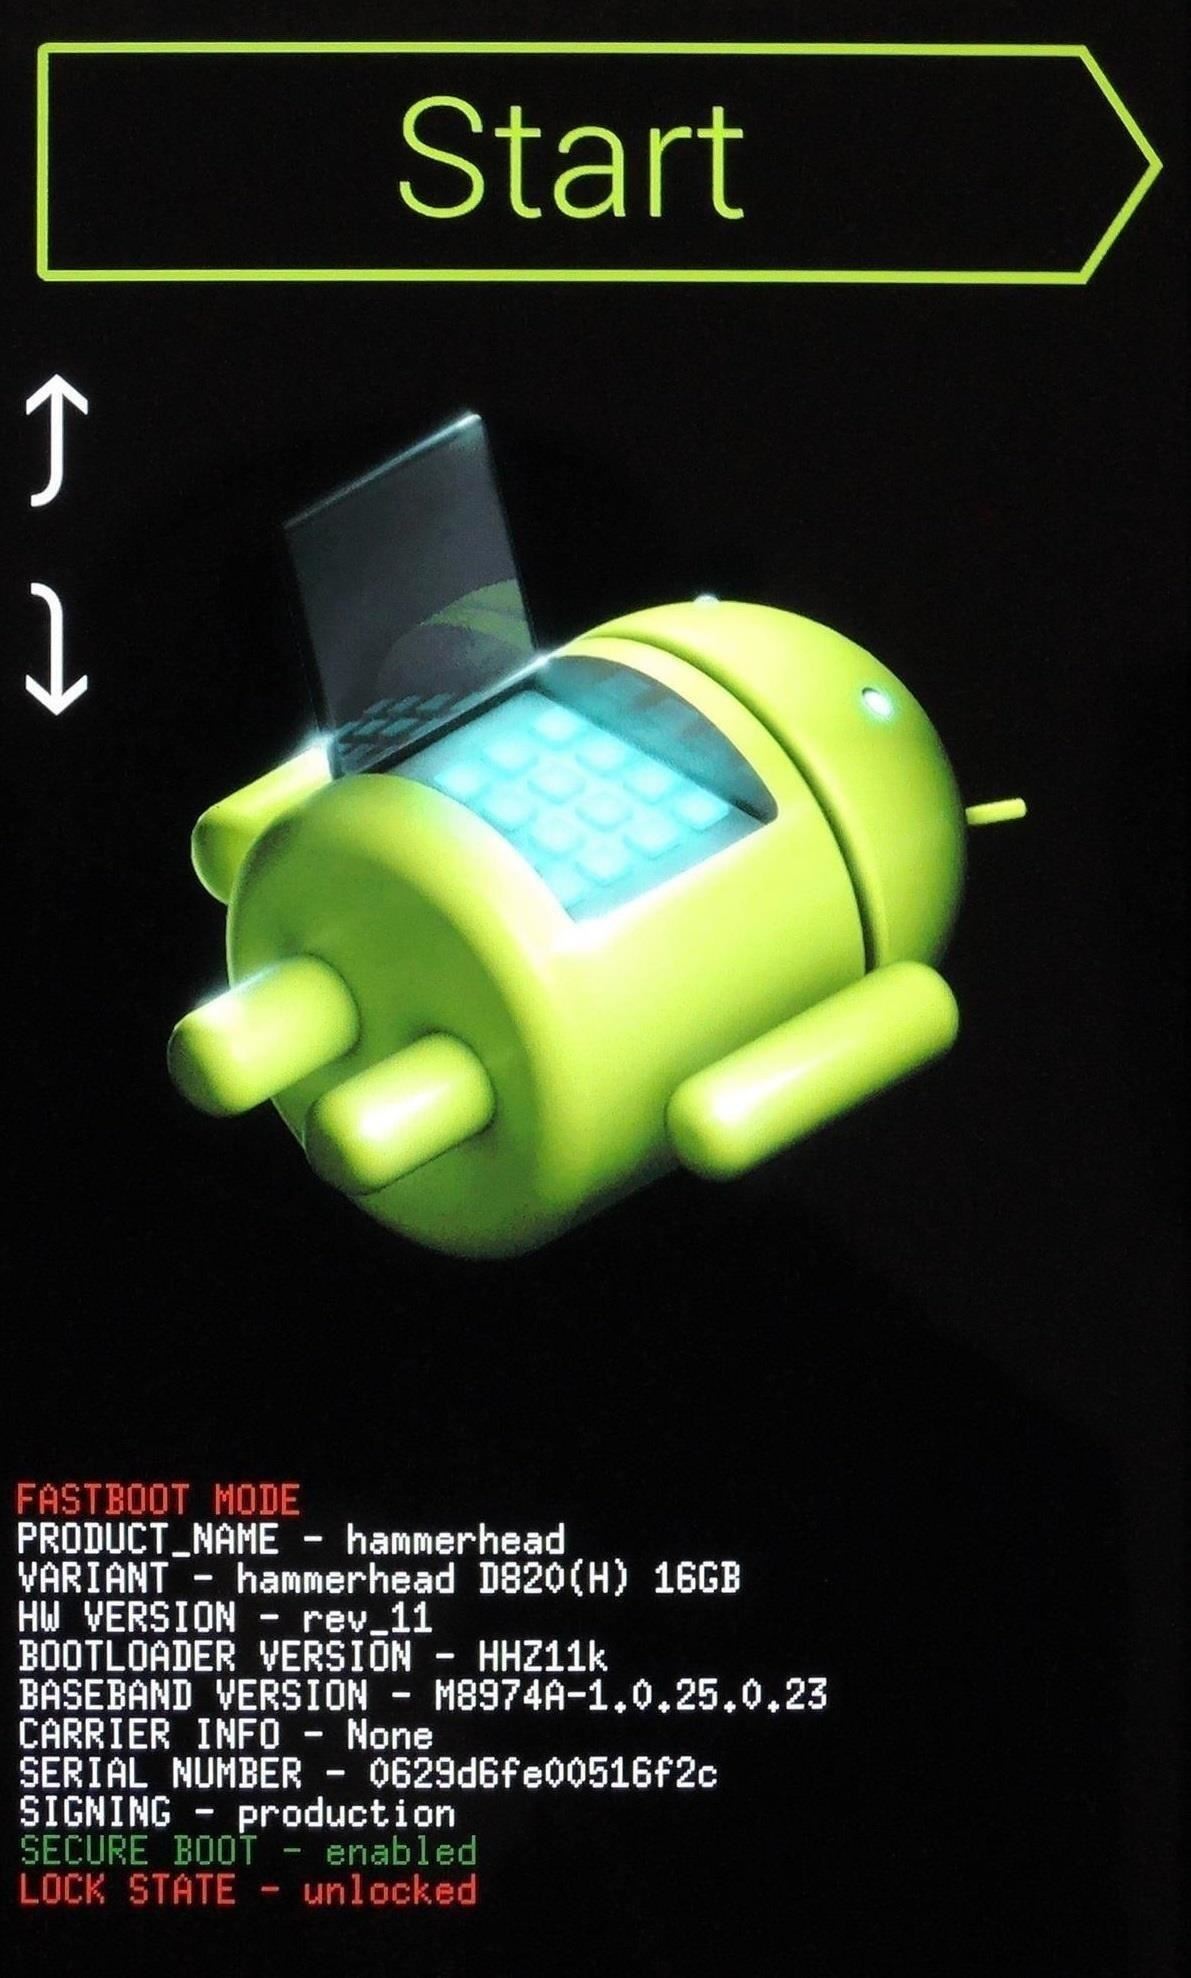
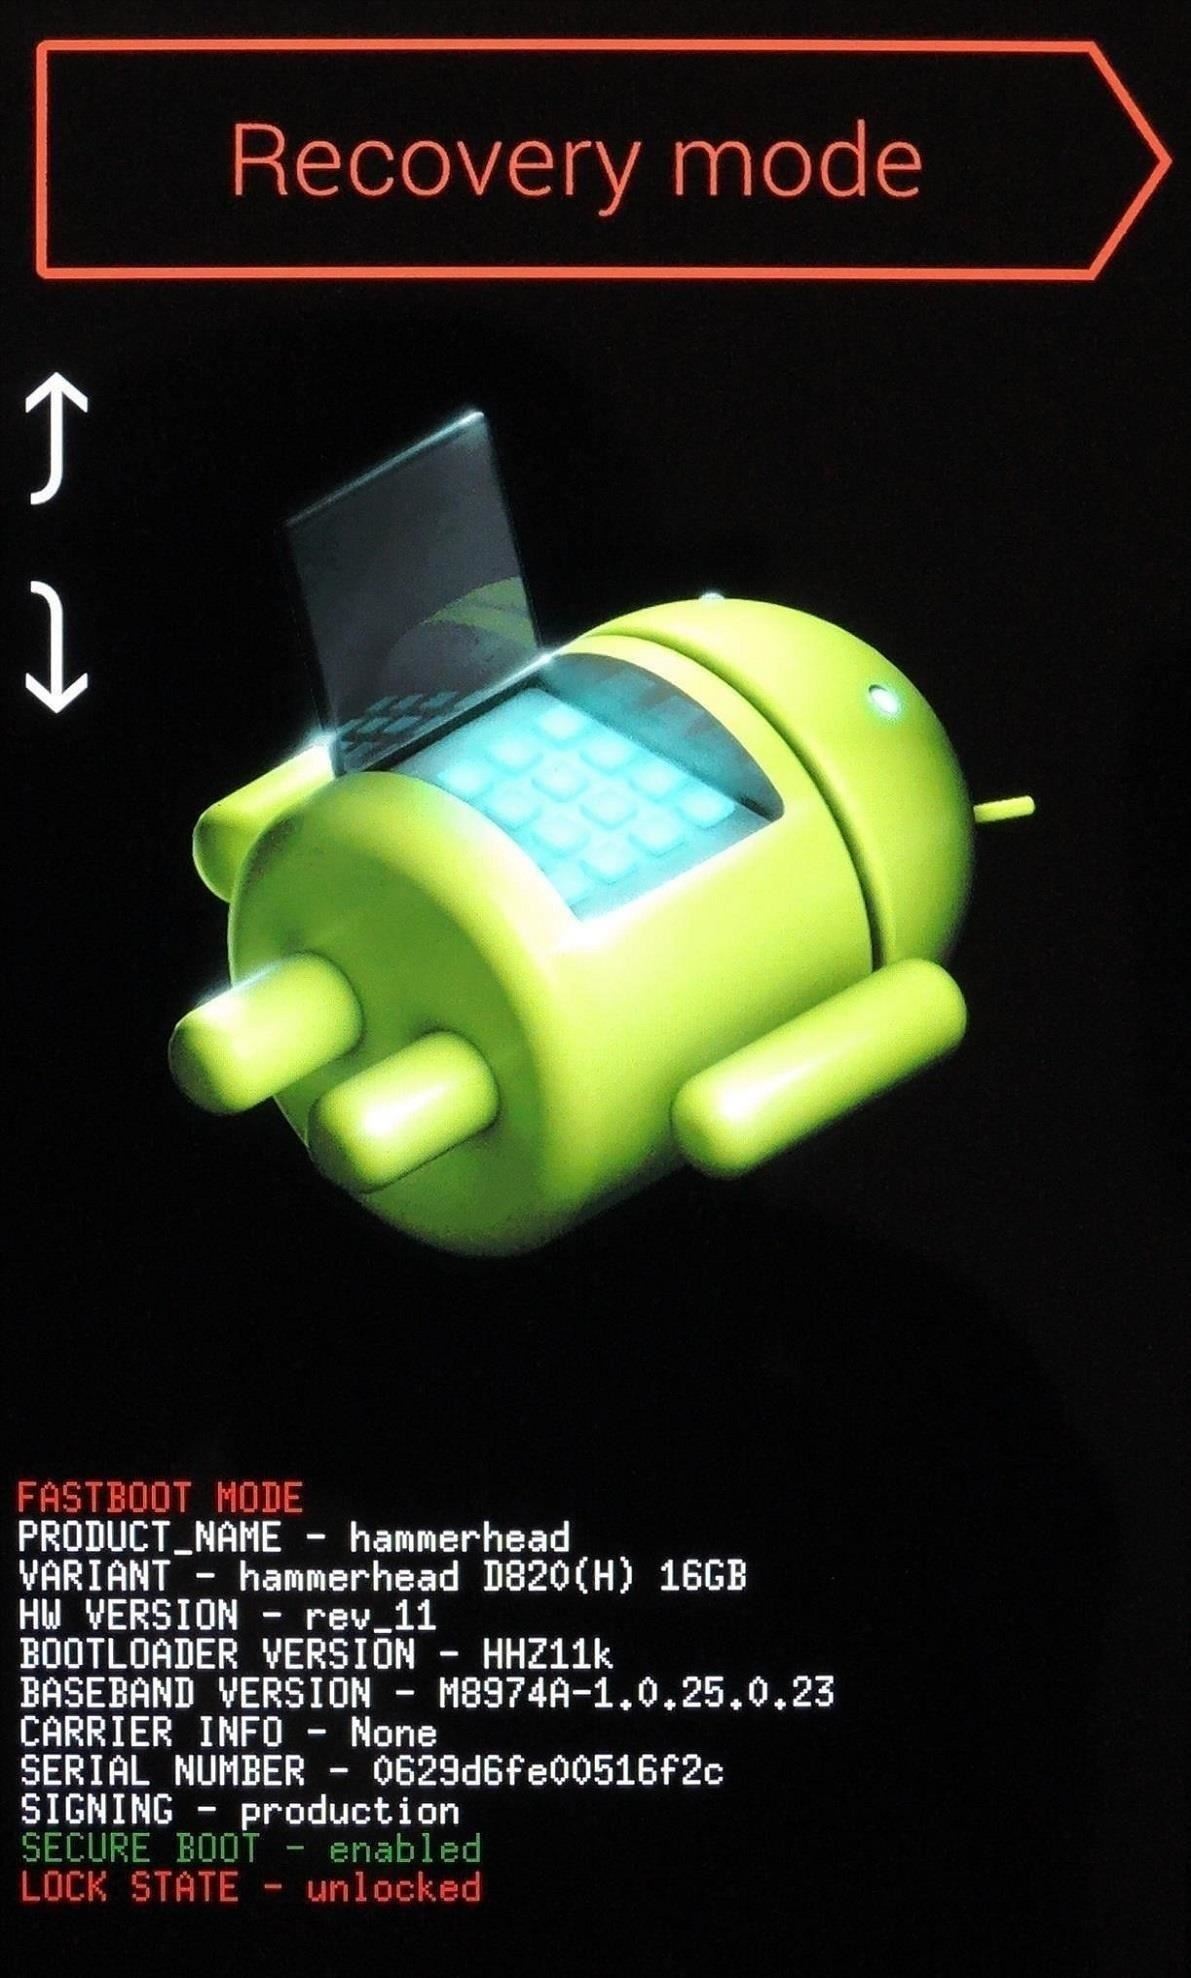
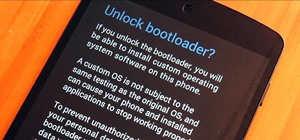
Step 2: Boot into Recovery
For a faster way to boot into recovery, check out my guide on that very subject.
Otherwise, you'll have completely power your phone off. When the screen goes black, hold the Volume Down button with one finger, then press the Power button with another. From the screen that comes up next, press the Volume Down button twice to highlight Recovery Mode, then press the Power button to confirm your choice.
Step 3: Install Franco Kernel
Before you go any further, be sure that you have a backup of your existing firmware. Franco Kernel performs beautifully on the Nexus 5, and you'll surely love it. But if you wish to return to stock after flashing this, the easiest way is to restore an existing backup.
From TWRP Recovery, first tap the Install button. Browse to your Download folder and tap the Franco.Kernel-nightly-r50.zip file.
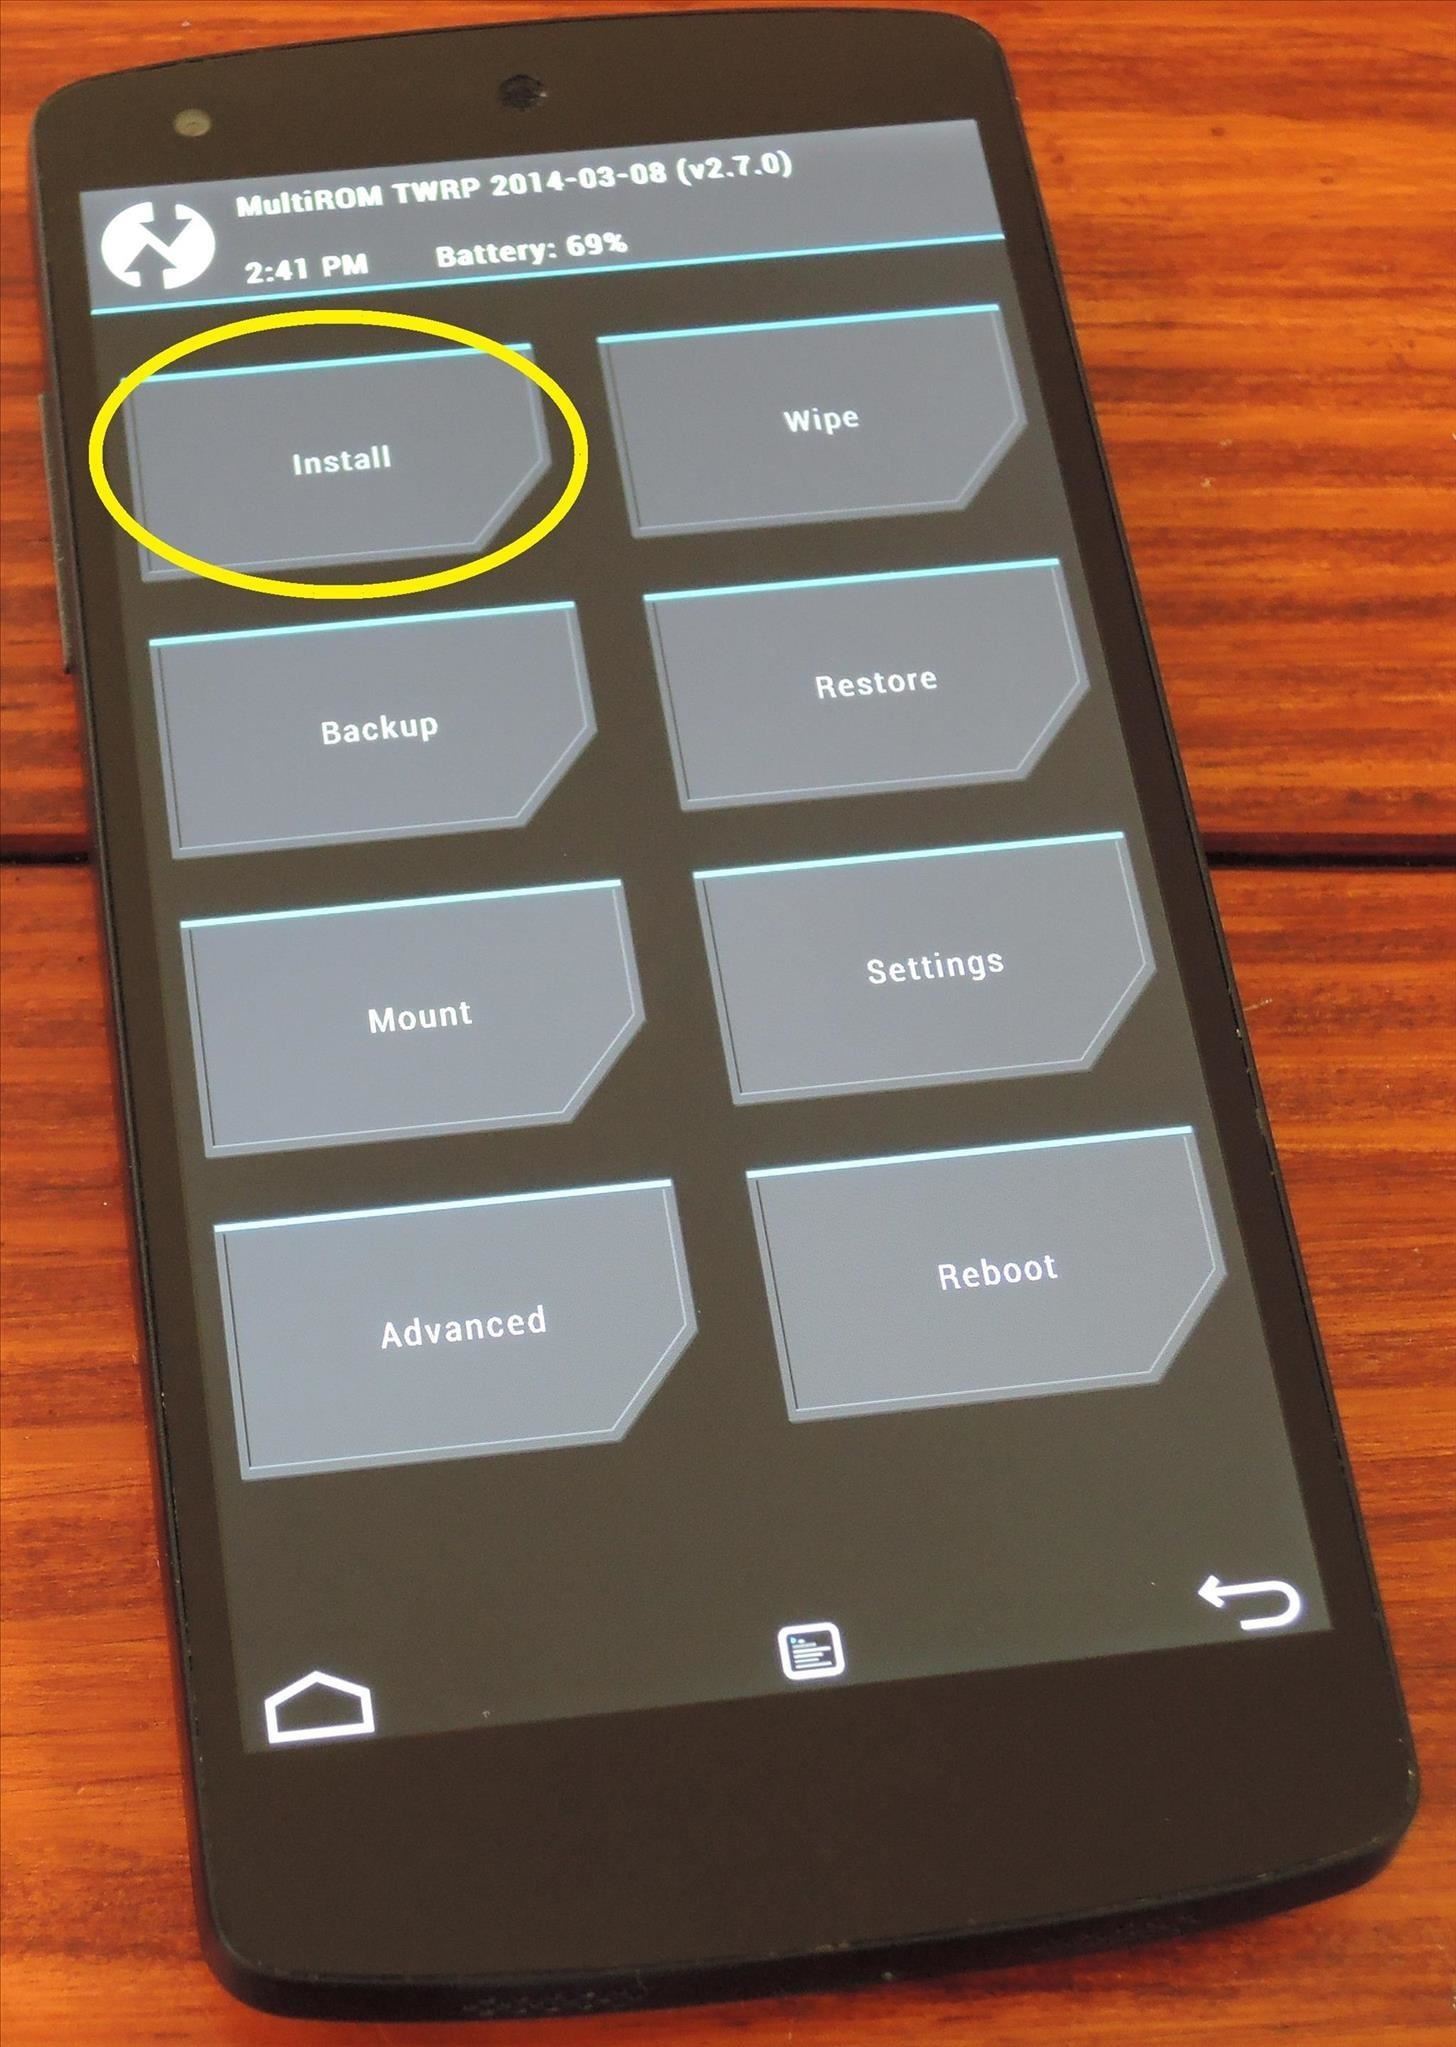
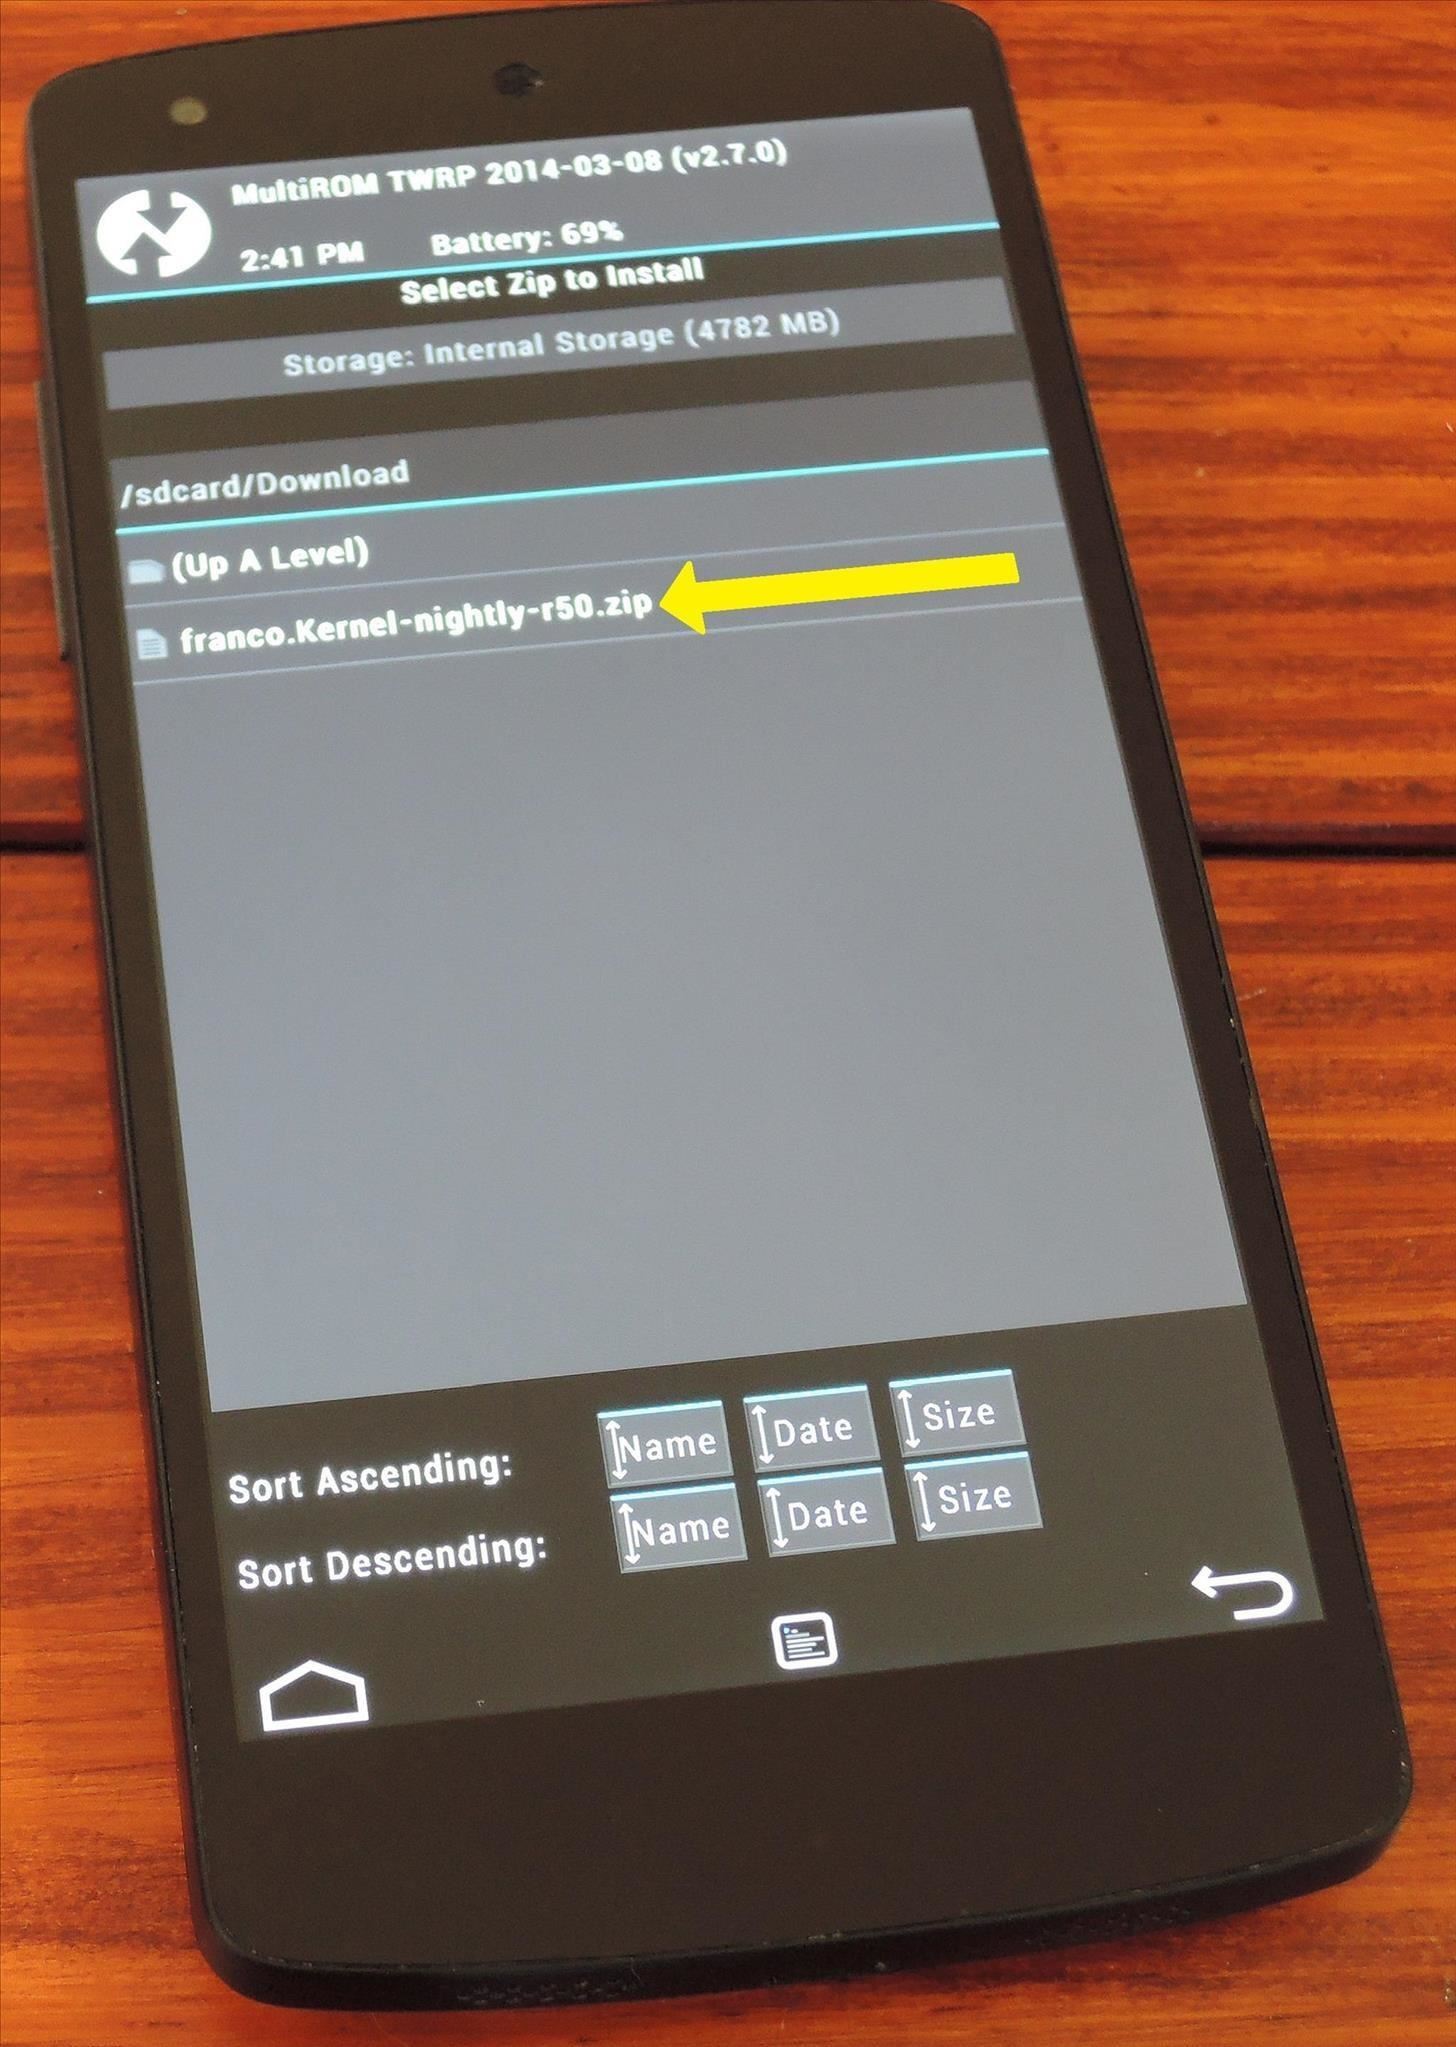
Next, swipe the slider across the bottom of the screen to initiate the install process. When finished, tap Reboot System.
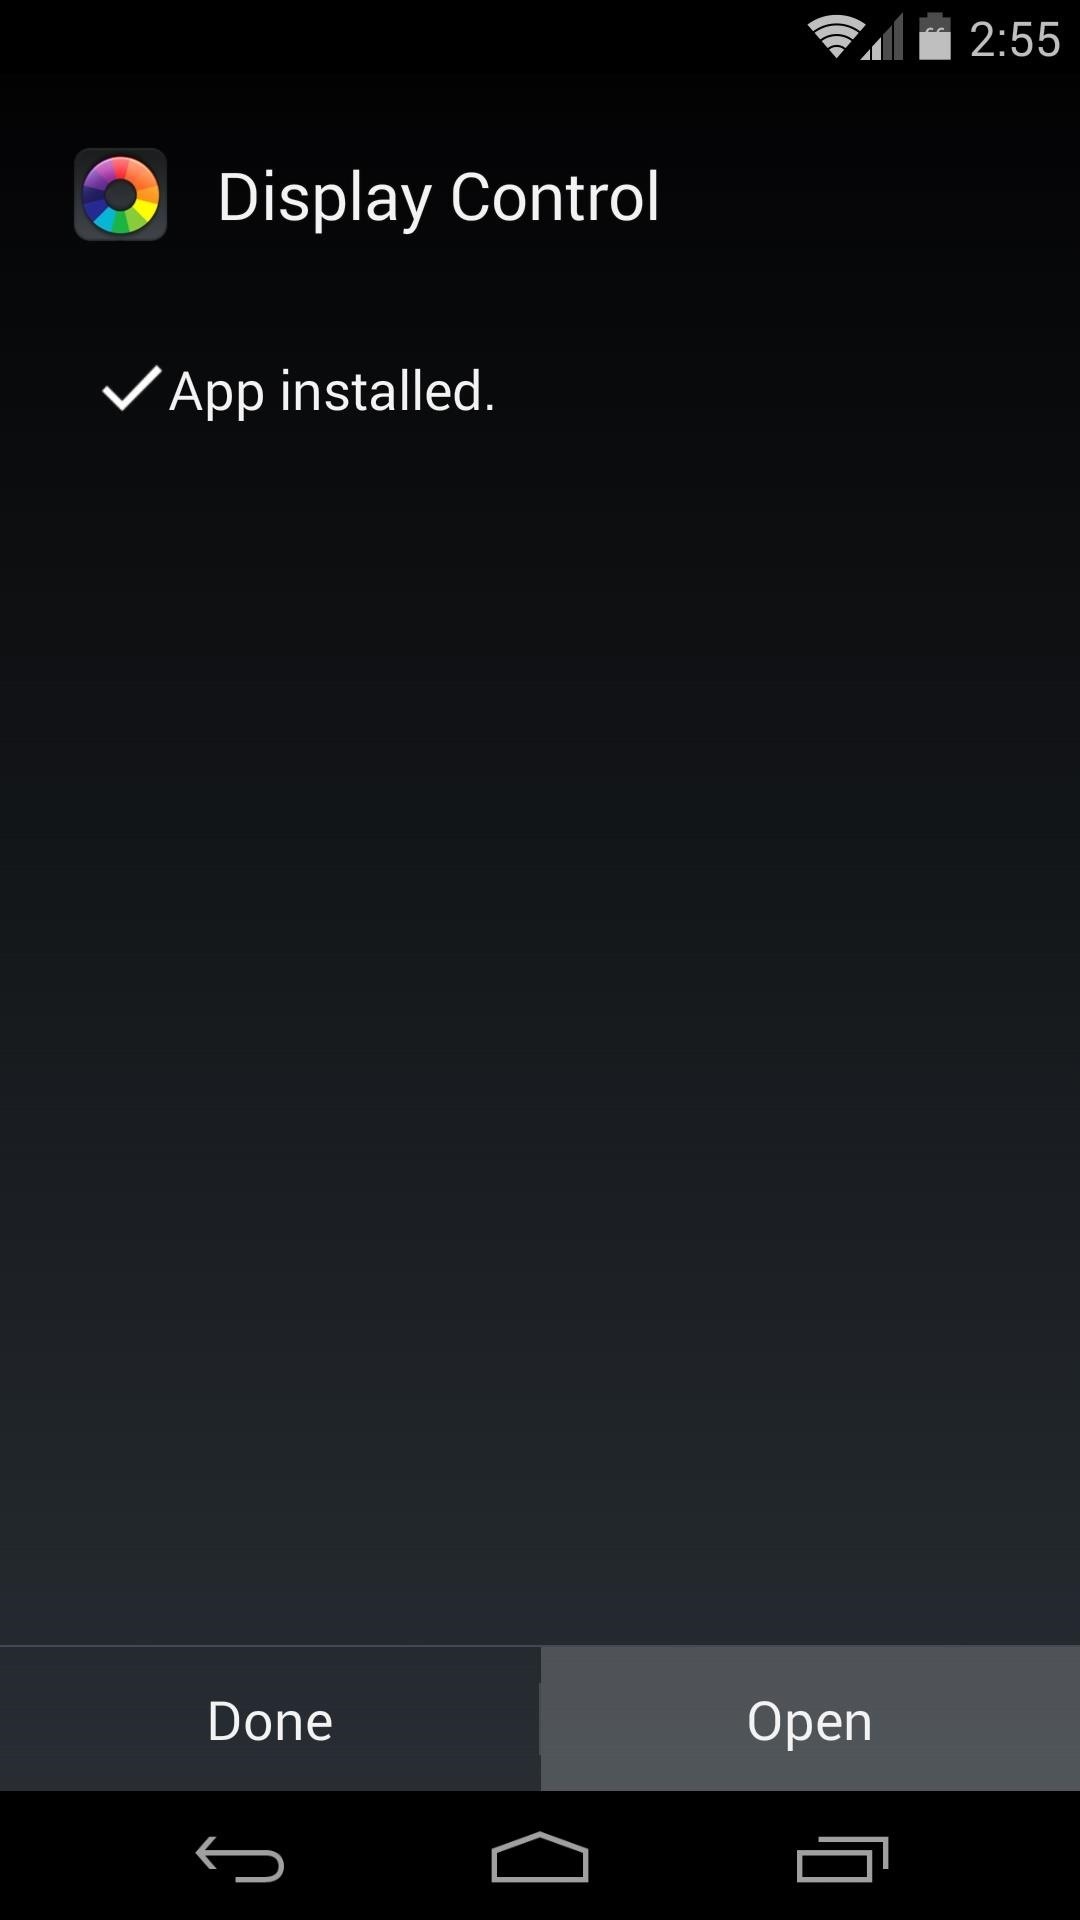
Step 4: Install Nexus Display Control
When you're booted back up, the next step is to install the app that can take advantage of Franco Kernel's built-in gamma controls. It's an app made by Francisco Franco specifically for this purpose, and it's available on Google Play for the price of $3.41. Franco has also made a free version of this app available to XDA users.
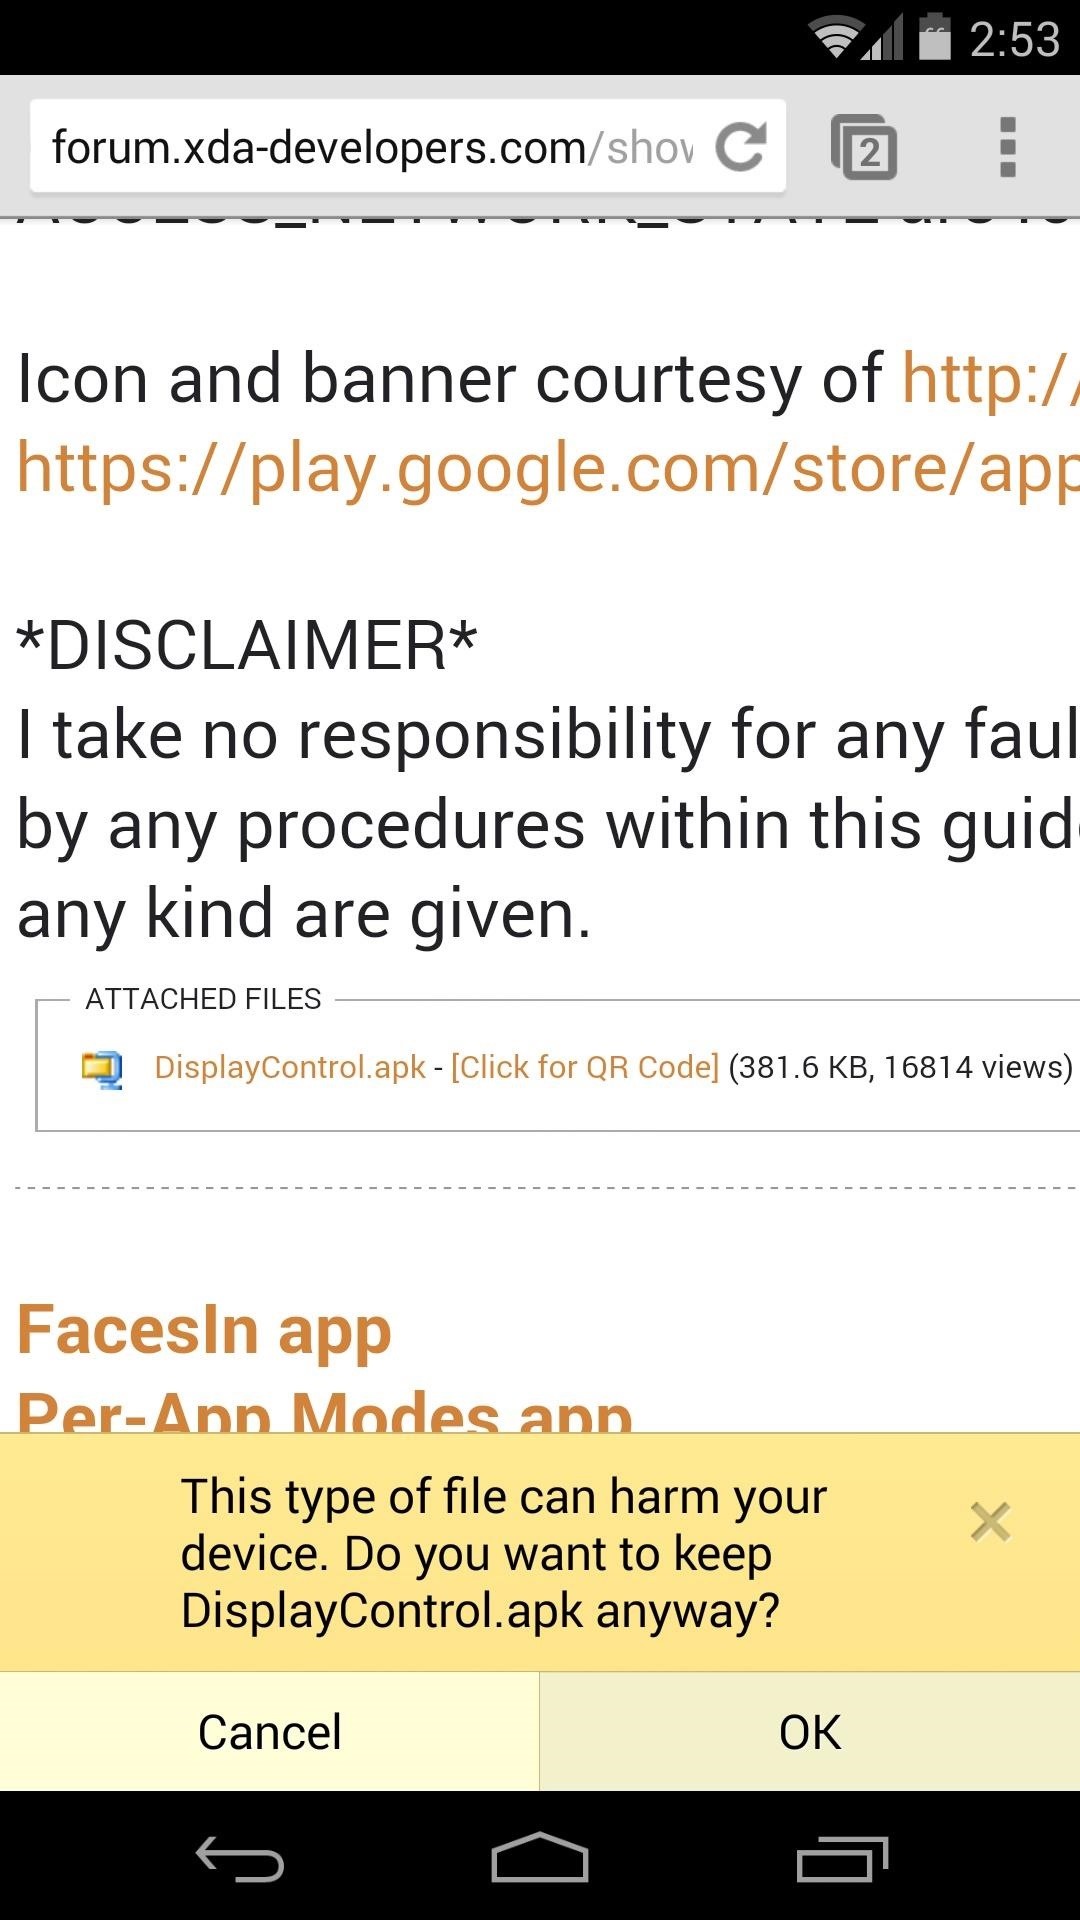
Franco has asked that this app not be shared outside of his thread on XDA, so I'll have to provide you a link to that thread if you'd like to download it that way. From your Nexus 5, tap this link to head to his XDA post. From here, scroll down a bit and find the link titled DisplayControl.apk. Tap that, then hit OK on the following popup.

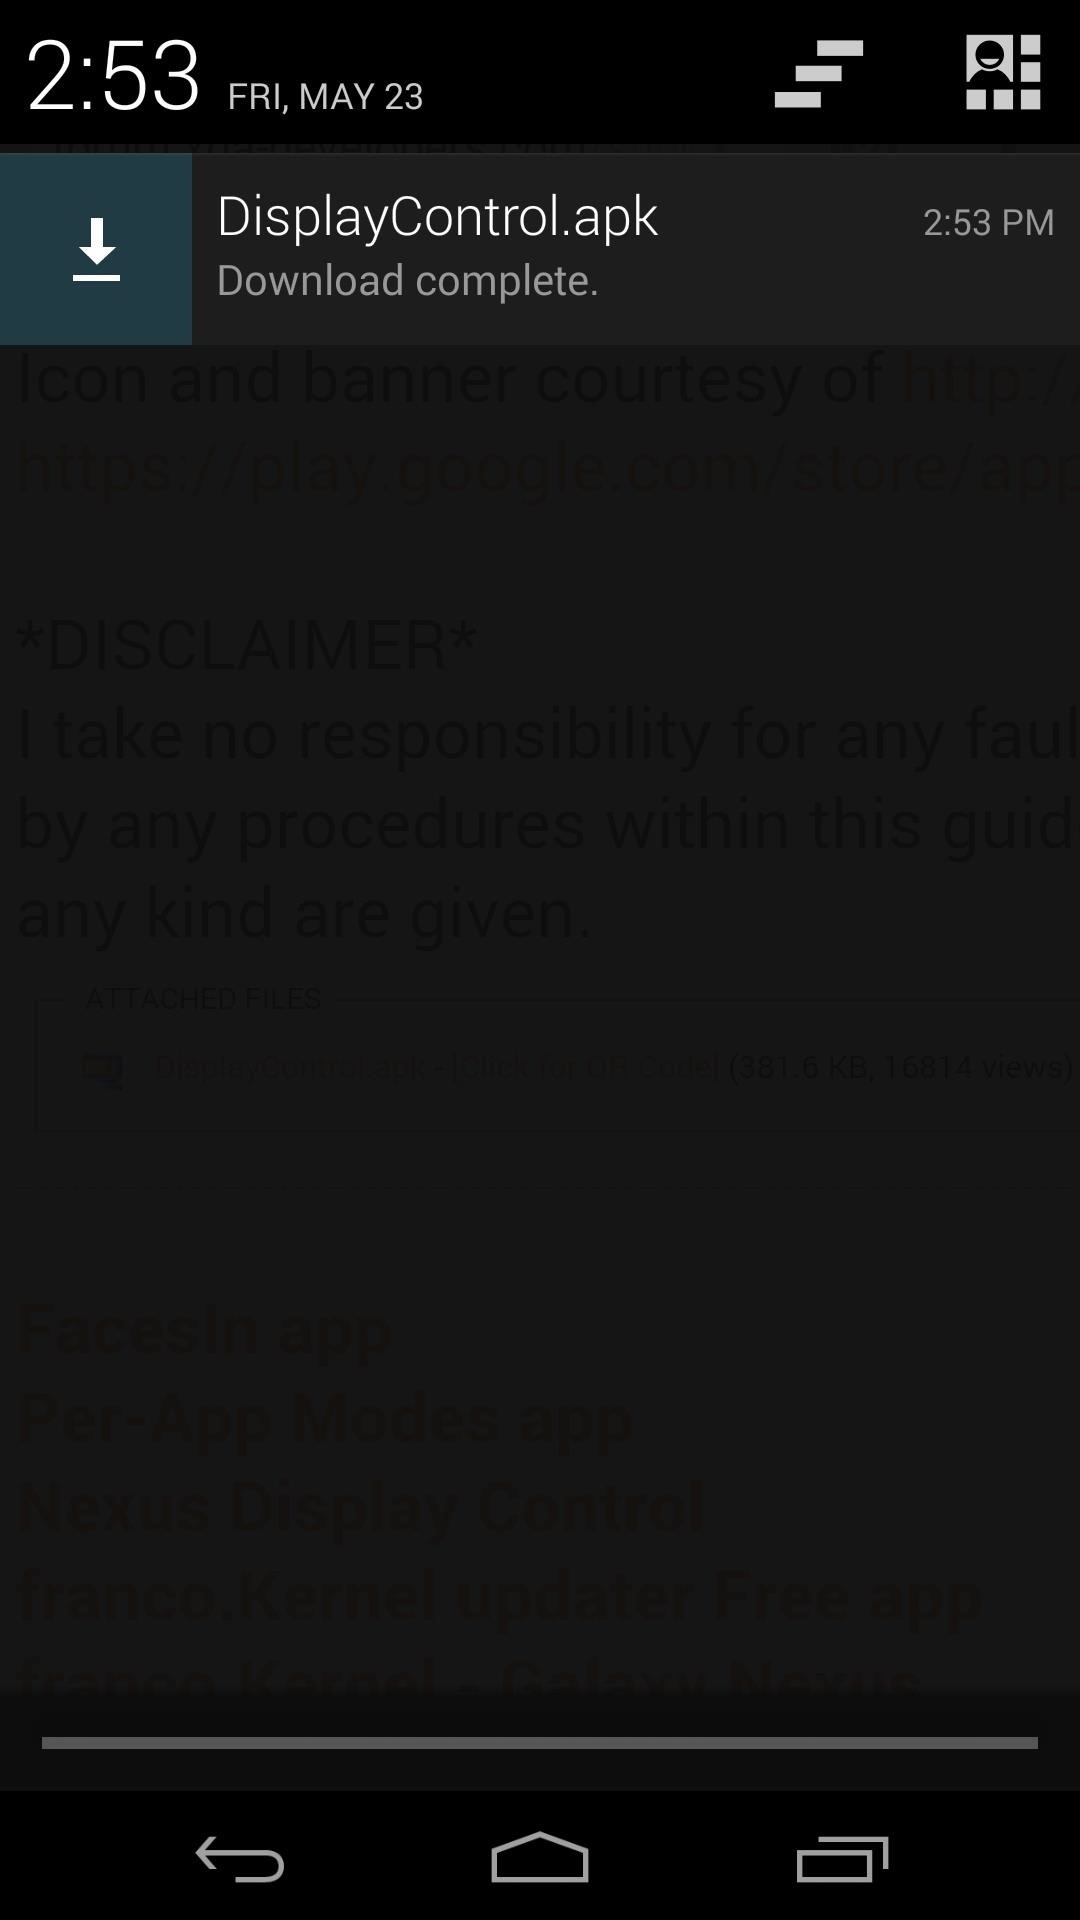
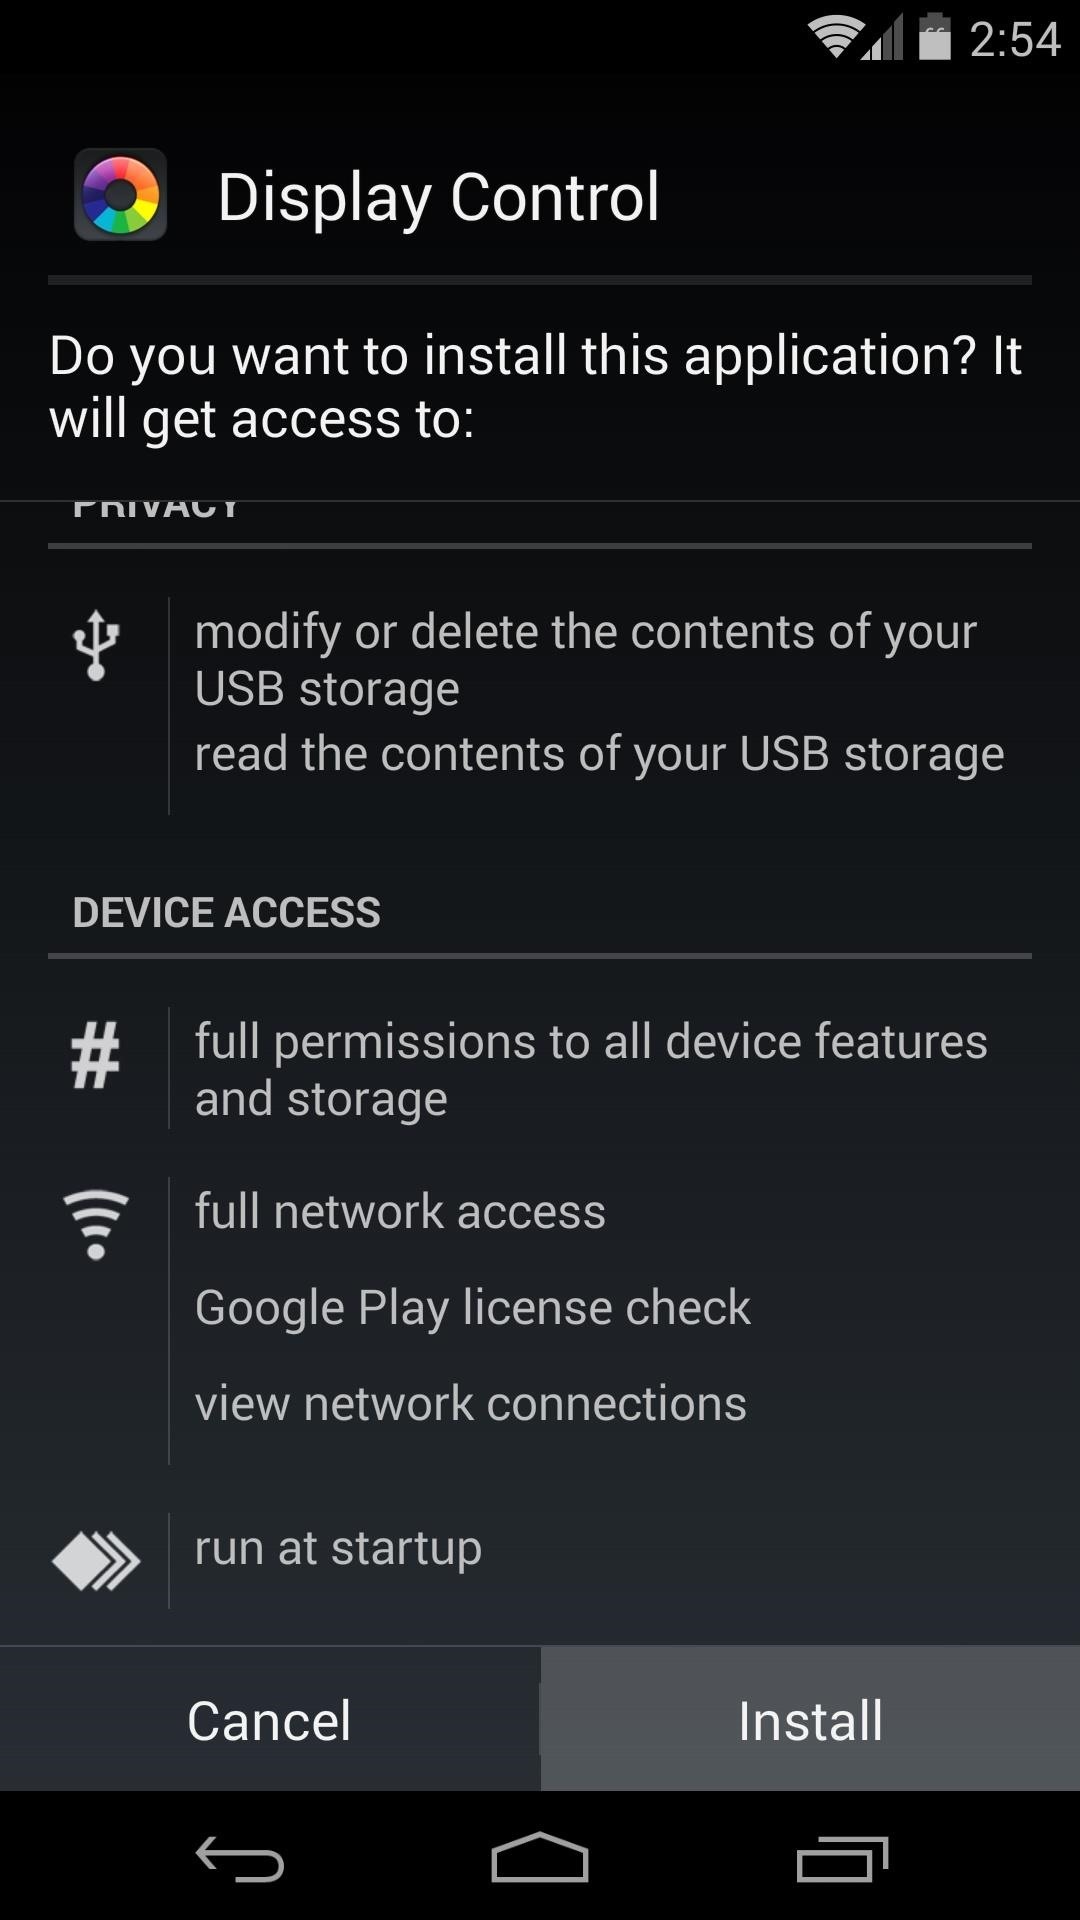
When the download is finished, tap the notification to launch the installer. Hit Install, and when finished, tap Open.
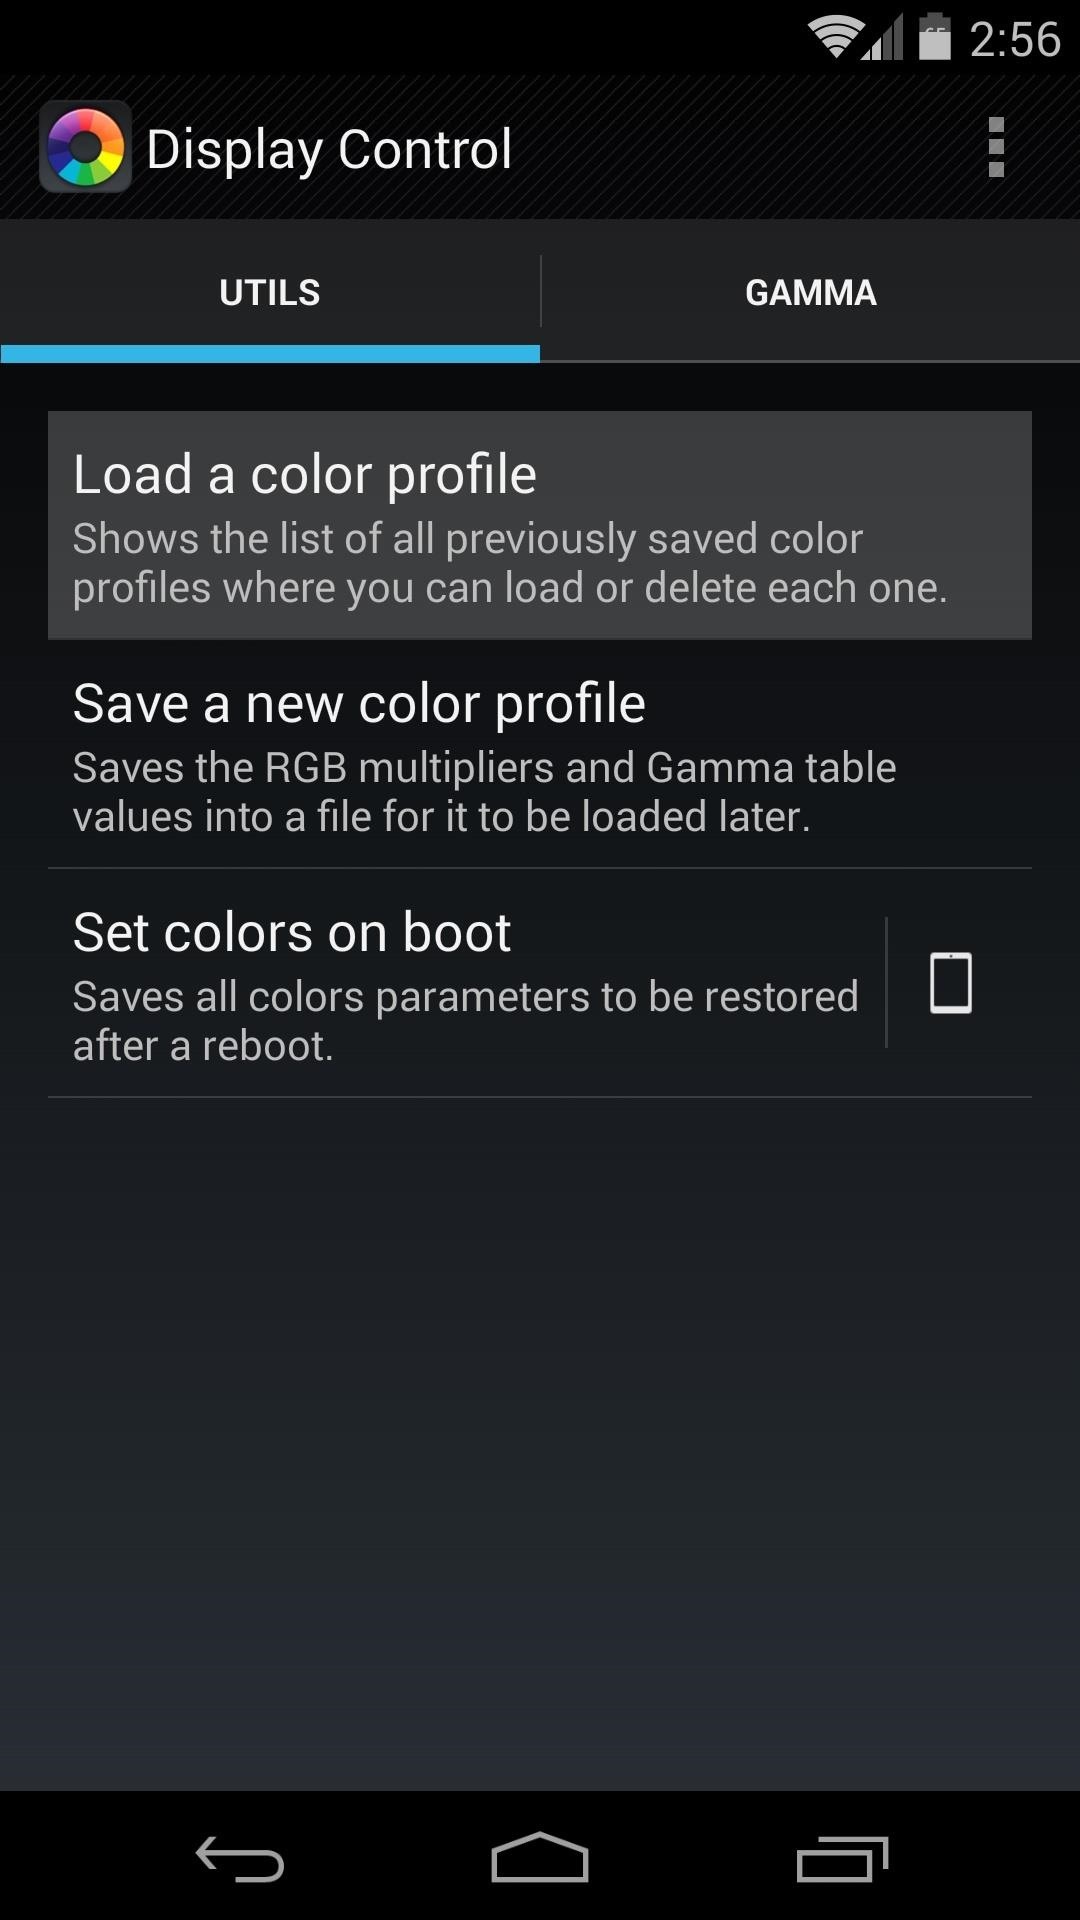
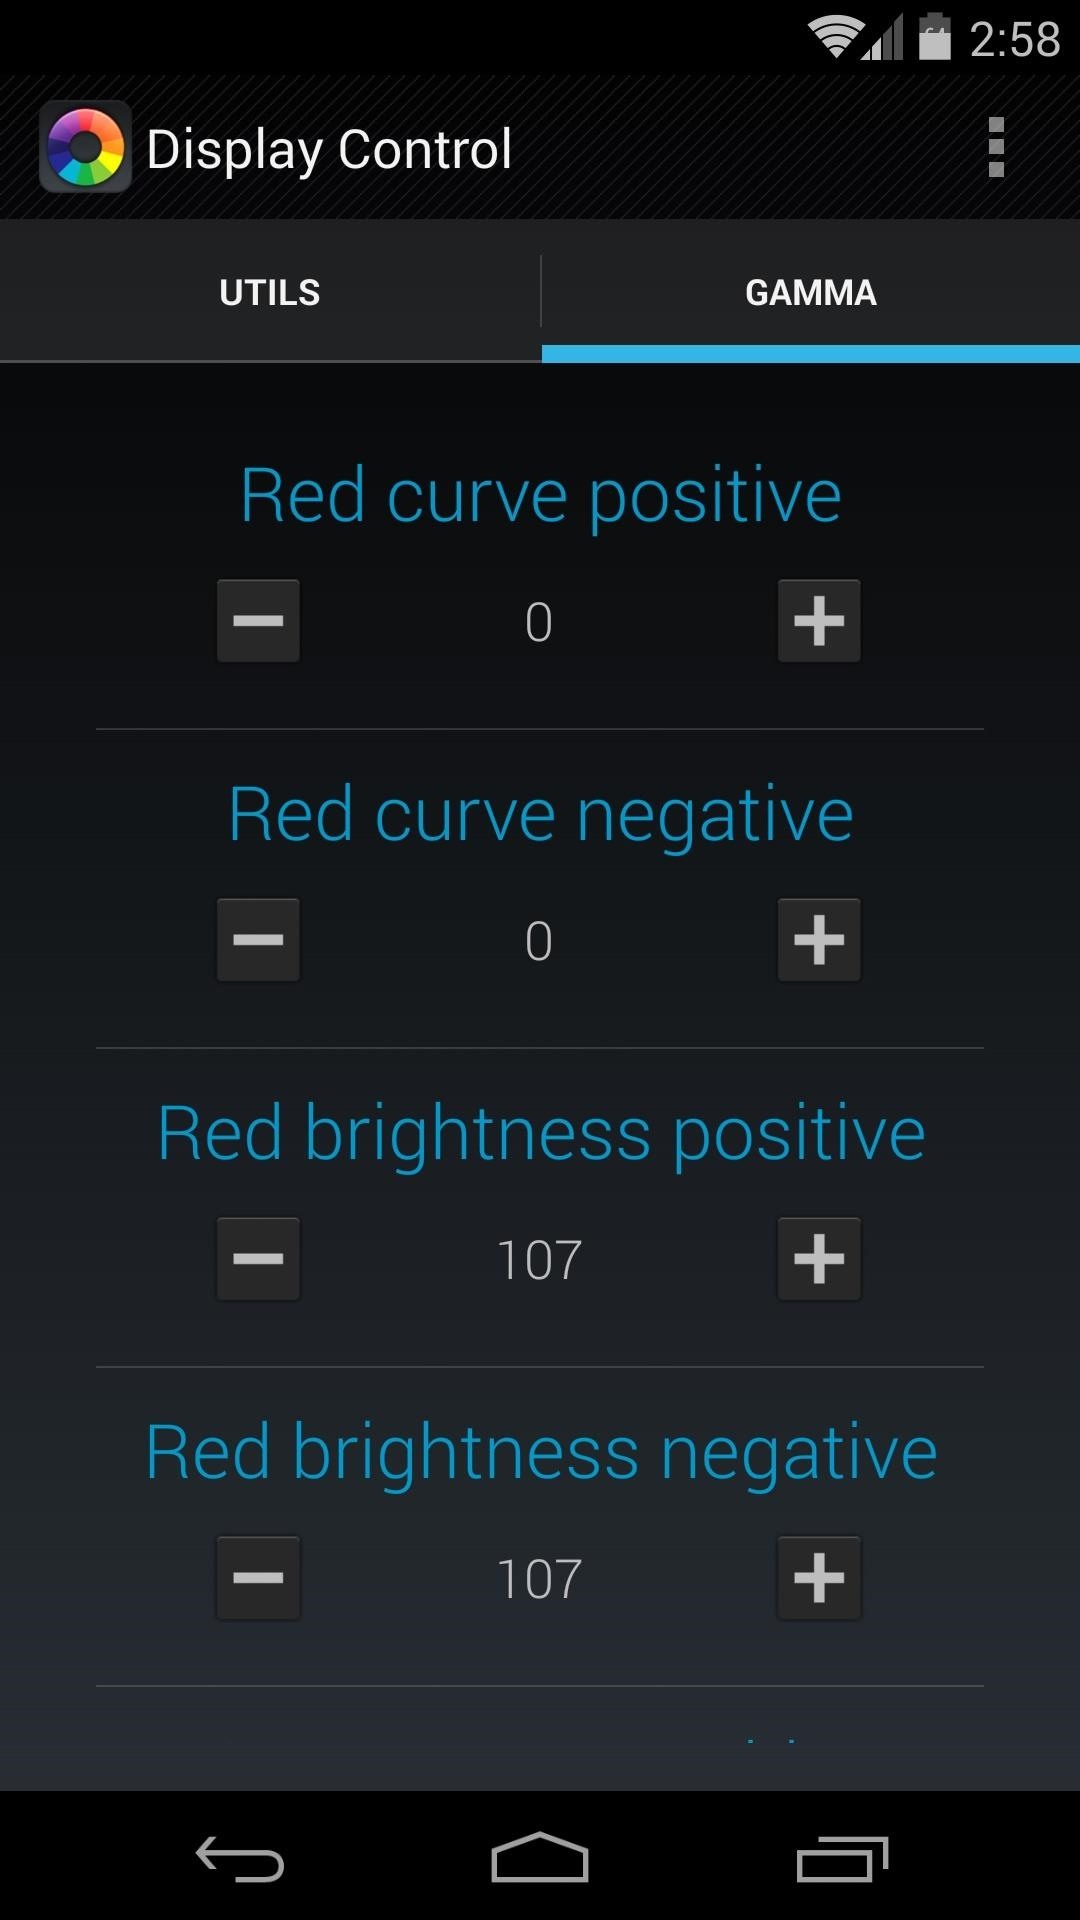
Step 5: Configure Display Control
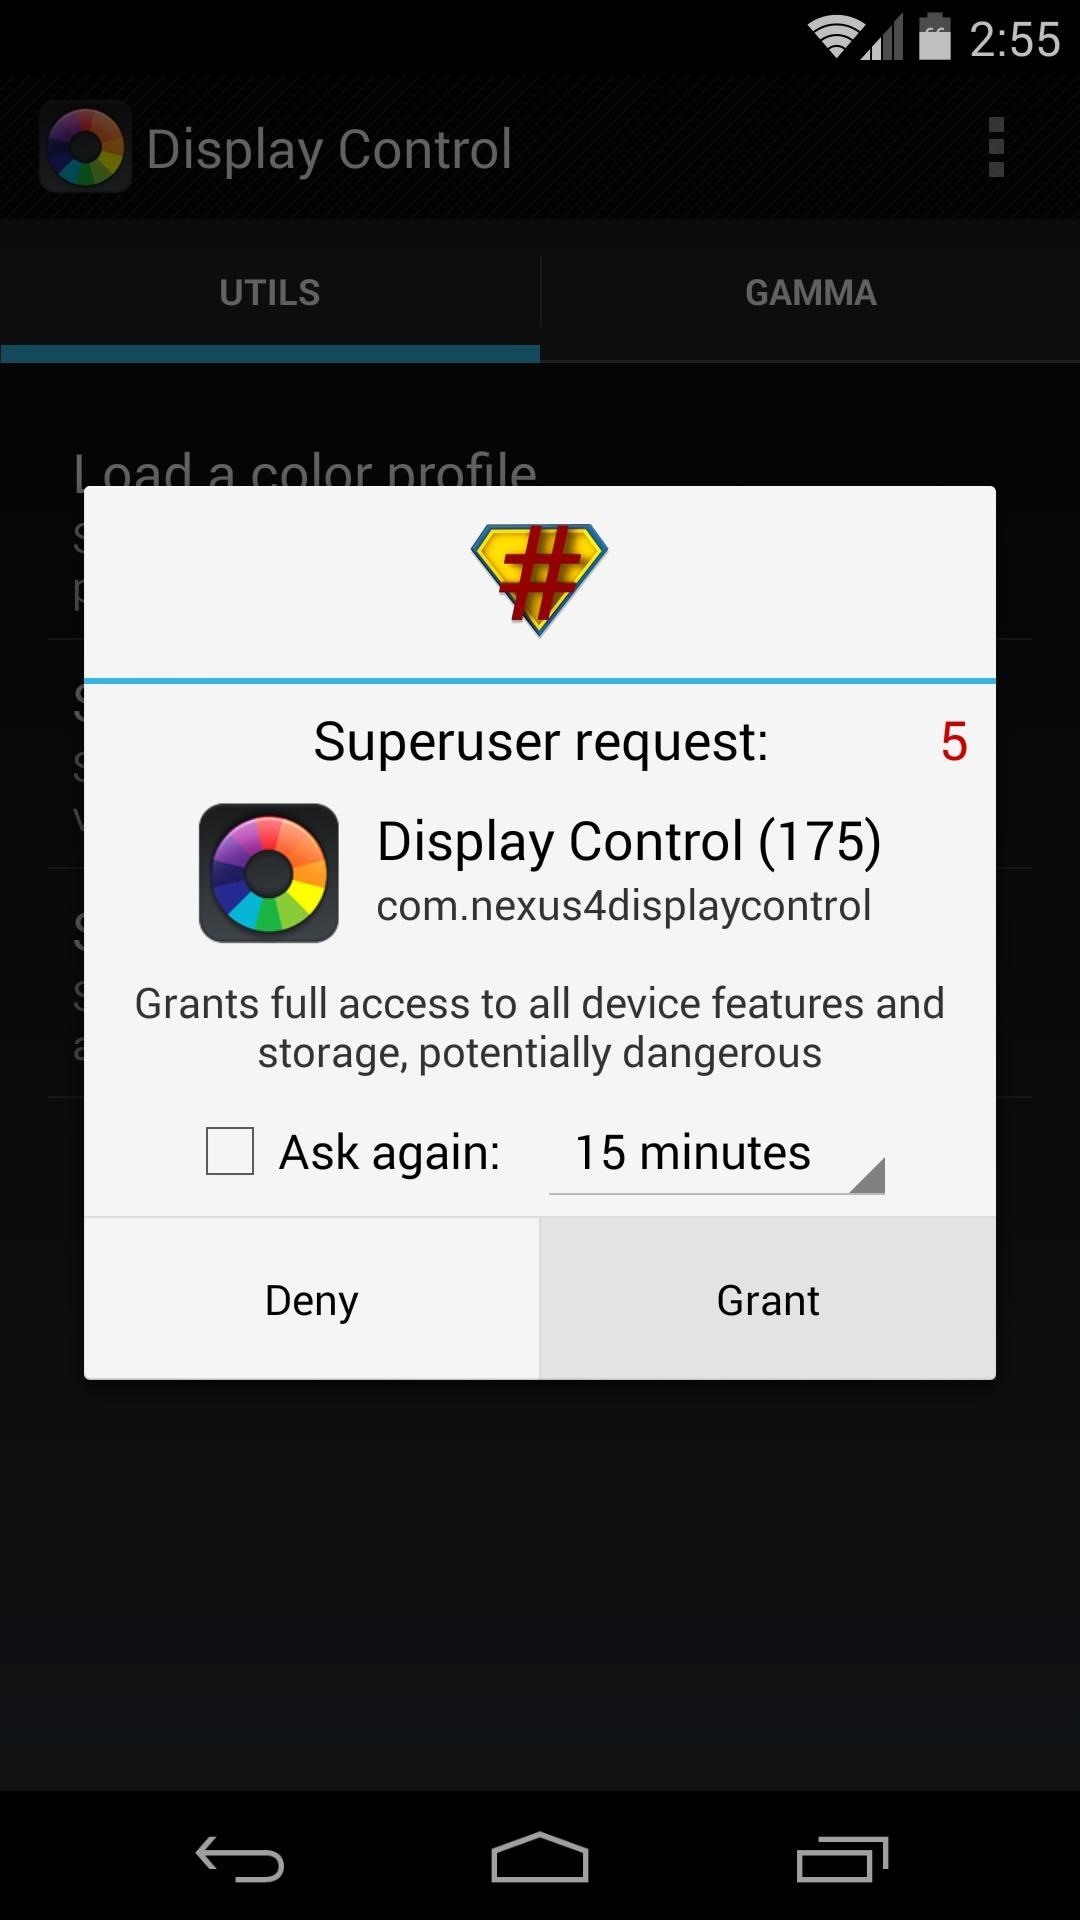
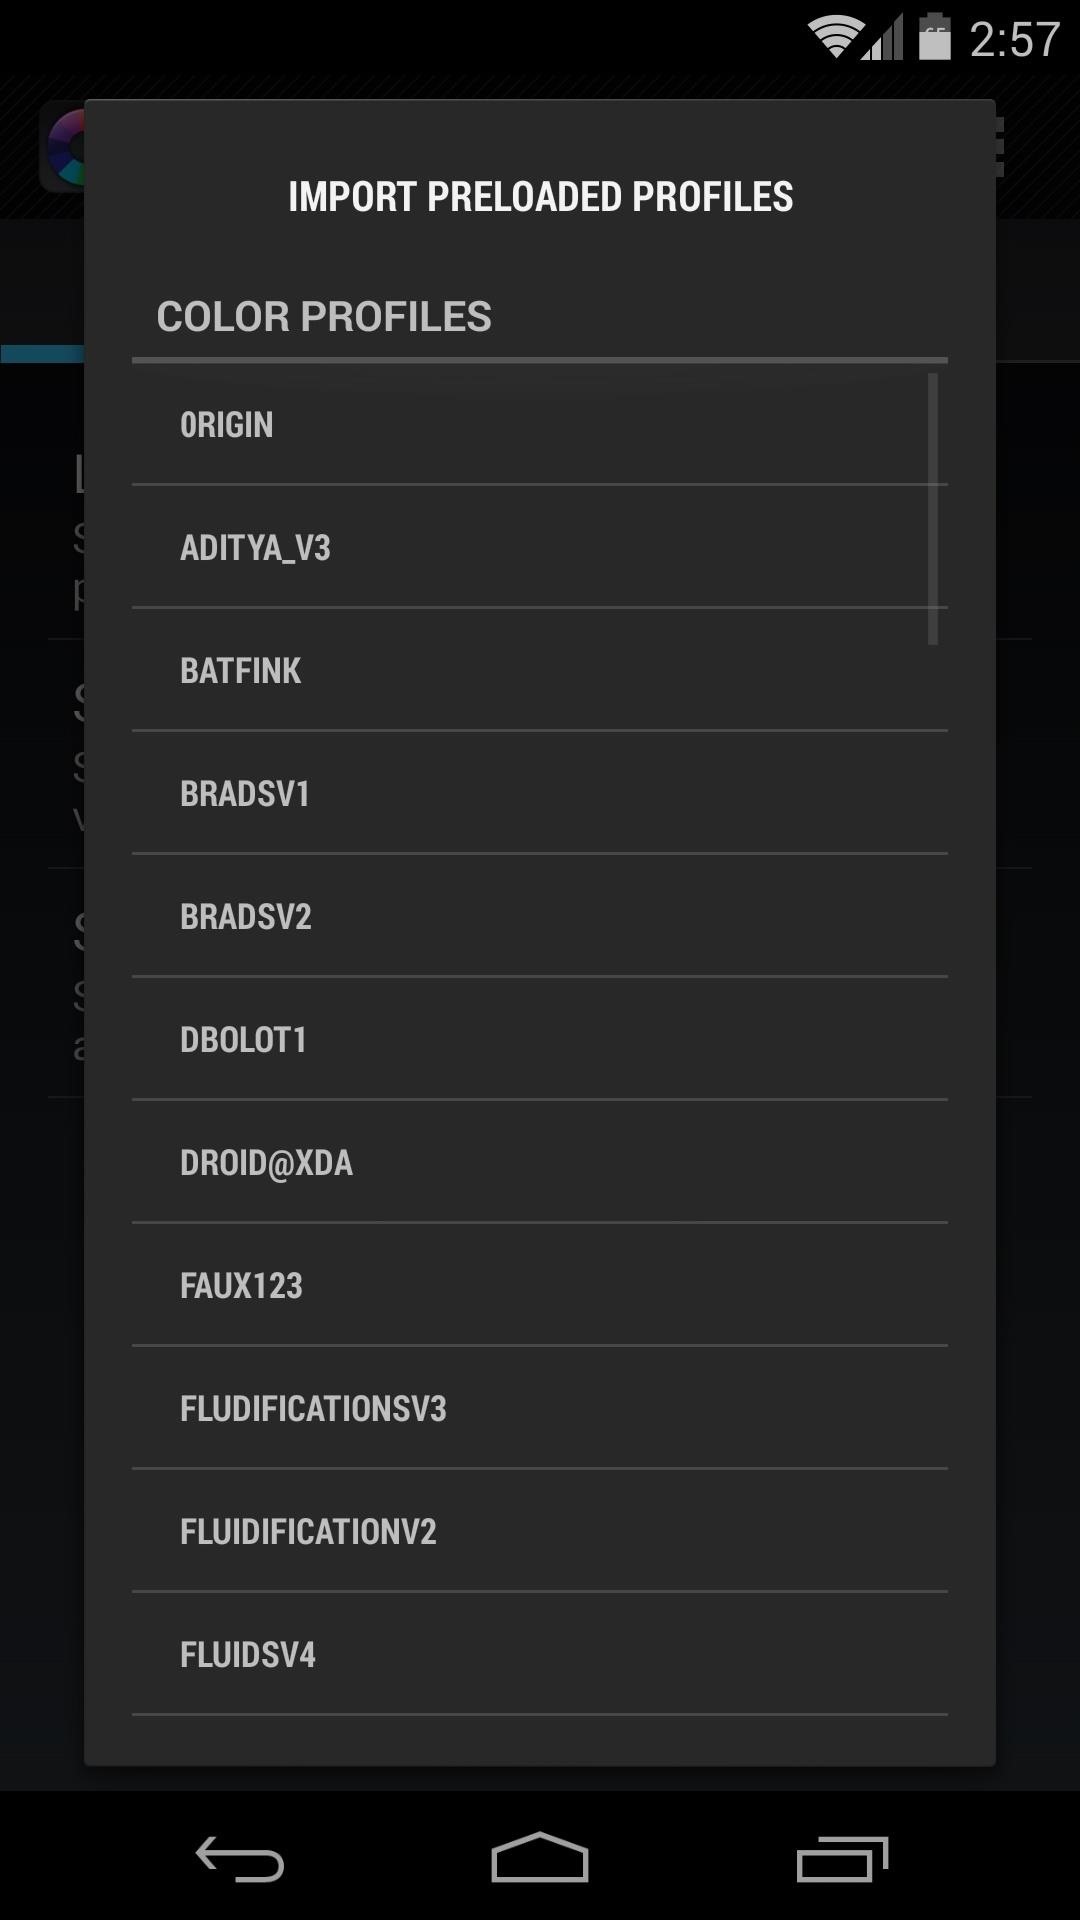
When you first open Display Control, it will ask for root privileges. Grant it those, then tap Load a Color Profile. From here, hit Import Preloaded Profiles.
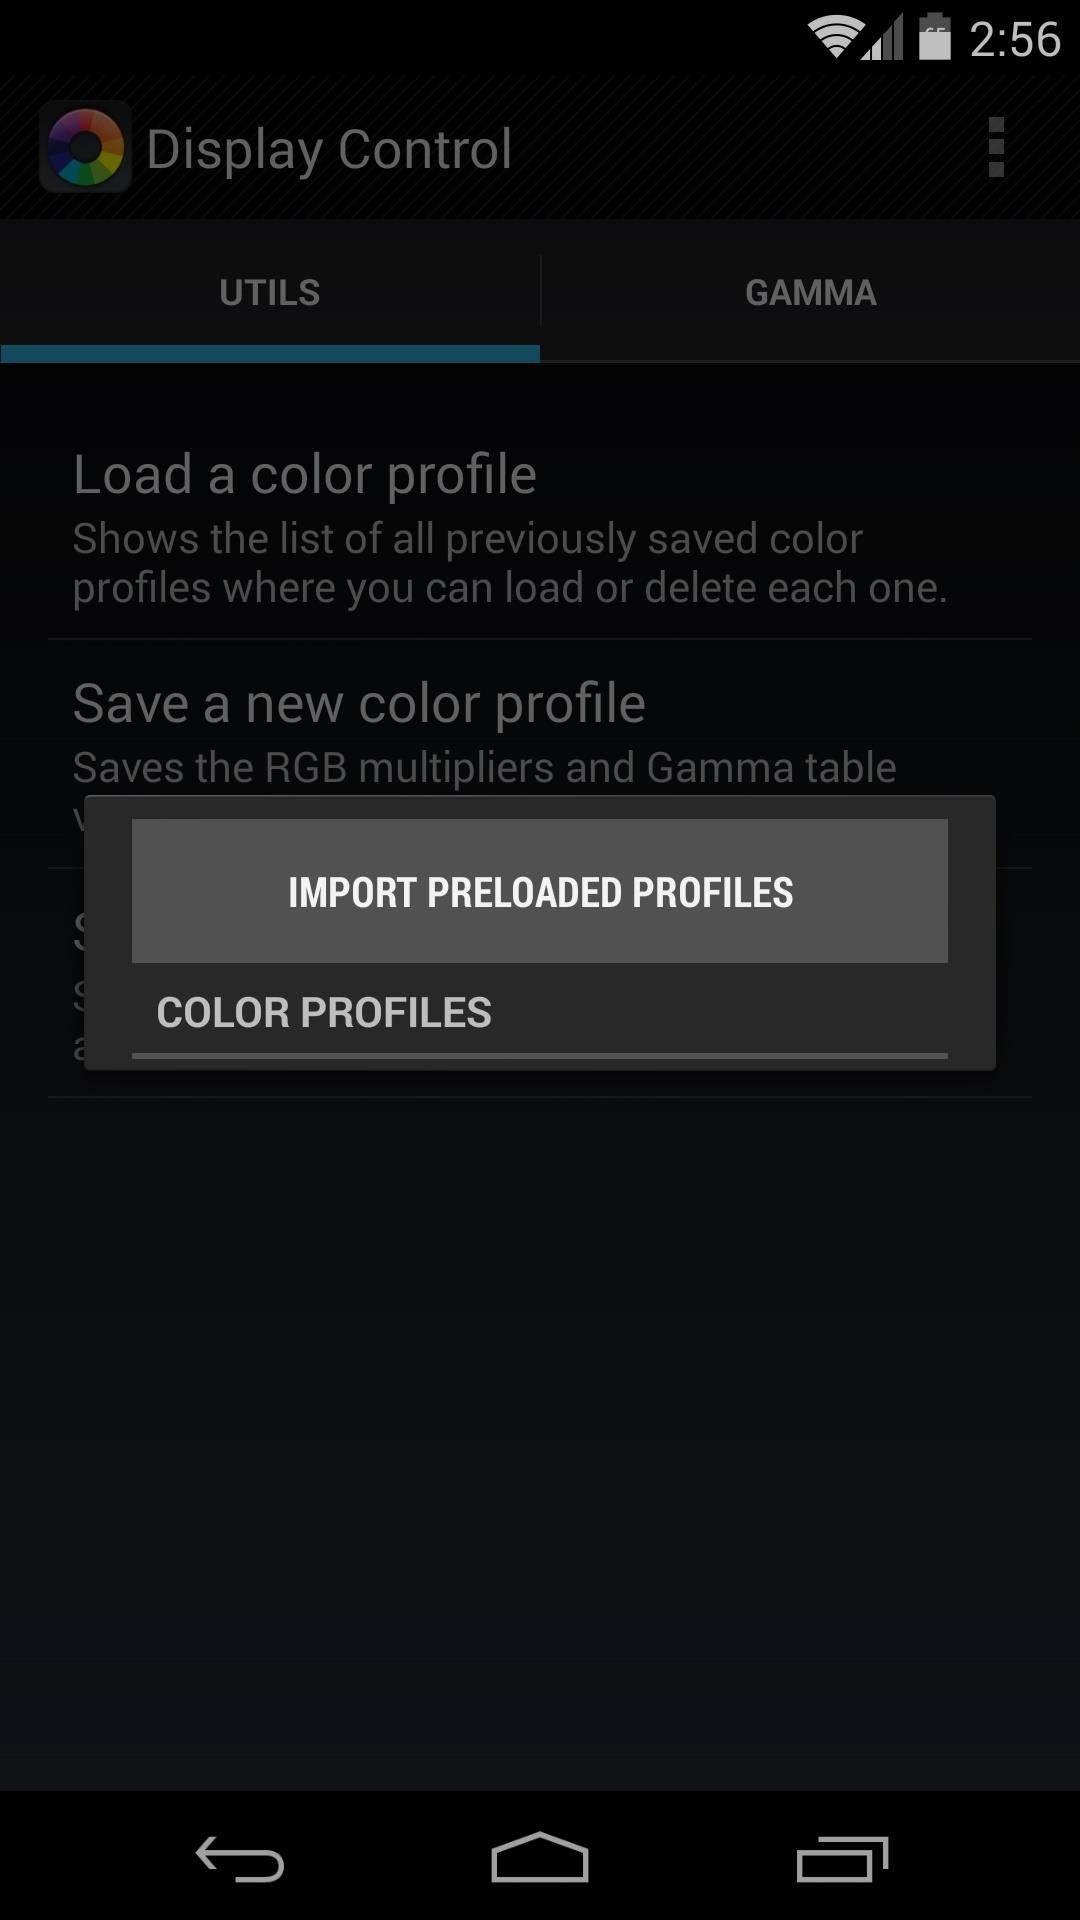
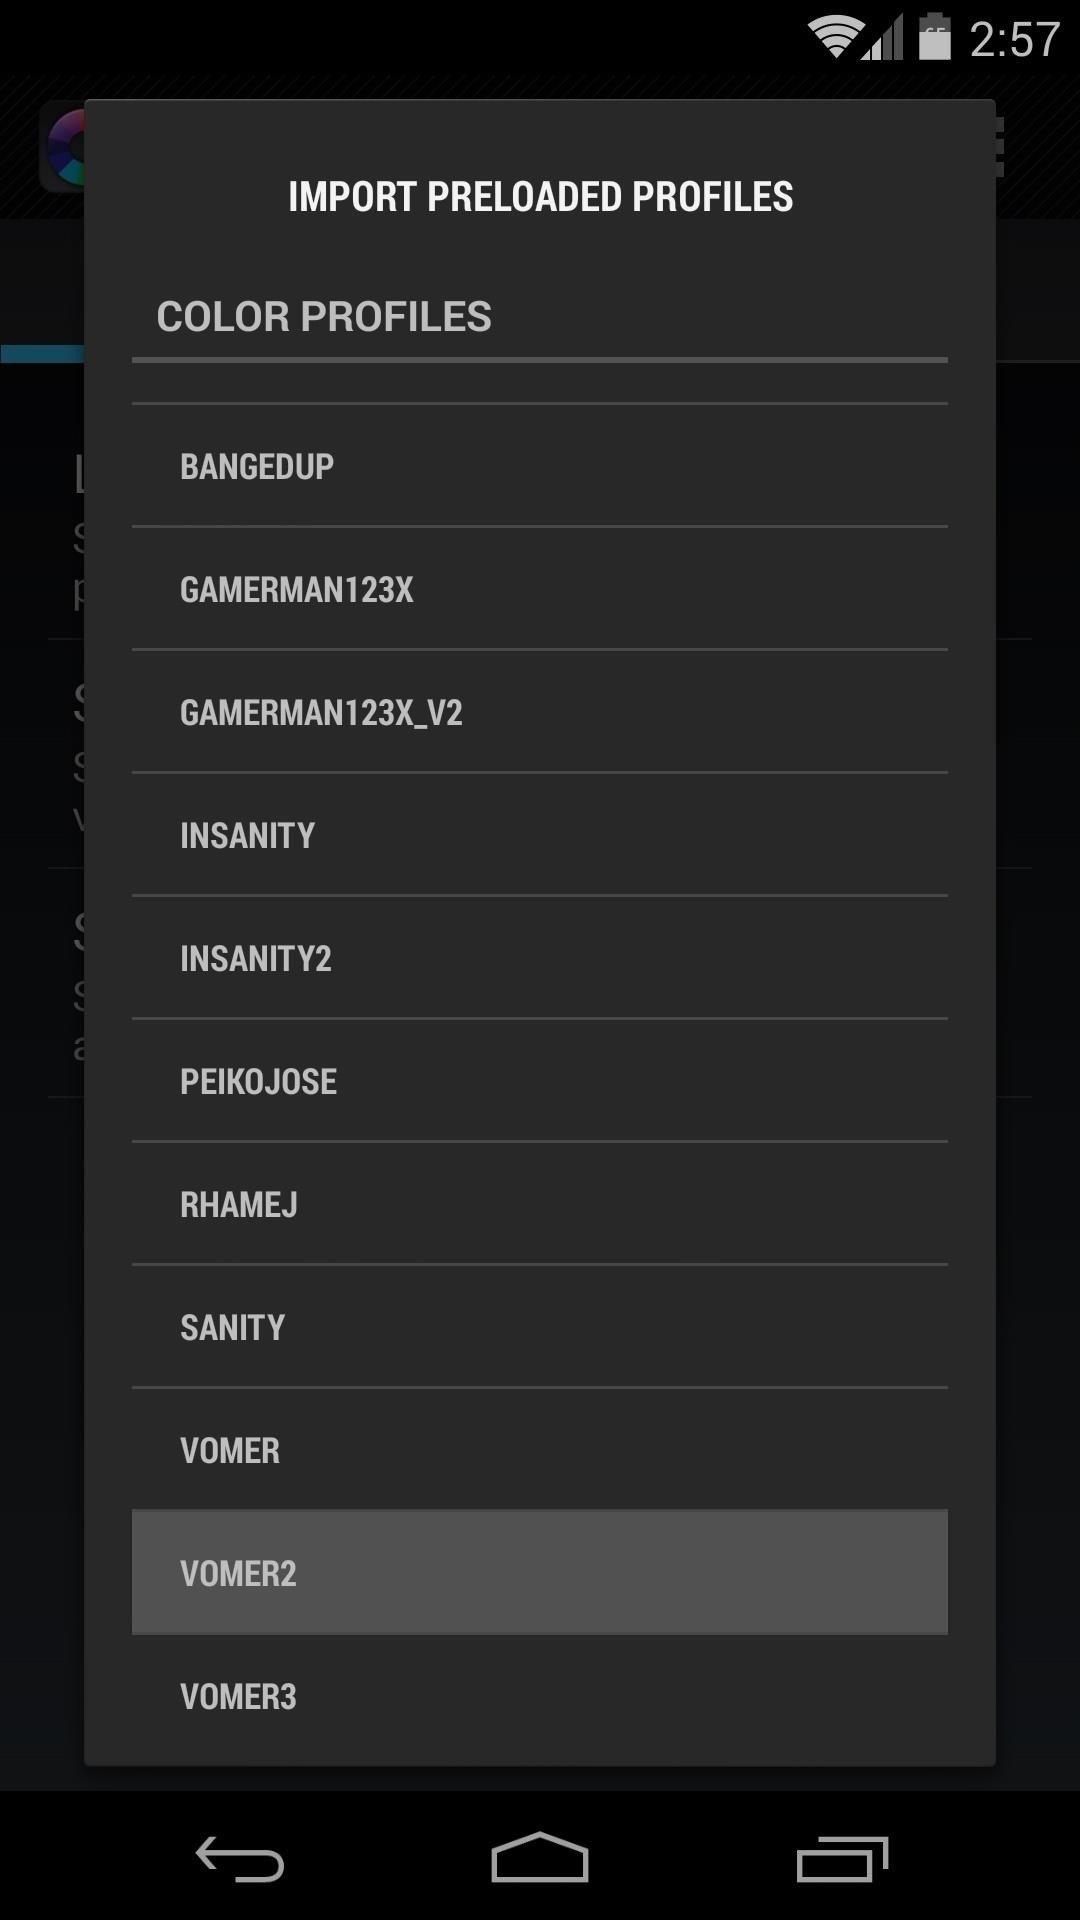
This will populate a list of color profiles that can be used to tweak the colors of your N5's screen. After quite a bit of experimentation, I've determined that the profile that best reduces the yellow tint on my display is the one called Vomer 2. Hit this one, then tap Apply.

A toast message will appear letting you know that the changes won't take effect until you turn your screen off and then back on.
To ensure that the color corrections are applied each time you start your phone, tick the box next to Set colors on boot.

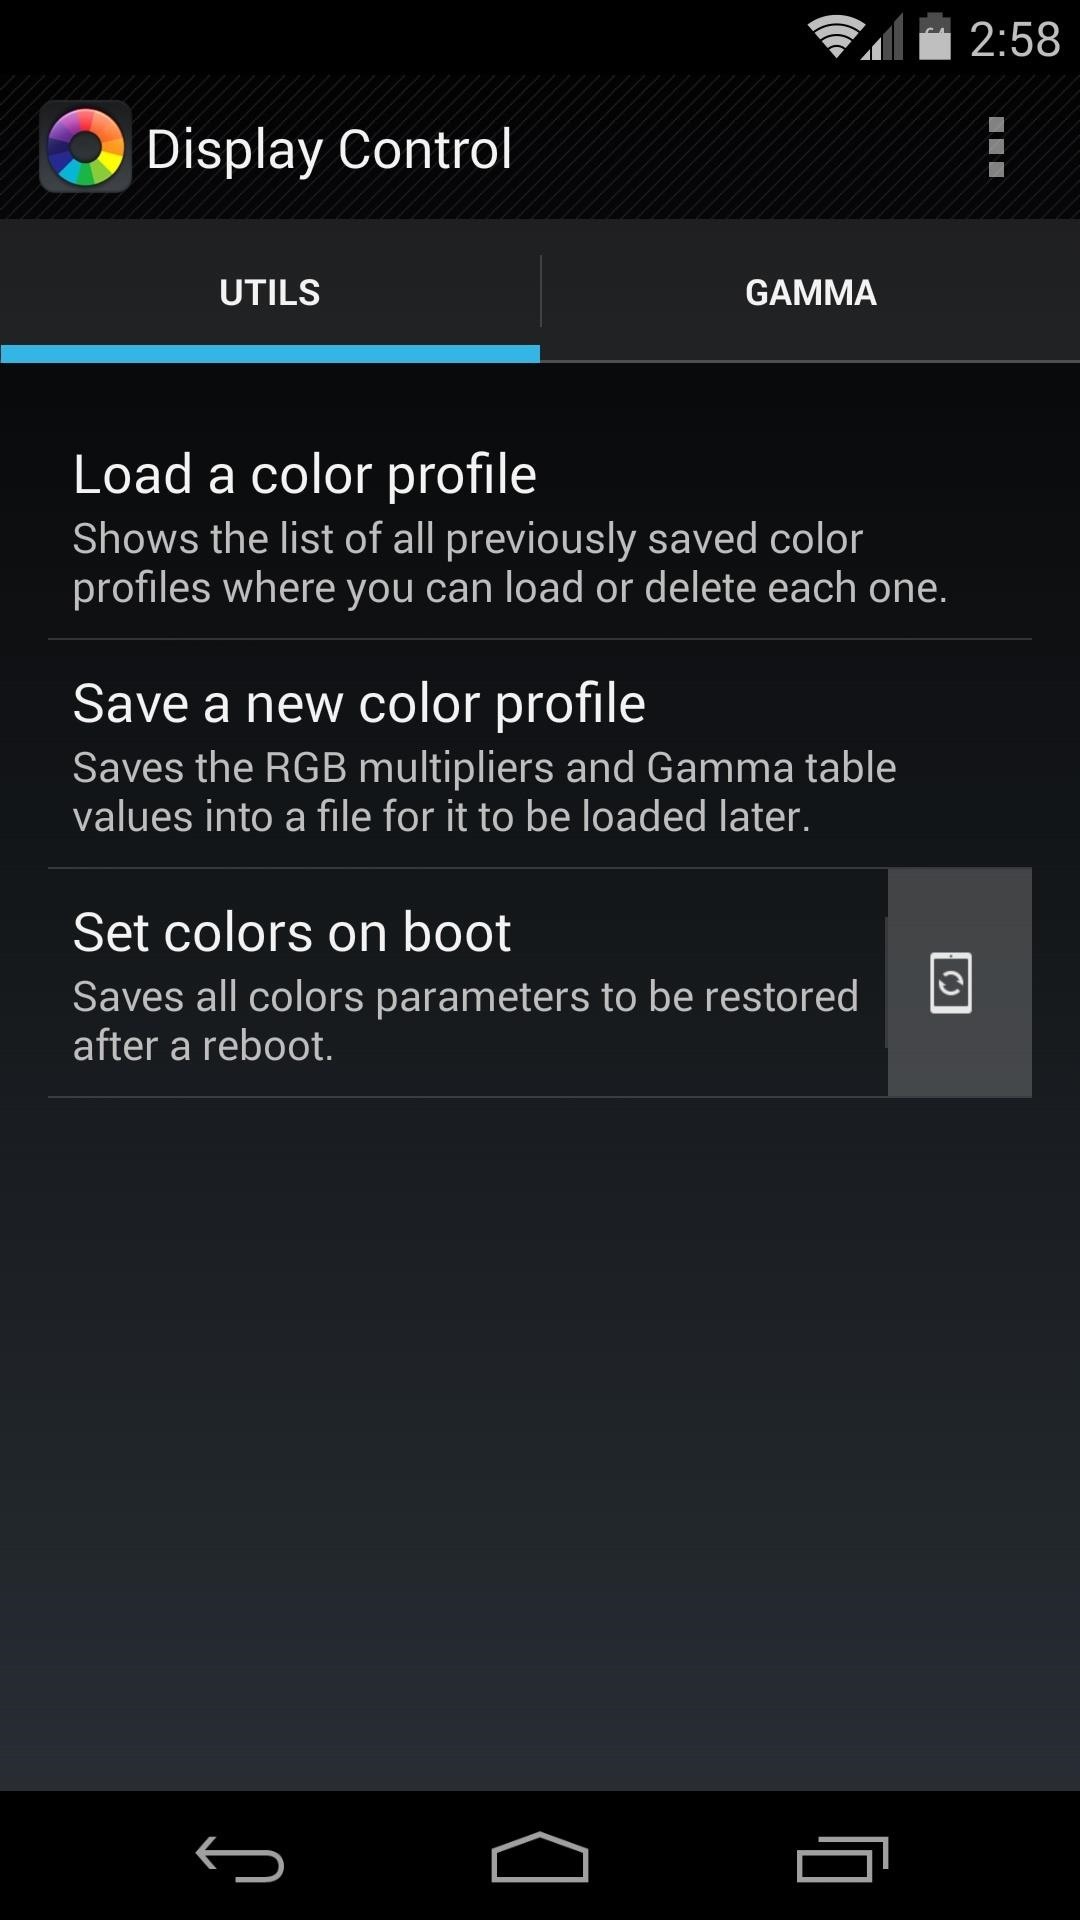
If you're feeling ambitious, further color customization can be done if you swipe over to the Gamma tab. If you do play around with these values, remember that the changes don't take effect until the screen has been turned off and on.
That yellowish tint should now be gone from your Nexus 5. Remember, I only recommended Vomer 2 based on my own observations, so if you're not as much of a fan of it as I am, you can test other profiles to find the one that suits you best.
Which profile are you using? Have you made any tweaks to the gamma values yourself? Tell us about your setup in the comments section below.
Just updated your iPhone? You'll find new emoji, enhanced security, podcast transcripts, Apple Cash virtual numbers, and other useful features. There are even new additions hidden within Safari. Find out what's new and changed on your iPhone with the iOS 17.4 update.


9 Comments
No, no, no, NO!.
This is the only bad advice I have ever seen on WHT, in fact I signed up just to post this.
I have 3 Nexus 5's in my household, I noticed the tint on the second one. Google offered me a replacement but I read that it could be the glue used on the screen. I still don't know what causes it but all you need to do is turn your brightness up to full for a few days.
On the second phone I turned the brightness up to full and left a video running overnight to make the screen hot. The third phone I just turned the brightness up and let it clear in it's own time.
All 3 phones now have lost their tint. The second one obviously cleared quicker than the others.
I completely agree with Seven Virtues here. Even I signed up just to post this.
My Nexus 5 had a similar issue, possibly because of the increase moisture around. In my case , the tint was pinkish
It however go resolved after I increased the brightness to full and watched a 1 hr movie on full screen.
I completely agree as well. But wouldn't it just be easier to lock your screen on and use a hairdryer?
//Quick Tip//
If you're replacing a digitizer or LCD on an android phone use a hairdryer to get the glue to let go.
Uh...what's the chance of something going wrong? Say that I do it step by step accordingly with the instruction? I haven't rooted my Nexus yet, and I'll probably do so with one of those one-click root programs for my Nexus 5 running Android 4.4.4.
You'll be fine. Use the root method here, it's super simple.
So I signed up to post my problem.
When I unzipped the franco Kernel via recovery mode, it got stuck in Recovery mode and I'm a little afraid right now. What do I have to do?
You flashed the Franco Kernel zip in a Custom Recovery like TWRP? If so, what menu are you looking at right now? Do you see 8 buttons that say stuff like "Install" "Backup", "Advanced", "Reboot", etc.? Or do you see 3 buttons that say "Add More ZIPs", "Wipe Cache and Dalvik" and "Reboot System"?
I got this screen, just the Recovery mode.
But my phone is like destroyed. I'm dutch so I hope this is the right translation, but I sent my phone back to LG. I was aware of the fact that it would cost some money because the warranty would be off, but my printed circuit board(?) is broken. So I've got a letter back from LG. They could fix my phone for like almost 400 euros. Maybe they just ask a lot of money because its LG, but is there any way to fix my problem like a lot more cheaper?
(I did it exactly as said above)
That's ClockworkMod Recovery, which is still a custom recovery, but it's made by a different developer than the one I used in this post (TWRP). It shouldn't make much of a difference aside from some options having slightly different names.
Regarding the PCB (Printed Circuit Board), if it is indeed broken or damaged, that's a physical issue that cannot be fixed by software tweaks. Unfortunately, it sounds like the 400 Euros is the only way to go, save for purchasing a new one. Perhaps you might find a better deal with an independent repair company rather than LG.
Share Your Thoughts