
Google has already issued a few updates to Android 7.0 Nougat. There aren't many headlining features, as these minor updates are mostly bug fixes and performance improvements. But there's a few security enhancements as well, so staying up-to-date with the latest patches is important for a number of reasons.
If you weren't rooted, you could just sideload the OTA update right now—but updates will refuse to apply if you've modified anything using root access. Luckily though, Google has already made the newest factory images available for download, and these don't check for root changes. So if you're up to the task, you can manually install the latest Nougat update on your Nexus device right now.
Note: If you haven't installed Android 7.0 Nougat yet on your rooted Nexus device, the instructions below are the same whether you're installing it for the first time or just updating it.
Method 1: Use Nexus Root Toolkit (Windows Only)
If you're using a Windows PC, the easiest way to manually install updates on a Nexus device is to use a program called Nexus Root Toolkit. The utility was developed by Wugfresh to provide a nice, mouse-friendly interface for this whole process, and I've covered it with an in-depth guide in the past. While the guide outlines updating to Lollipop, the steps will be exactly the same if you're updating to Nougat.
Method 2: Use ADB & Fastboot Commands (Mac, Windows, or Linux)
If you don't own a Windows PC, or if you'd simply prefer not to use the Nexus Root Toolkit, manually updating your Nexus device is still fairly simple. You'll have to download the update yourself, install ADB and Fastboot on your computer, and type in a few commands—but I'll go over the entire process in detail below.
Step 1: Install ADB & Fastboot on Your Computer
First, you'll need to install a pair of Android tools on your computer, which are called ADB and Fastboot. This process will vary depending on your operating system, but we've got an easy-to-follow guide for Mac, Linux, and Windows that will cover all of the bases.
Step 2: Download the Newest Factory Images
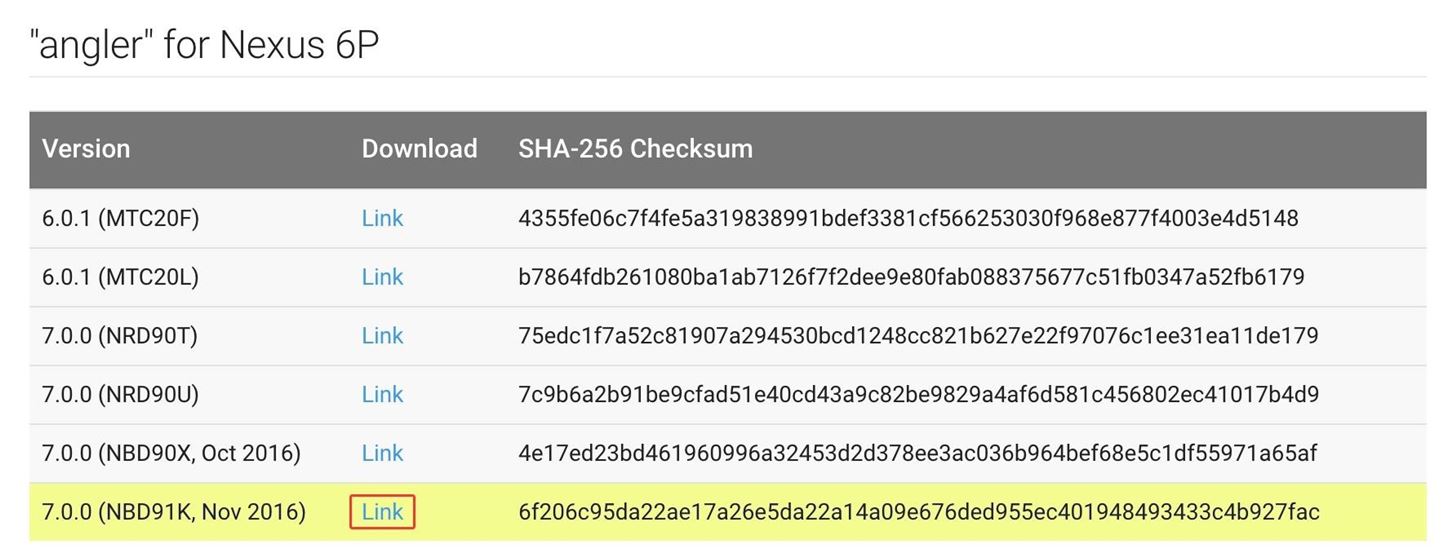
Next up, you'll have to download the latest factory images package. This is an archive that includes the entire stock firmware for your device, and Google always publishes the latest versions on their official site.
On your computer, visit Google's official Factory Images for Nexus Devices website. From here, tick the box next to "I agree," find your device, and download the newest firmware by clicking the link at the bottom of the list.
Step 3: Move Files to Platform Tools Folder
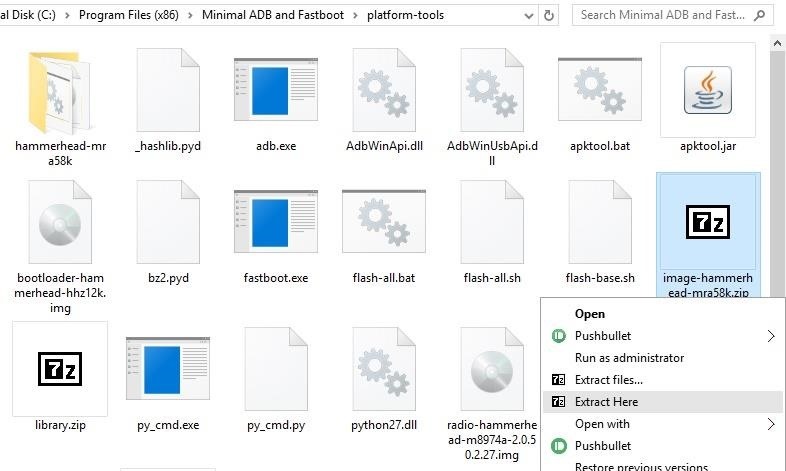
Once the factory images file is finished downloading, copy the TGZ file over to the "platform-tools" folder inside of the ADB installation directory. From here, use a program like 7zip or WinRAR to extract the contents of the TGZ file into the platform-tools ADB folder.
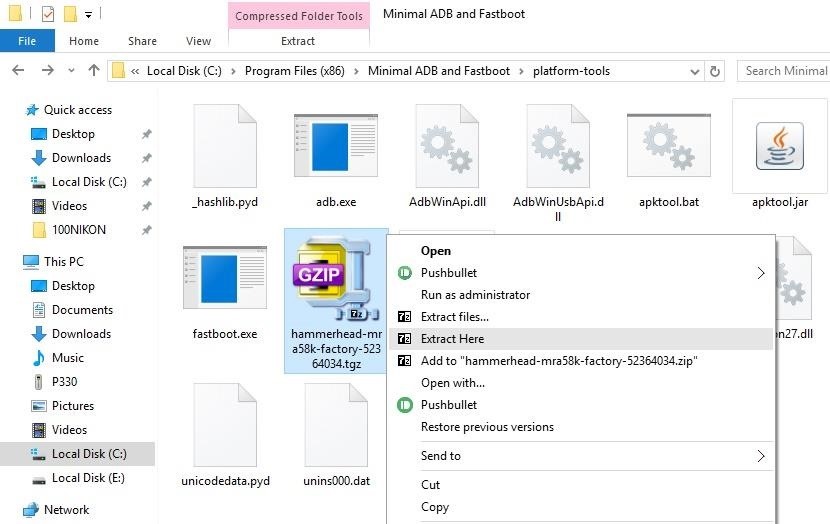
Once you've done that, you'll find another archive—this time a TAR file. Extract the contents of this archive as well, then open the folder it creates. From here, copy all of the files inside of this folder, then paste them into the parent platform-tools folder.

Step 4: Enable USB Debugging & OEM Unlock on Your Nexus
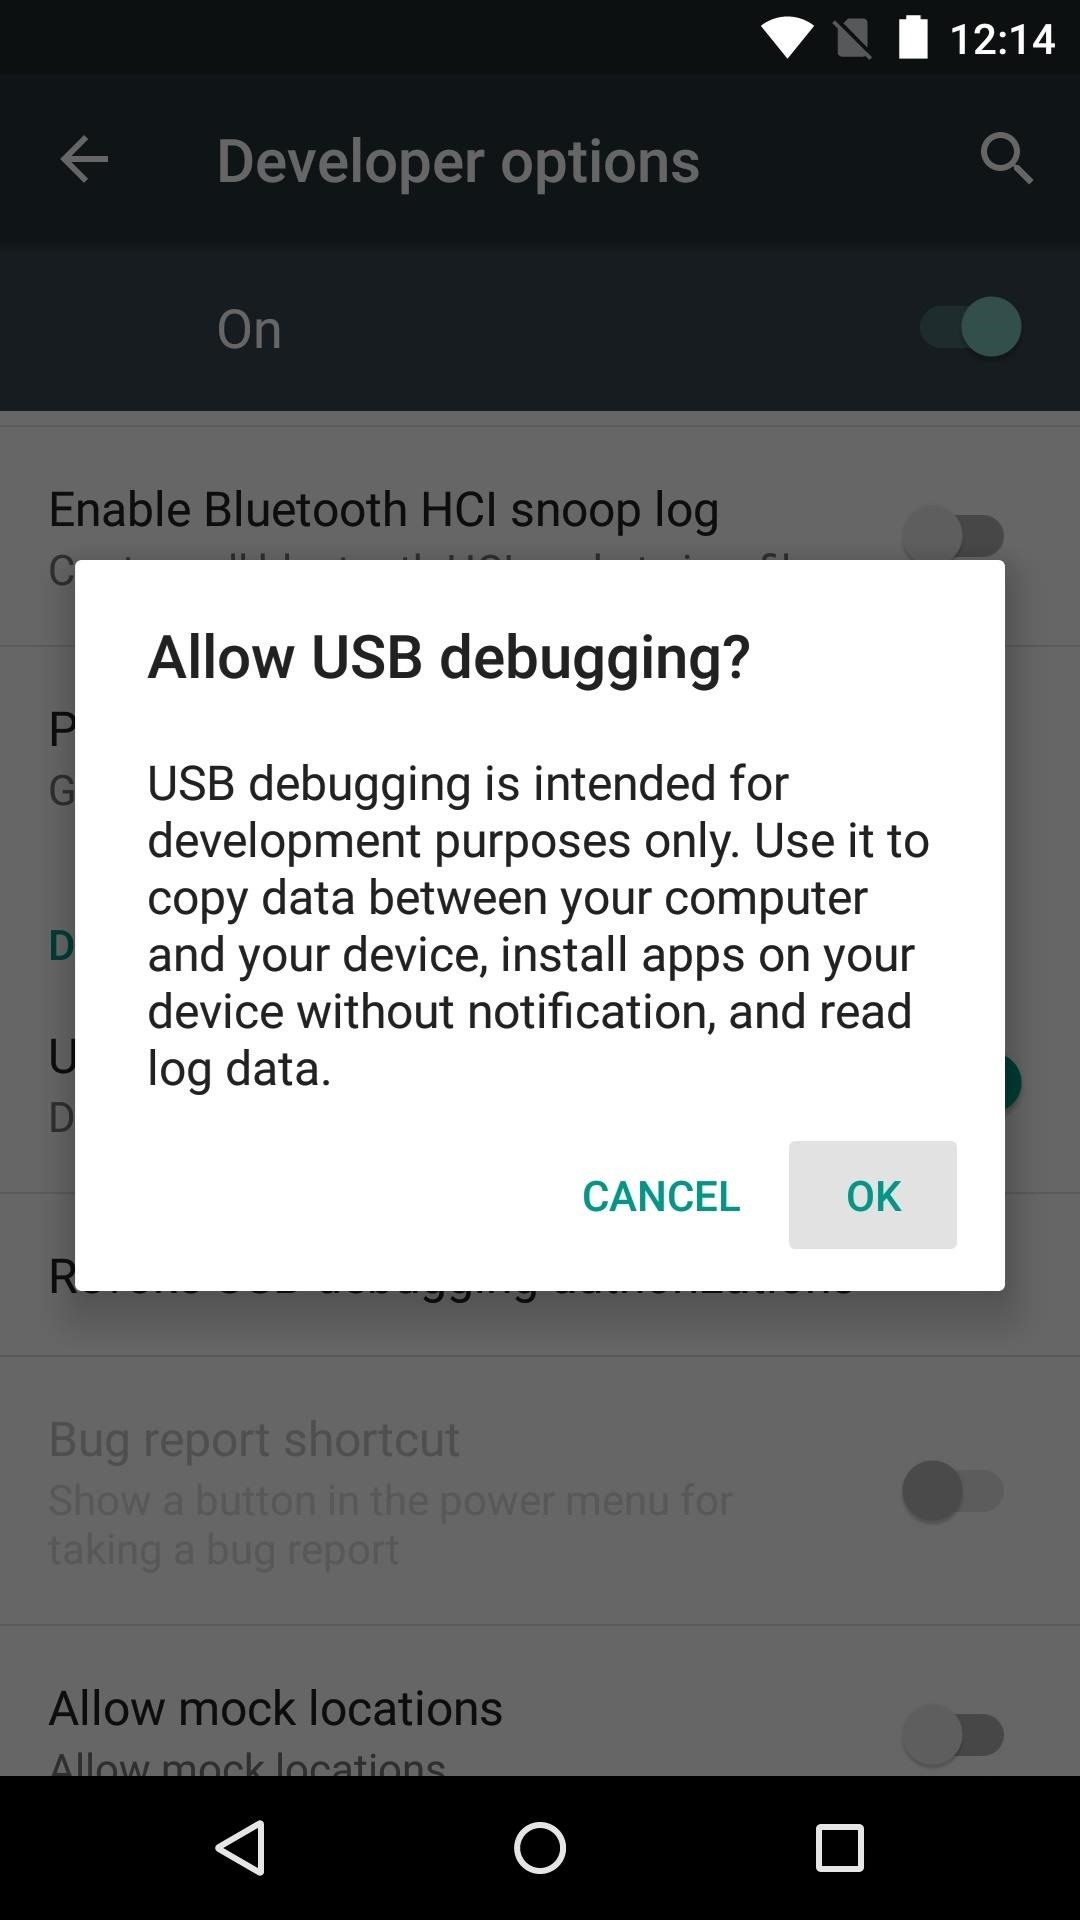
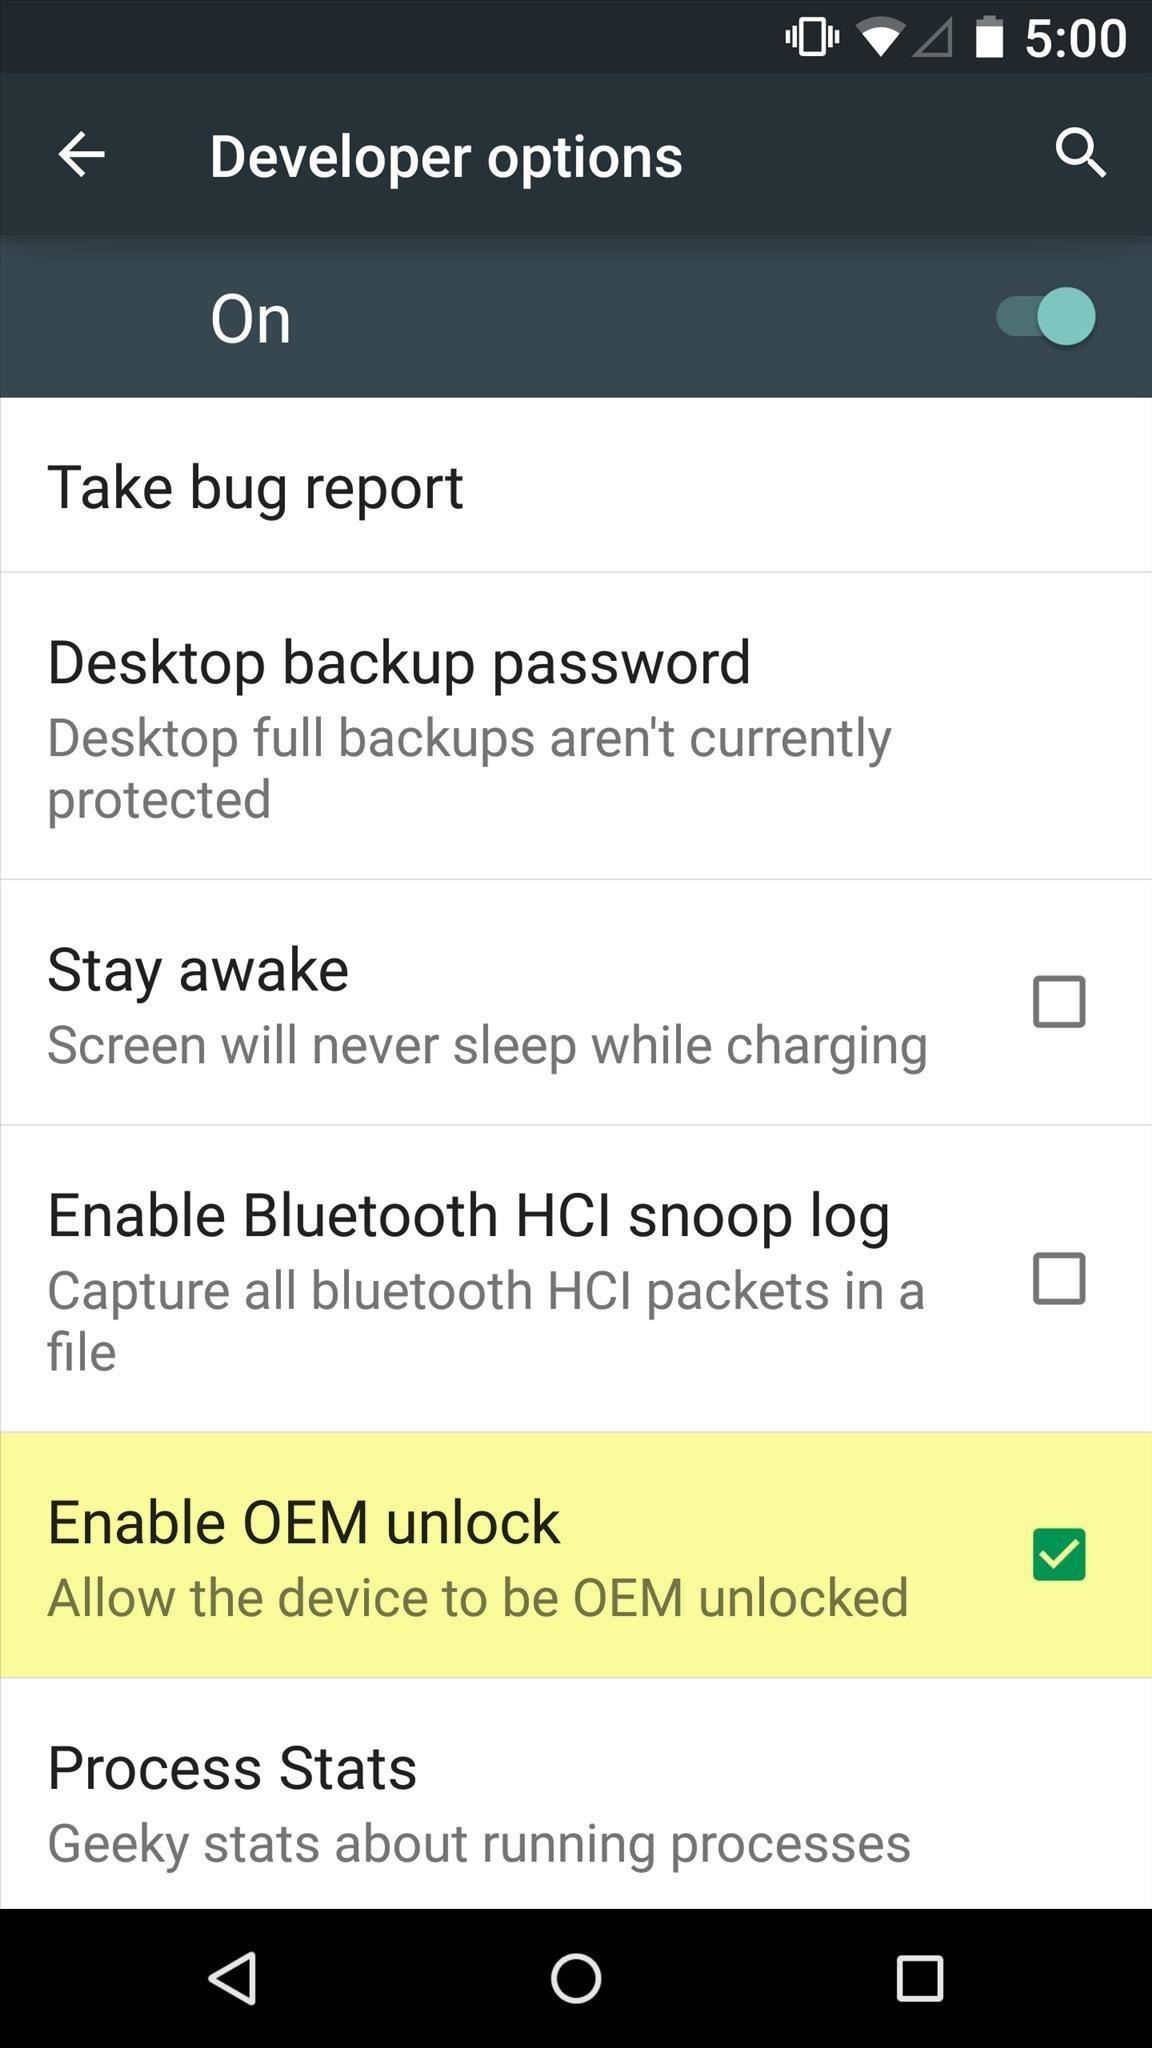
Before you can flash the factory images that you just downloaded, you'll have to enable an option or two on your Nexus device. Both of these settings can be found in the Developer options menu, which is hidden by default. To activate this hidden menu on your device, refer to our guide on enabling Developer options.
From here, all Nexus devices will need to have the "USB debugging" setting enabled for any of this to work, so make sure to take care of that. If you own a newer device like the Nexus 6P, you'll also have to turn on the "Enable OEM unlock" setting, which allows you to unlock your bootloader.

Step 5: Unlock Your Bootloader
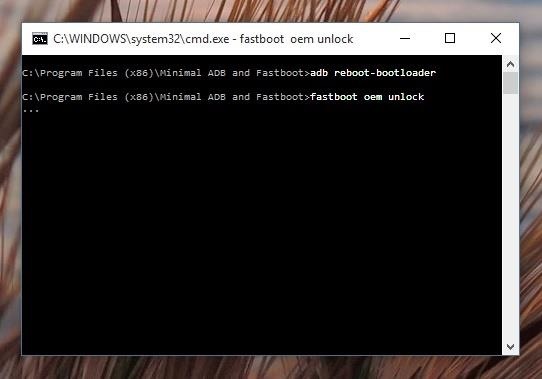
Next, you'll need to unlock the bootloader on your Nexus to enable manual updating if you haven't already done so. Plug your device into your computer with a USB data cable, then open a command window in the platform-tools folder inside of your ADB installation directory and enter the following command if you're using a Windows or Linux machine:
- adb reboot-bootloader
If you're using a Mac, it's essentially the same command, but with a period and slash at the beginning:
- ./adb reboot-bootloader
Once you've done that, your Nexus will boot into bootloader mode, which is a black screen with green and white text. To unlock your bootloader, enter the following command, and remember to add "./" to the beginning if you're using a Mac:
- fastboot oem unlock
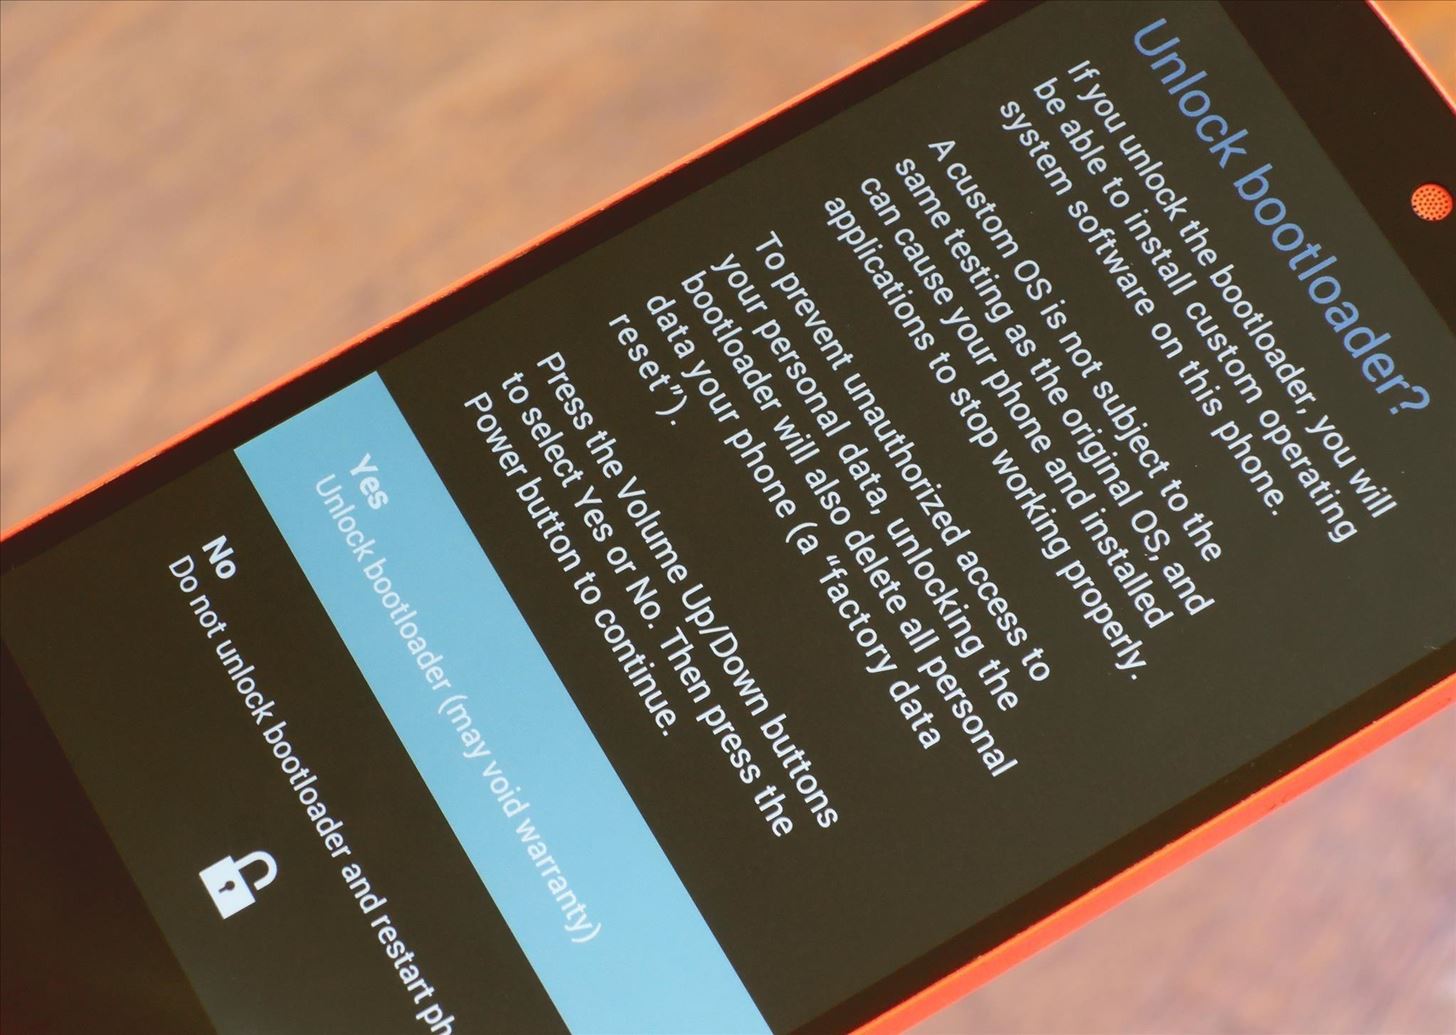
At this point, you'll see a menu on your device asking if you'd like to unlock the bootloader. Press the volume up button once to highlight "Yes," then press the power button to confirm your choice. The process will take up to a few minutes, so wait until it's finished before proceeding to the next step.
Step 6: Install the Android Update
At this point, you're ready to install the latest Android version. With the terminal window still open, enter the following command to install the factory images, remembering to add "./" to the beginning if you're using a Mac:
- flash-all
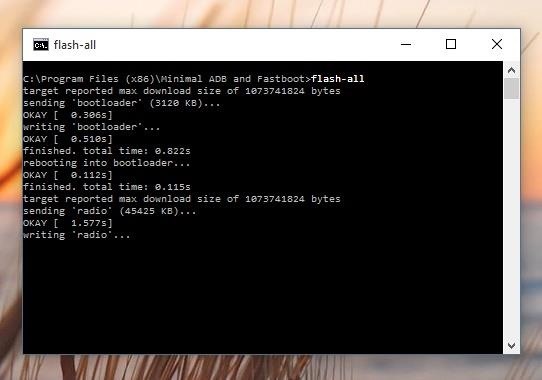
This should automatically flash all of the factory images onto your Nexus device, and the process should take 5 to 10 minutes. If you experience any issues with the flash-all script or a "missing boot.img" error, you may have to flash the individual factory images manually. To do that, extract the last remaining ZIP archive from the initial factory image file and make sure its contents are all stored in the platform-tools folder.
When you're done there, enter the following commands, one by one, remembering to add "./" to the beginning if you're using a Mac, and substituting the text inside of the brackets with the name of the actual file:
- fastboot flash bootloader [bootloader file name].img
- fastboot reboot-bootloader
- fastboot flash recovery [recovery file name].img
- fastboot flash boot [boot file name].img
- fastboot flash radio [radio file name].img
- fastboot flash cache [cache file name].img
- fastboot flash userdata [userdata file name].img
- fastboot flash system [system file name].img
- fastboot reboot
At this point, your Nexus device should automatically reboot, and you'll be running the latest version of Android. The first boot will take longer than normal, but if it hangs up on the boot animation for more than 5 minutes, simply unplug the phone or tablet from your computer, then press and hold the device's power button to force a reboot.
Just updated your iPhone? You'll find new emoji, enhanced security, podcast transcripts, Apple Cash virtual numbers, and other useful features. There are even new additions hidden within Safari. Find out what's new and changed on your iPhone with the iOS 17.4 update.


7 Comments
What clock/weather widget is that?
It's HD Widgets with the Colourform XP theme. More specifically, that's the 4x2 widget with opacity set to 0%.
Hmmm I'm not seeing any of them that look similar to the widget in this picture https://img.wonderhowto.com/img/43/13/63607547574789/0/install-android-7-0-nougat-your-rooted-nexus-device.1280x600.jpg
Choose "(4x1) HD Widgets," then pick Colourform XP from the drop-down and swipe over to "Clock | Indicator | Date." It'll take a little customization (mainly setting opacity to 0 and picking weather as the indicator), but it should be pretty straightforward from there.
Two q's:
Yep, it'll work regardless of how you rooted your phone. Your second question's a bit more complicated to answer.
If you already unlocked your bootloader, it's possible to update this way without losing data. You can tell if your bootloader is unlocked by restarting your phone—if it has a screen that says "Your software can't be checked for corruption" and shows a small "unlocked" icon during bootup, your bootloader's unlocked.
So if that's the case, you can skip Step 5 altogether since it's already unlocked. Then, when you get to Step 6, don't do the "flash-all" command. Instead, do the alternative method outlined there where you extract all the individual images.
But then, just skip the "fastboot flash userdata [userdata file name].img" part. That's the one that overwrites your existing data, so if you don't flash it, your data will remain intact. Other than that, just run the rest of those commands in the bullet-point list near the bottom, and you'll be fully updated. You'd have to re-root when you're done, but that's unavoidable.
thanks for the guide. I have a question: can I use this to update from marshmallow (6.0.1) to the latest version of oreo?
Share Your Thoughts