
Okay, so you're rooted and need to return your Nexus 5 to its stock firmware. Whether it's because you need to send your phone in to the manufacturer to fix a defect or you just want to use the device's over-the-air updating feature, unrooting and returning your Nexus 5 back to its fresh-out-of-the-box state is a fairly simple process with the right tools.
Step 1: Connect Your Nexus 5 to a PC
Plug your Nexus 5 into your Windows PC using any USB cable. Make sure the cable you're using has no visible damage to either connector and that it plugs in firmly to your phone, as an accidental disconnect during this procedure could lead to a bricked device.
Step 2: Enable USB Debugging
In order to get access to this setting, we'll need to unlock the Developer Options menu. To do that, head to Settings, then About Phone. Scroll down to the bottom of this list and tap Build Number 7 times in rapid succession.

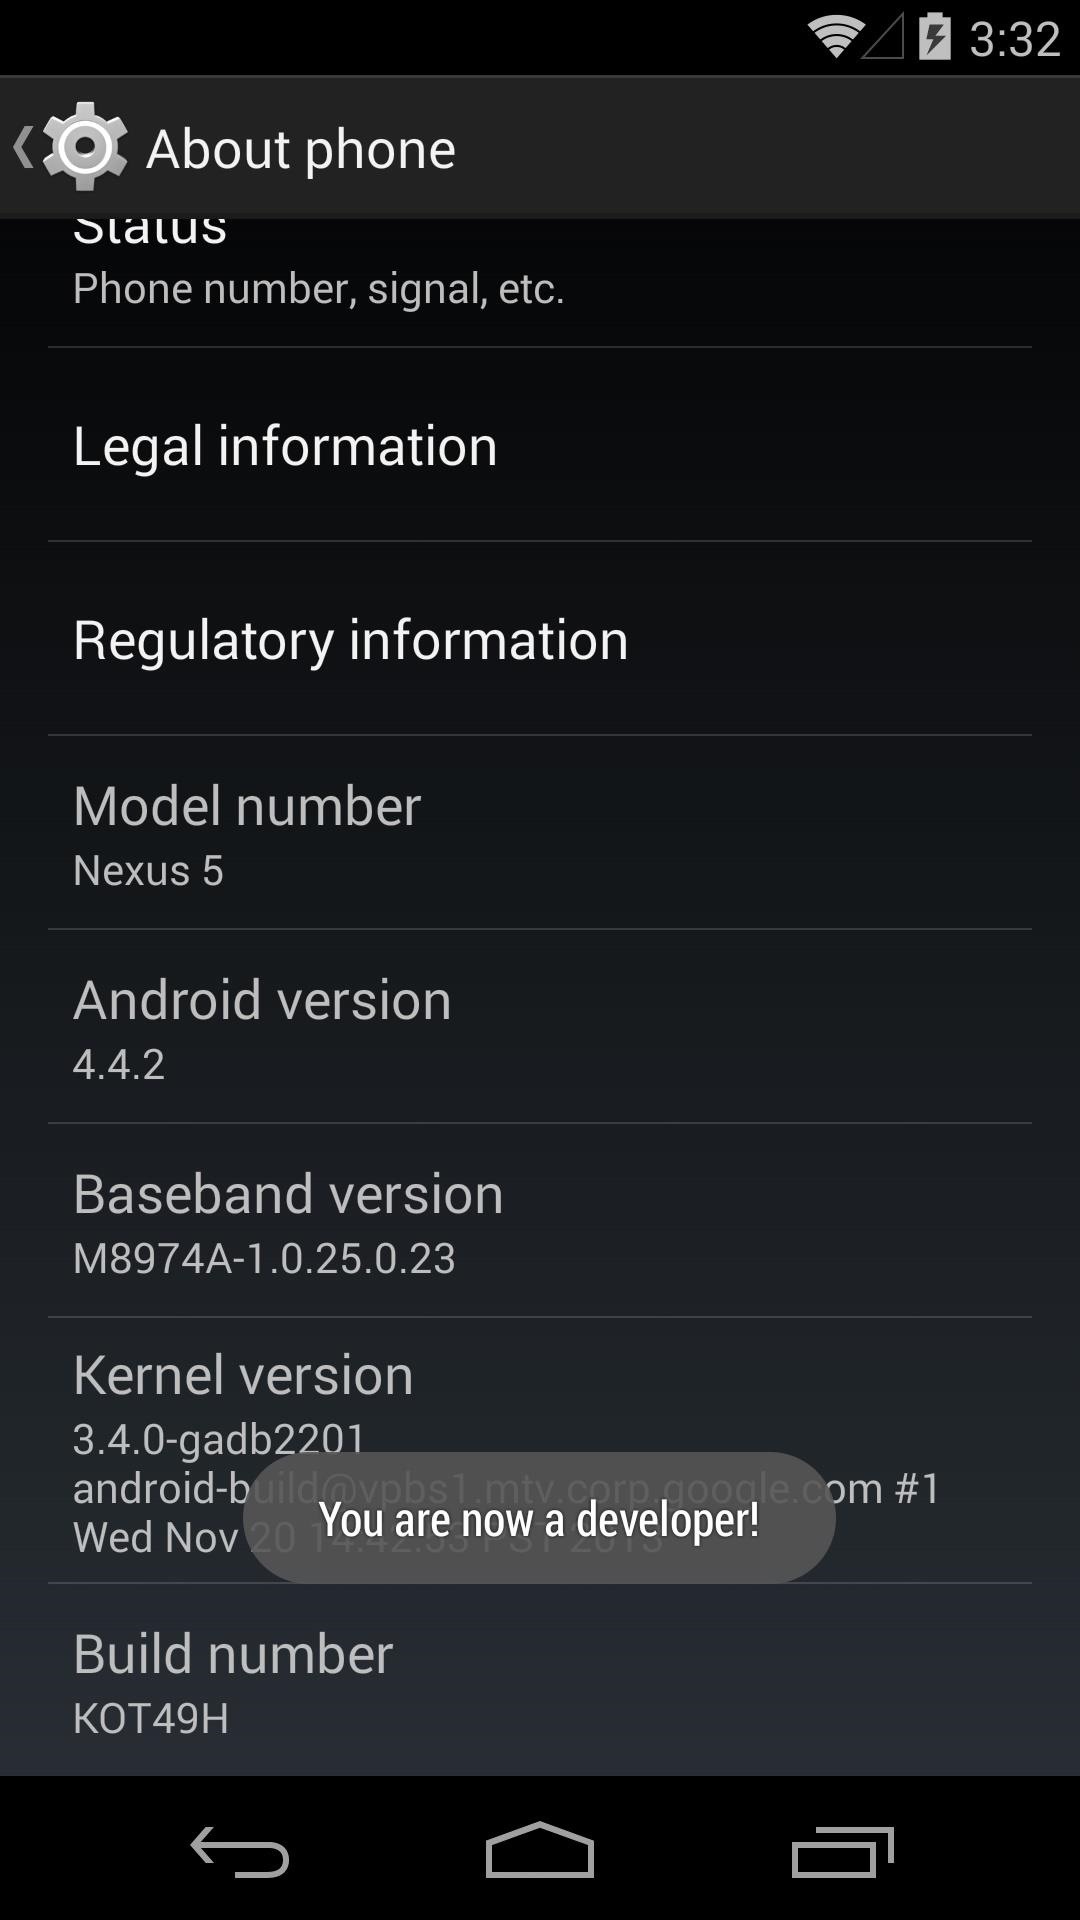
Note: Take this opportunity to jot down your Build Number, it will come in handy later.
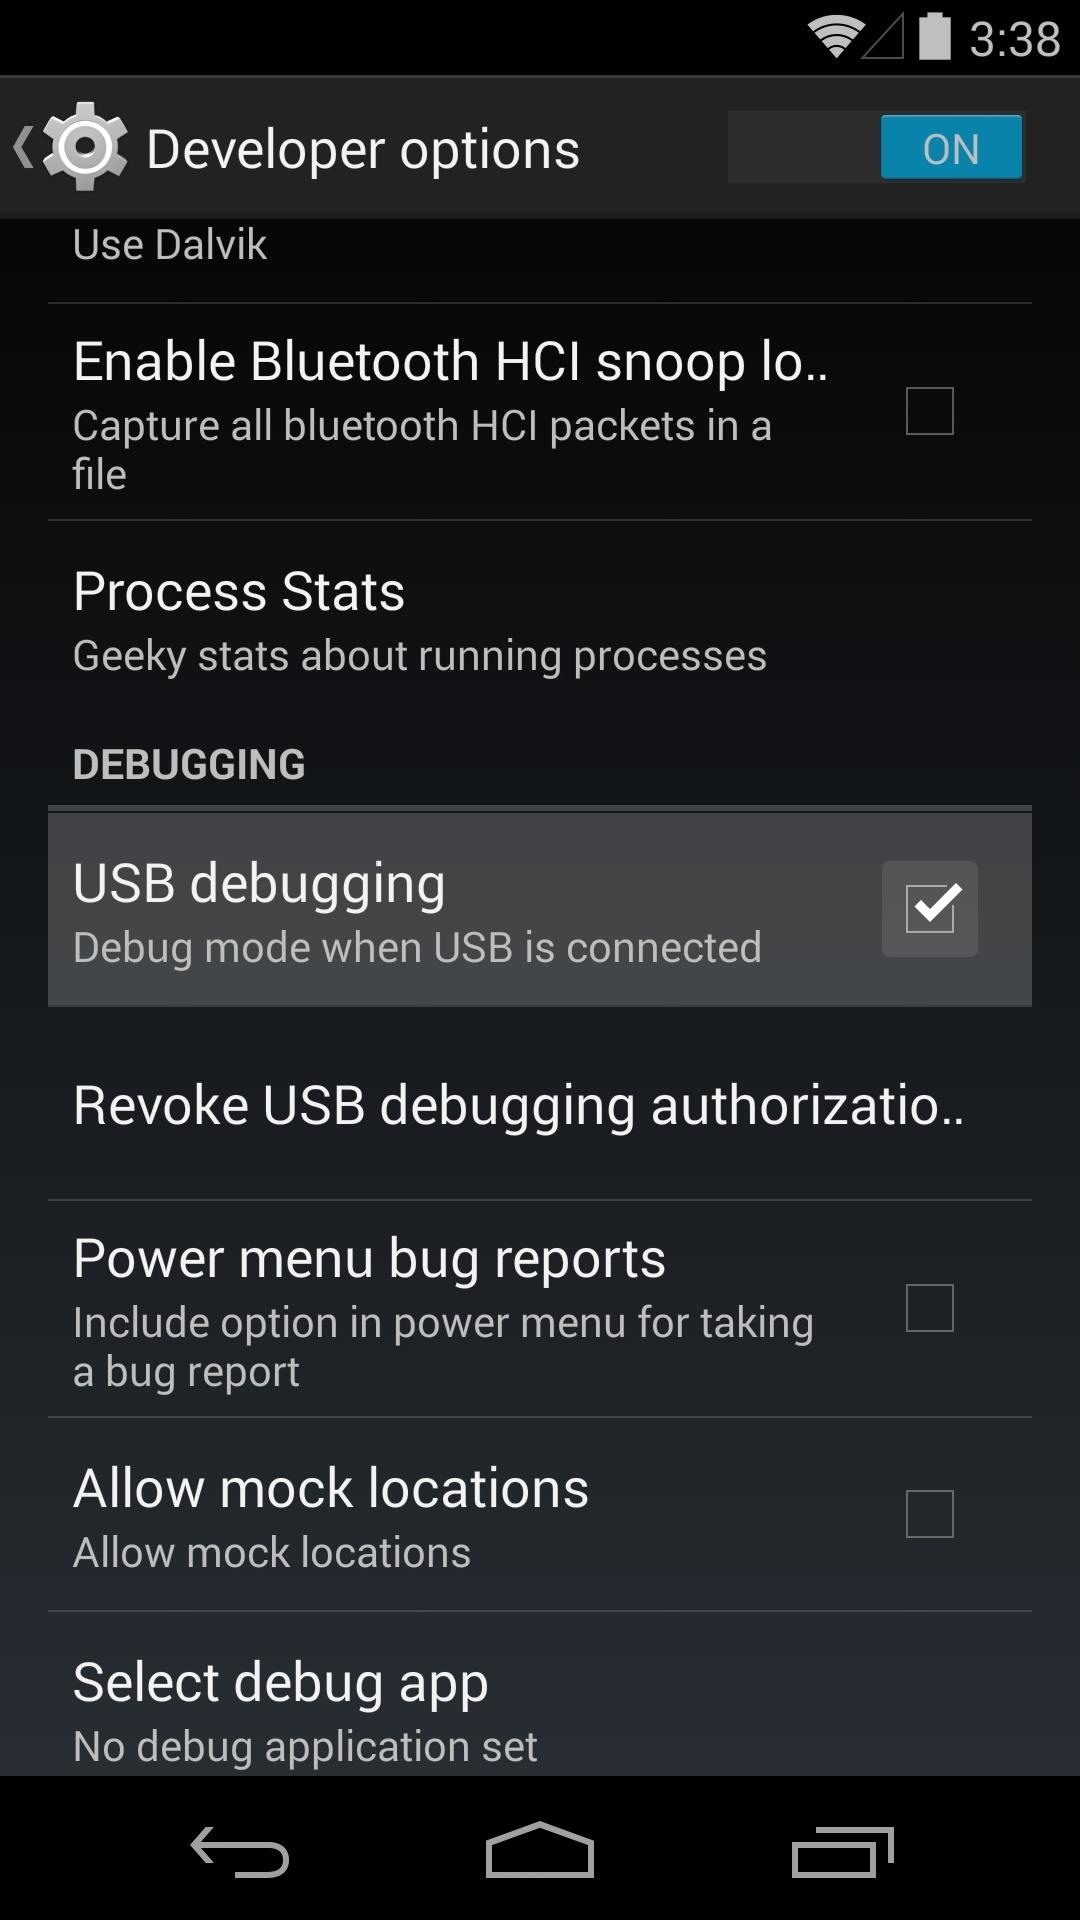
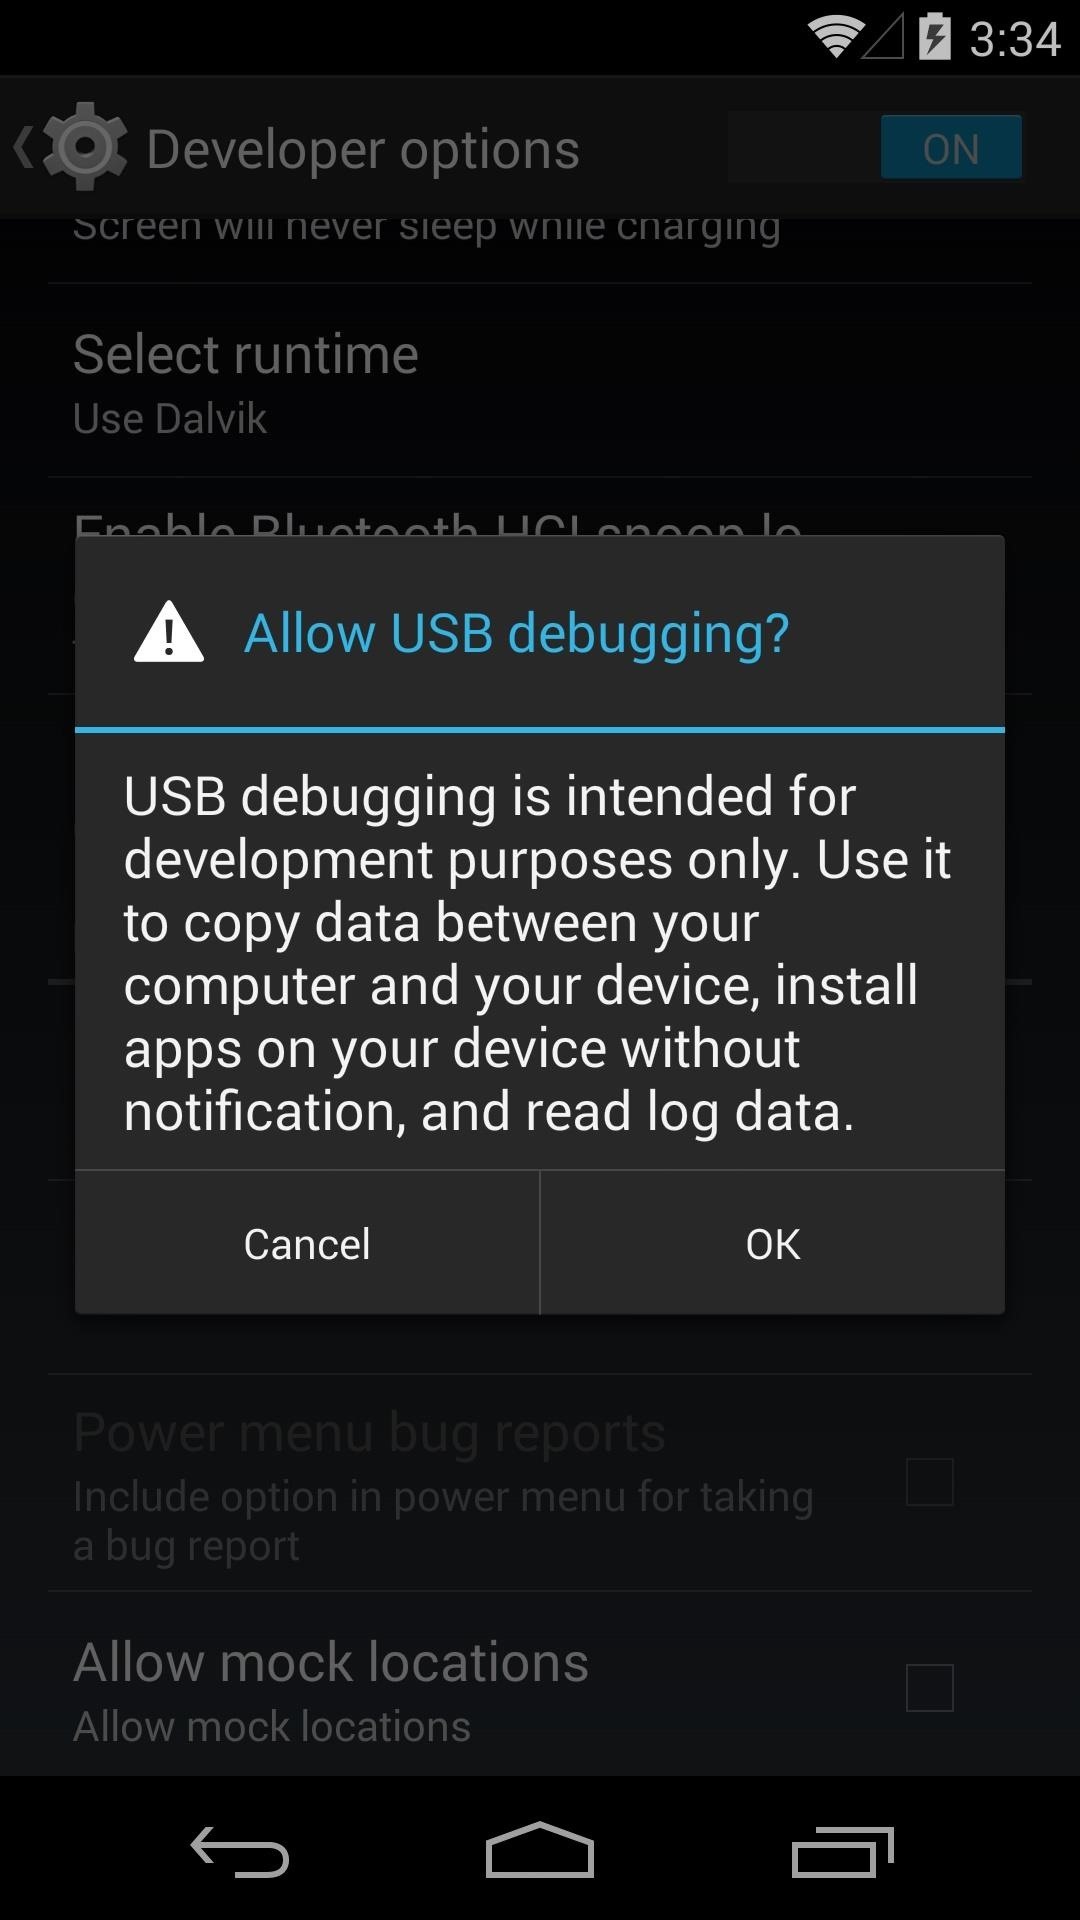
From here, back out to the main Settings page and tap Developer Options. Tick the box next to USB Debugging, then select OK from the dialog that appears next.
Step 3: Install Nexus Root Toolkit on Your PC
From your Windows PC, click on this link to download the install file for the Wugs Nexus Root Toolkit app. This is version 1.8.2, but you can always get the latest version on the WugFresh website.
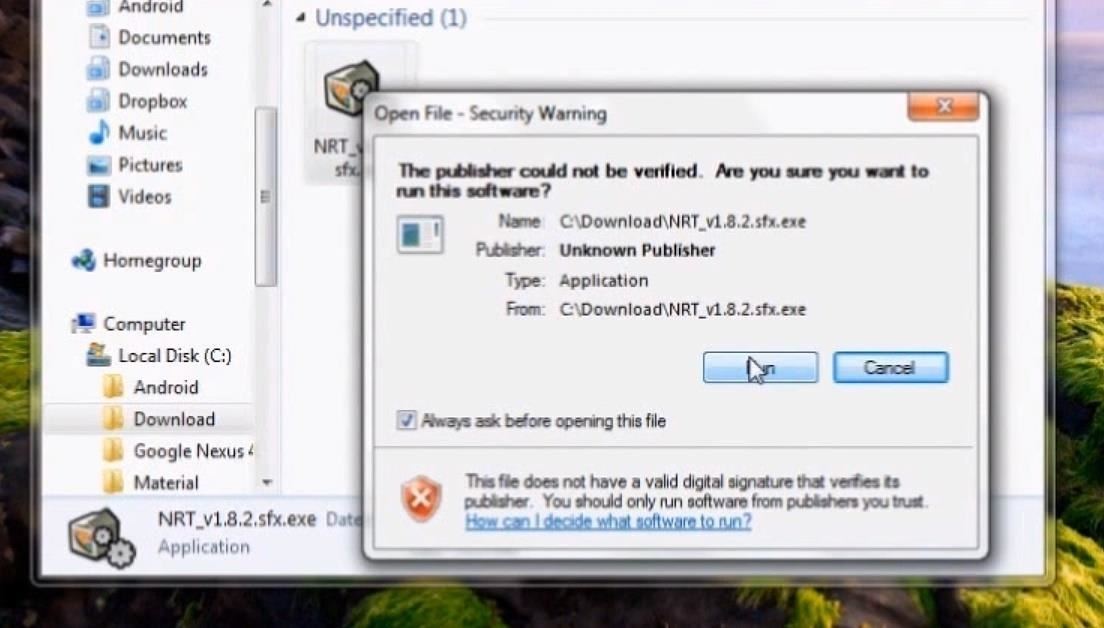
Once the download has finished, install by double-clicking the file in your browser's download folder. Click Run on the following window.
Follow the prompts for installation, allowing the toolkit to download additional files when it asks.
Step 4: Allow USB Debugging
As the installation process finishes on your PC, a dialog will appear on your Nexus 5 asking you to allow USB debugging access from the computer you're connected to. Tick the box next to Always allow from this computer and press OK.

Step 5: Set Up the Root Toolkit
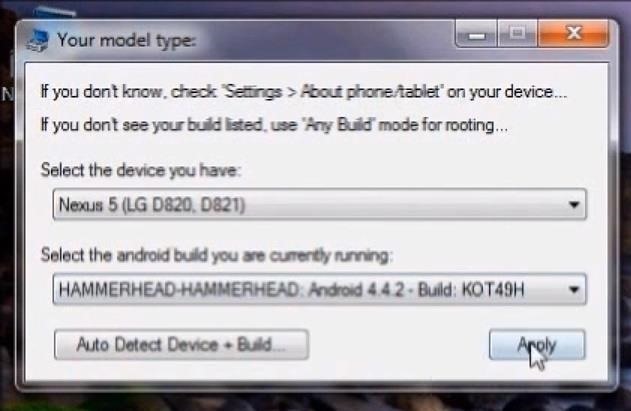
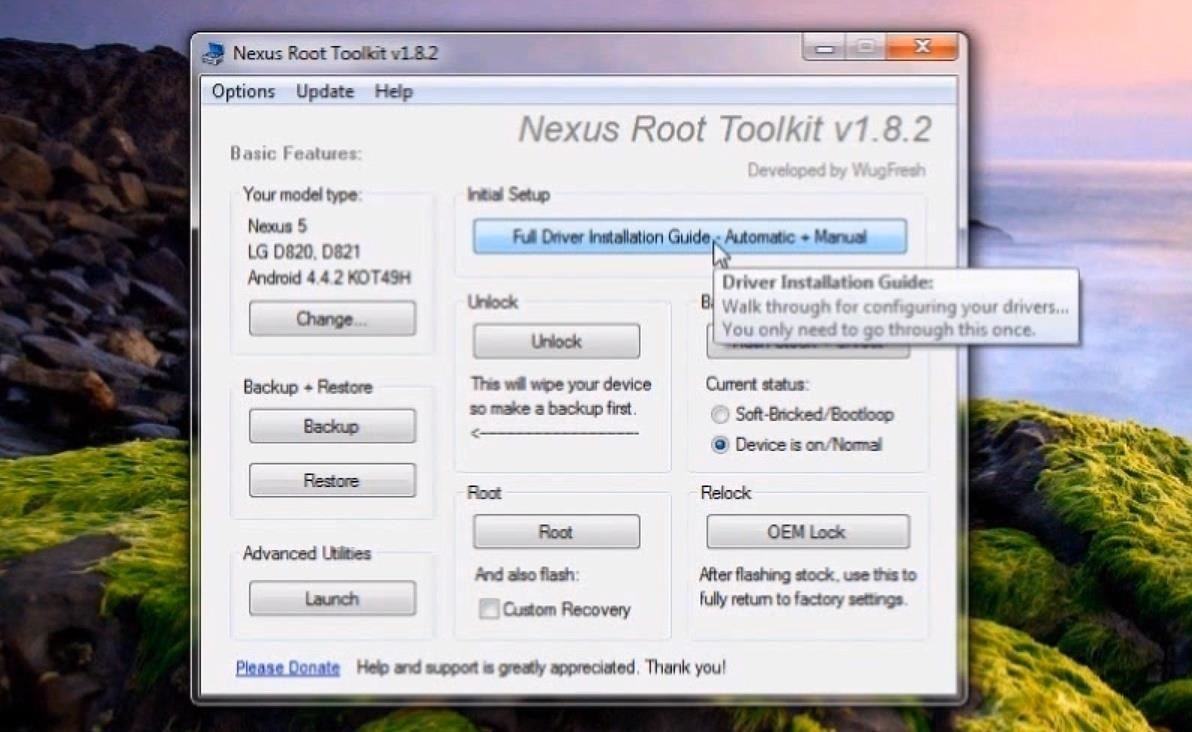
When the installation is complete on your PC, you will be prompted to enter your phone's Model and Android Build. Enter Nexus 5 as the model, and refer to the build number you jotted down in Step 2 for the Android Build.
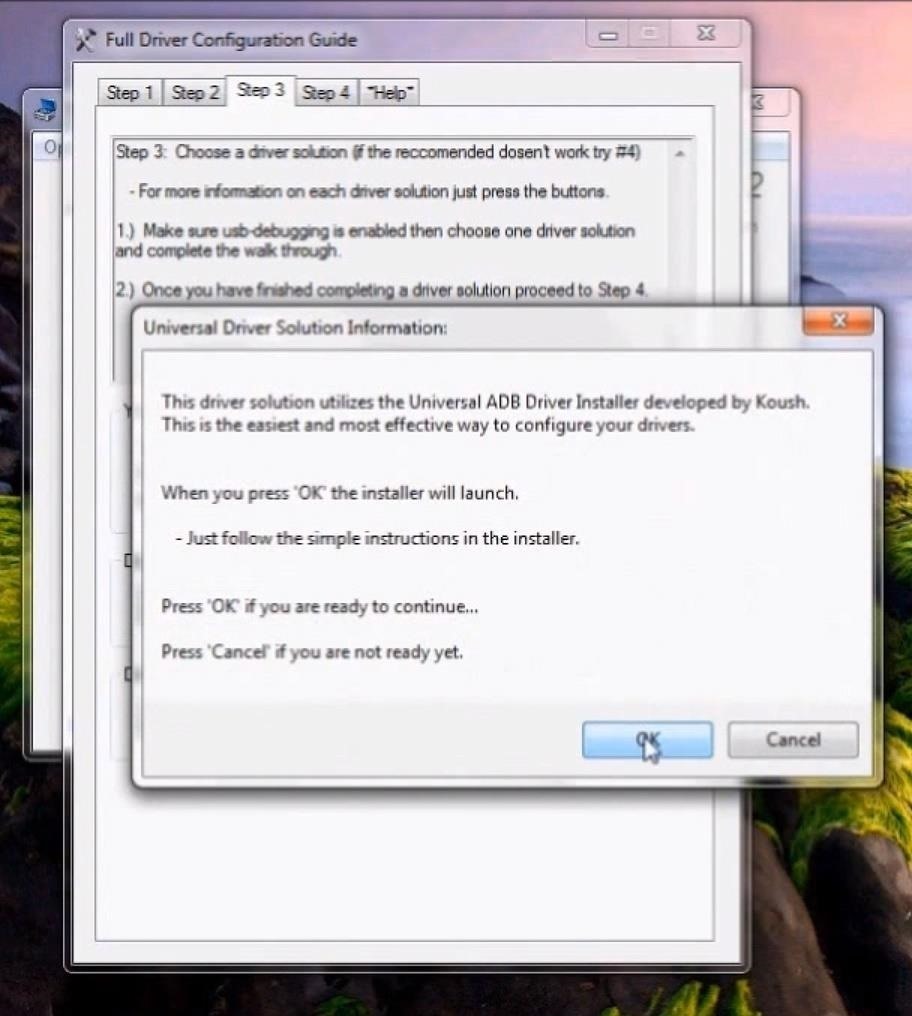
Next, click the button labeled Full Driver Installation Guide - Automatic + Manual near the top-right of the toolkit's main screen.
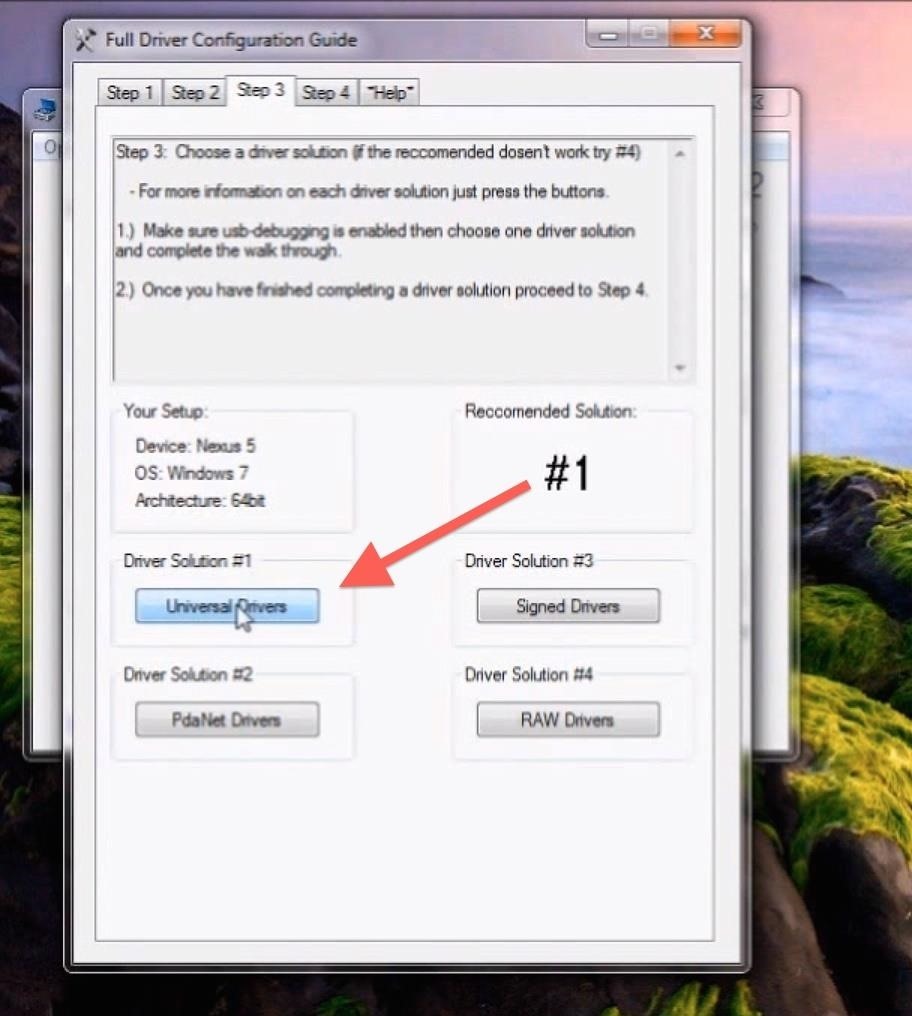
Follow the instructions provided by the toolkit to install the proper device drivers. On the "Step 3" tab in the dialog box that appears, take note of the Recommended Solution it provides and install the corresponding set of drivers.
Step 6: Back Up Your Data and Apps (Optional)
As you probably remember, the process of unlocking your Nexus 5 deletes all of your phone's apps and data. The same applies when re-locking and returning to stock.
There are several methods available to back up your data, but most won't be able to restore anything without root or a custom recovery. The best option to back up your music, photos, videos, and other data is to copy them to your PC temporarily using Windows Explorer. When you have returned to stock, you can then copy these files back to your phone.
For backing up apps, however, there is an automated option provided by the Nexus Root Toolkit. Simply click Backup from the toolkit's main menu, then select Create Android Backup File on the following screen.
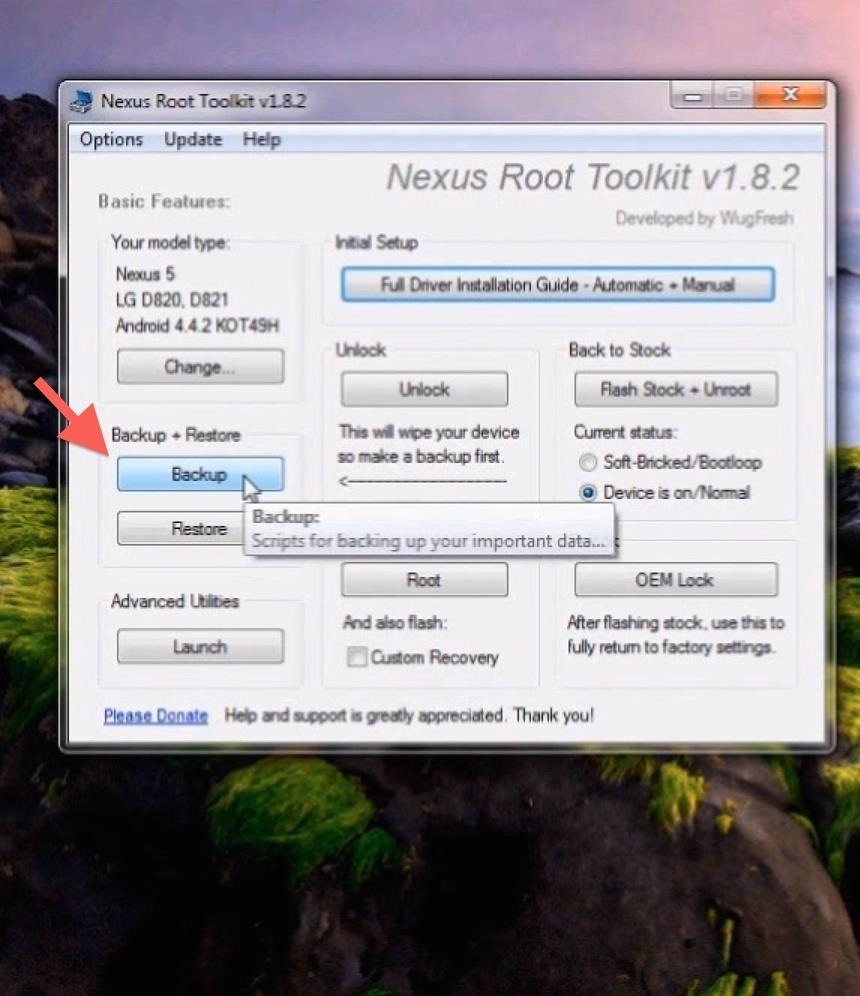

Follow the toolkit's instructions through the backup process. Be sure to note the save location of the backup file so that you can find it when it comes time to restore.
Step 7: Flash the Stock Firmware
Before proceeding, remember that THIS PROCEDURE WILL DELETE ALL APPS AND DATA FROM YOUR PHONE.
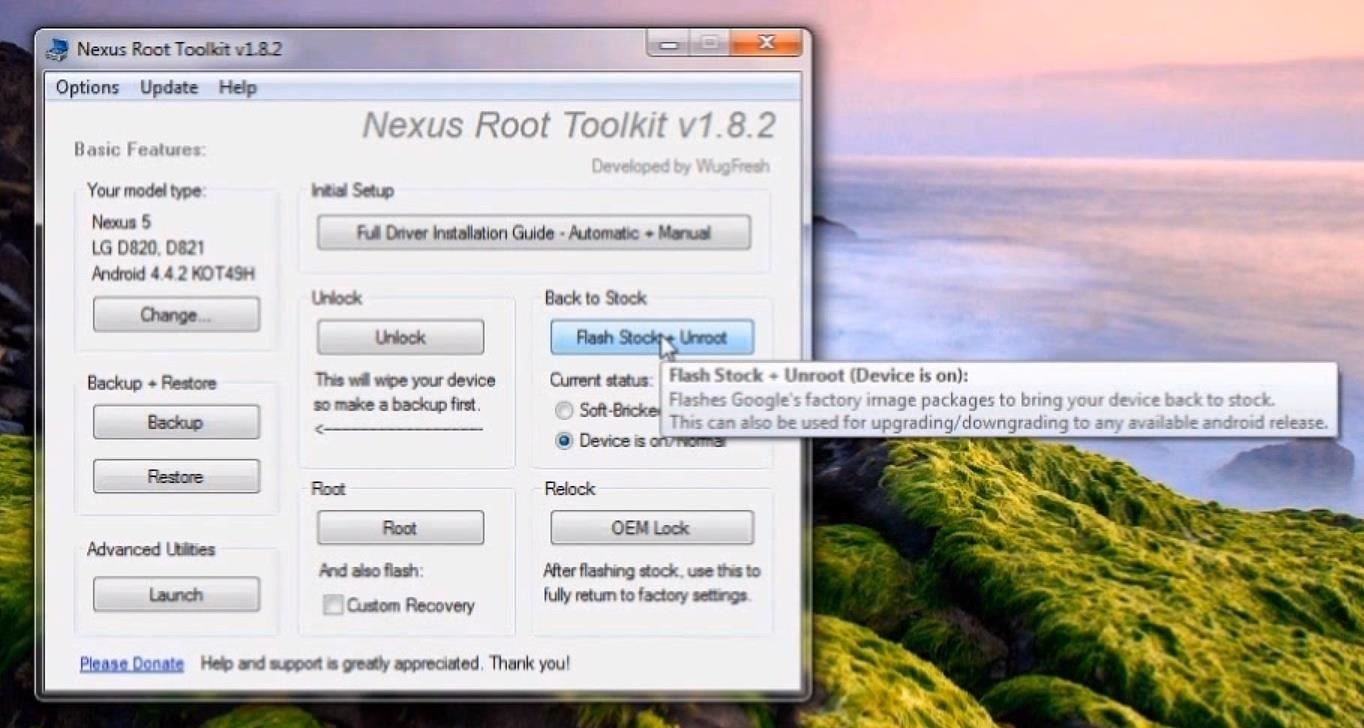
From the main menu of the toolkit, select Flash Stock + Unroot.
Press OK to continue, and on the following screen, make sure Automatically download + extract the factory image selected above for me is selected.
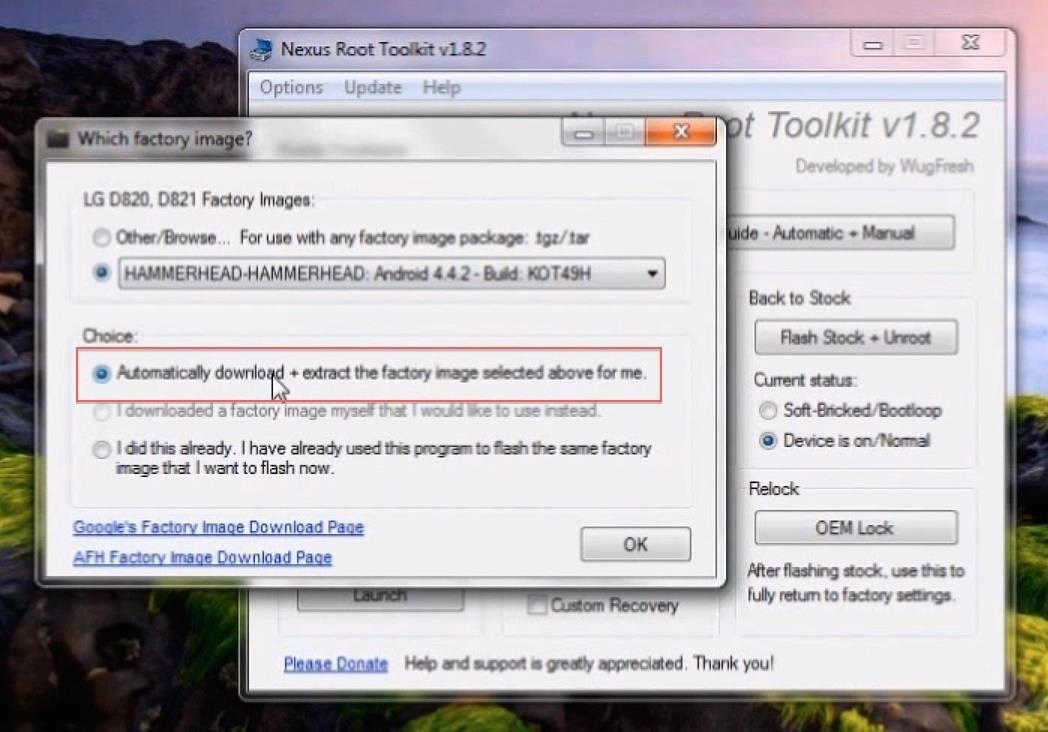
Click OK, then follow the instructions to flash the factory images. DO NOT DISCONNECT THE USB CABLE DURING THIS PROCESS.
Step 8: Enable USB Debugging Again
Now that you've flashed the stock firmware, all of your previous settings have been reset. This includes the USB Debugging option we enabled earlier, so refer back to Step 2 of this guide to enable it once again.
The dialog on your Nexus 5 asking to allow your computer to connect should appear right away this time. Tick Always allow from this computer and select OK again.
Step 9: Lock the Bootloader & Reset the Tamper Flag
Not only will this part of the process put the bootloader back into its original state, but it will also destroy any evidence of the phone having been modified in the first place. This is important if you are returning your phone to the manufacturer or your wireless carrier for warranty purposes.
From the main menu of the toolkit, select OEM Lock, then OK from the following prompt.
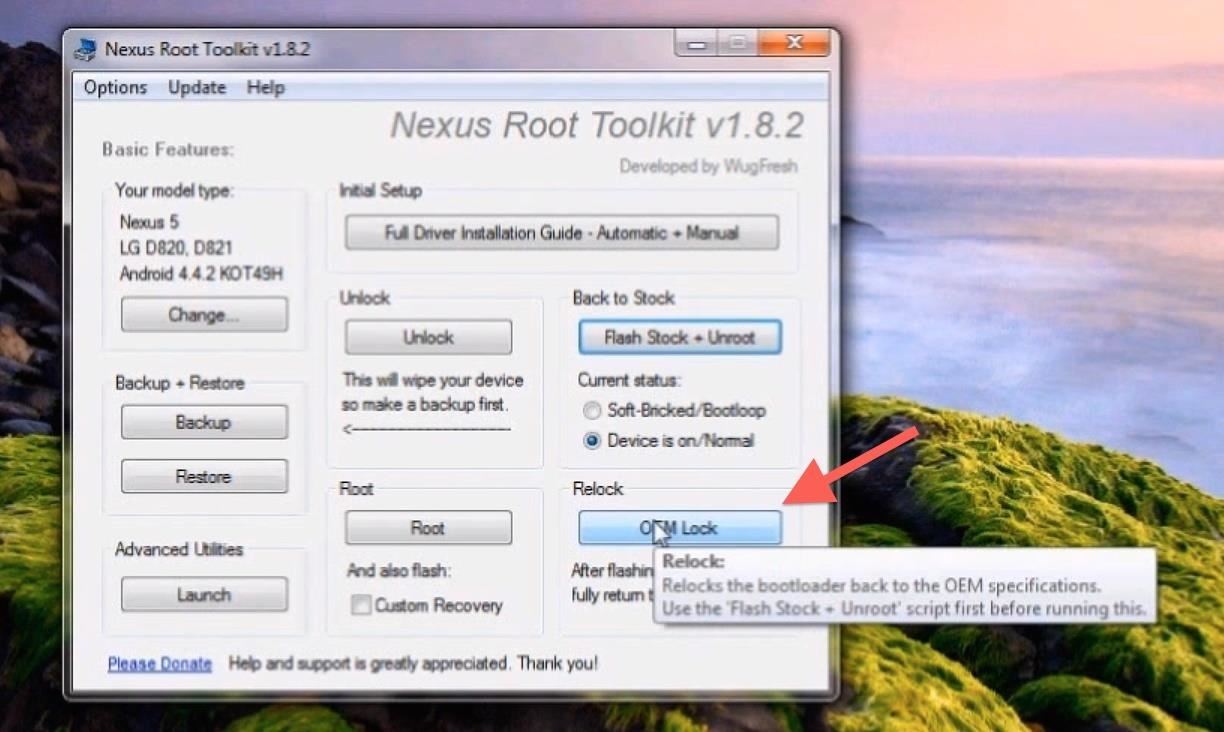
This process will automatically reboot your phone several times, so be patient.
Step 10: Restore Your Backups (Optional)
At this point, it's safe to go ahead and restore any backups you've made. If you copied any data to your PC, you can now copy that back to your Nexus 5.
To restore any apps you backed up with the toolkit, click Restore from the main menu, then Restore Android Backup file from the next screen.
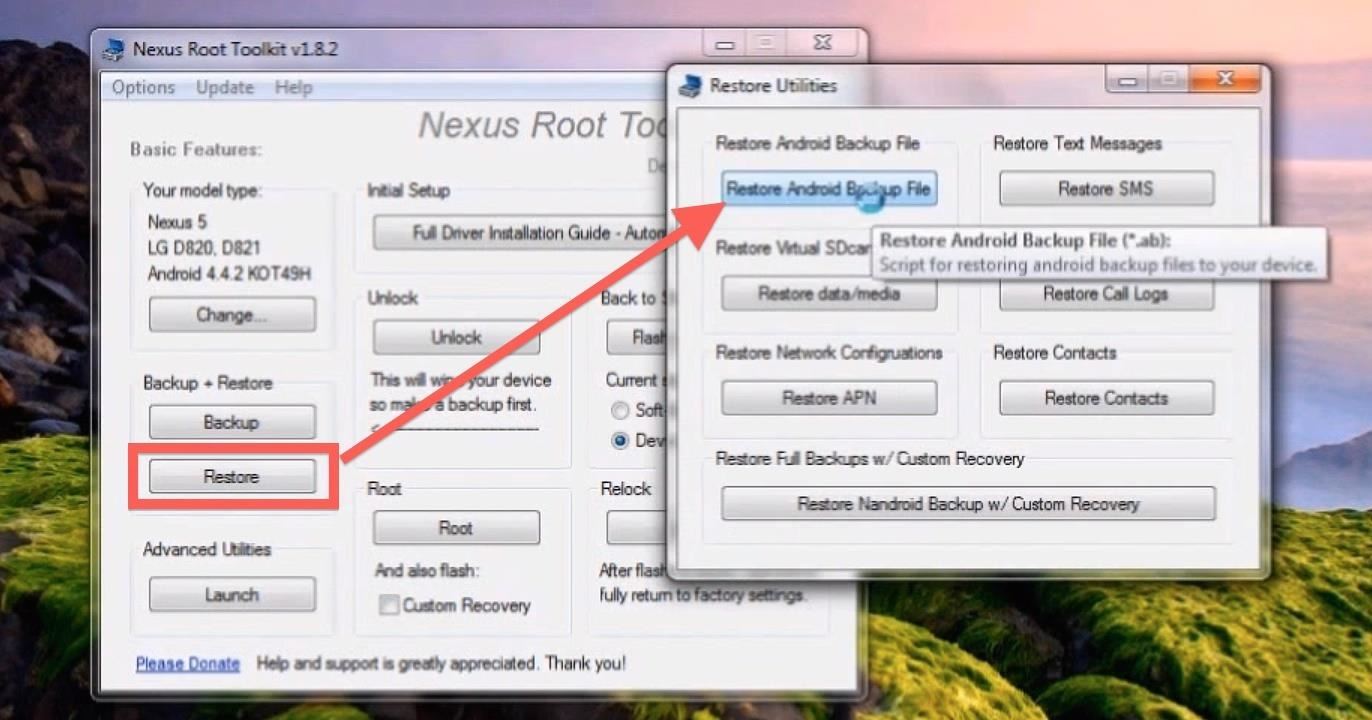
Follow the toolkit's instruction to complete the process.
Savor the Stock Flavor
You should now be holding a completely stock Nexus 5. Your phone is now ready to be sent back to the manufacturer or carrier if need be. Otherwise, enjoy your fresh-out-of-the-box device.
New Nexus 5 image via Phandroid
Just updated your iPhone? You'll find new emoji, enhanced security, podcast transcripts, Apple Cash virtual numbers, and other useful features. There are even new additions hidden within Safari. Find out what's new and changed on your iPhone with the iOS 17.4 update.


37 Comments
i've downloaded the 4.4.3 file image for nexus 5. I want to know if the same procedure is to be followed for installing it as for 4.4.2 mentioned in the root toolkit?
It's a tiny bit different, but I've got an article coming out really soon that'll walk you through it (if you can stand the wait).
Edit: Guide is up now
I have a few questions...
1.) I rooted the Nexus 5 4.4.2 using the chainfire method in another article on this website. will this unroot method work with that(so that I can do OTA)?
2.) If not, then tell me which steps I need to follow(detailed, I am quite the beginner in rooting)
3.) Is there a way to directly go from rooted 4.4.2 to unrooted or rooted 4.4.3?If yes, please guide me.
I asked these questions as they all seem too technical for me on other sites on the web.
Yes, this method will work with the Chainfire method just fine.
But even easier, I've got a full guide up now that can take you through updating your rooted Nexus to 4.4.3. There's an optional step at the end of that one which will allow you to re-root with one click once the update has been applied.
Here's the update guide.
mine couldn't find system image
I made 2 nandroid backups in TWRP and i wiped 2 times the device to install custom roms and the third time i wiped the device the backups where deleted as well, now in TWRP it says that the phone has no OS, i tried with a lot of methods and it does not work, please help me.
It looks like you have accidentally wiped everything on your device. When wiping with TWRP, there's an option that will also wipe your internal storage (AKA SD Card), and you must have somehow ticked that box.
This means that there is absolutely no data on your phone at this point. So TWRP cannot flash anything, since there's nothing there to flash.
But you're in the right place. You can get your phone back up and running using most of these same steps. You'll have to skip Steps 2, 4, and 6, since your phone is not operational right now. Instead, when you get to Step 7, follow the guide precisely with the exception of one thing—tick the Softbricked/Bootloop option under Current Status before clicking Flash Stock + Unroot.
After that, your phone should boot back up again and you can proceed to Step 8. If you don't want to be fully stock & unrooted when this is finished, you can skip Step 9. If you want to get root and TWRP recovery back at this point, you can simply tick the box next to And also flash: Custom Recovery, then click the Root button in NRT.
Hey, can I still get back to Android 4.4 (Factory reset) even if I have already downloaded Android L. How will I go about this? Please help
Yep, it would still be pretty much the same process that's depicted here. Except you'd have to lie to Nexus Root Toolkit in Step 5 and tell it that your Build Number is Android 4.4.4 (but don't worry, that little white lie won't harm anything).
Beyond that, just be sure to select Android 4.4.4 as the firmware you'd like to install in Step 9.
THANK YOU VERY MUCH. YOU SAVED MY PHONE AFTER ROOTING HIM. THANK YOU VERY MUCH. GOOD BLEESS YOU
can I update my phone from wifi after this?
Yep, over-the-air updates will work like normal.
thank you so much
but I can't find the build number in the NRT , I have KVT49L test-keys
on my phone 4.4.2 . is that makes any difference if I choose KOT49H?
That will be fine. The build number setting in NRT is more about the firmware version that is going to be installed when the process is finished.
Thanks a lot :D
after step 7 my phone screen stuck up in bootloader screen mode showing downloading ... but the cmd process was over on screen so i tried next step 9 it showed unable to connect ... what to do....
I have an nexus 5 with stock 4.4.4 ( i just bought it) i want to instal cyanogenmod on it with cm installer. if i have problems with it, will this help me get it unrooted and get it back in warranty?
I dropped my nexus 5 from 3 feet and its screen went black its touch is not responding but the notification light is blinking ,I need to unroot it before sending it for replacement .Is it possible to unroot the phone without using screen and only laptop .
Meh, everything works for me but I see the phone go to the START Fast Boot screen, it sits there for a while and reboots. Then looks normal and the NRT on my computer says "Waiting for your device..." And it just stays there - pops up eventually and tells me the operation timed out.
All steps were successful, including being able to browse the device in my explorer and installation of the recommended driver.
I assume I am supposed to be doing something different when the device gets to the Fastboot screen? Did I miss a step here somewhere?
Nexus 5 v.4.4.4 (KTU84P)
Figured it out - it wasn't staying in the fastboot mode. Once I had it in fastboot I was able to run the flash.
Thanx again!
Need Help.
what should i do? i've followed the instructions. already tried it many time but still no luck.
i used forced flash here.
One of the things these instructions don't cover is checking if your bootloader is locked
couple things you will need to do.
5.once command line comes up type (with out quotes) "fastboot oem unlock"
I have followed all procedures successfully,
and used a App called Root Checker to check the status. It said it is rooted.......
So the unrooting have been FAILED. Anyone knows what happened?
p.s. I am using Nexus 5 and have rooted it with Towelroot
Interesting. Like the post above you states, this tutorial assumed your bootloader was unlocked, because that was a requisite in the available rooting procedures at the time this article was made. But since Towelroot made it easy to root without unlocking your bootloader, that adds a wrinkle to this process.
All of that considered, I'd suggest clicking the "Unlock" button in the Nexus Root Toolkit after you complete Step 6 of this tutorial. Then, enable USB Debugging on your phone again since the process of unlocking your bootloader will reset that setting. After that, pick back up at Step 7 and you should be good to go.
Does this delete TWRP? And if at step 7 I select 5.0 is it ok? So that I will immediatly have it without requiring an update?
Yes and yes. This will remove any custom stuff that you've installed on the phone and put everything back to stock. The same will happen if you use the new 5.0 stock images instead of the ones listed in this tutorial—you'll just be on stock Lollipop instead of stock KitKat when you're done.
I tired all the steps you have mentioned. Even i had rooted my phone using towelroot. I followed your steps and unlocked the phone then flashed it then locked it again. But now when i try to update the phone with OTA android L, after downloading, it says error and reboots while installing. Could you please suggest a way to install android L? :-)
Towelroot didn't exist when I made this article, so I didn't account for the fact that folks would be rooted while still having a locked bootloader, and I think that's the problem here.
If your bootloader is still locked, this tutorial will not work as-is. Instead, when you finish with Step 6 of this guide, click the "Unlock" button in the Nexus Root Toolkit, then follow the prompts to unlock your bootloader. After that, enable USB Debugging on your phone again since the process of unlocking your bootloader will reset that setting. When you've done that, just pick back up at Step 7 of this tutorial and you should be good to go.
If you're trying to update to Android 5.0, Nexus Root Toolkit will give you the option of installing that as your stock firmware in Step 7. So you don't have to revert to KitKat in order to be fully stock and running Lollipop.
Hello :) Thank you so much for your reply, really appreciate it! And its done. I followed your instructions and my N5 is rocking the lollipop now! Thanks a ton again. Cheers
^^
Well, here's the deal with my phone (Nexus 5),
After that I have updated my phone to 5.0.1 it shuts off randomly. It then goes on and off, and on and off again. Sort of like a bootloop. But after a while it goes on again. I have searched on different kinds of forums about this problem and some people have experienced this kind of problem too, and many of them complaining that it is a software issue after updating to 5.0 lollipop. My device is rooted, it hasn't have a custom roms on it.
I wan't to unroot my device and then try to send it to the manufracturer. My device still has warranty.
Now, I'm wondering, will my manufacturer see that I have rooted my device in the past?
If you follow the steps here (and optionally substitute the newer factory images that are now available), they won't be able to tell. The factory images overwrite everything on your device, so there are no files or traces of files left behind. Then, Nexus Root Toolkit resets your tamper flag and re-locks your bootloader (Step 9), so there is no evidence of tampering even in your phone's lowest level of software.
hi
this is vinoth, i have tried to root my mobile by seeing nexus5 rooting from you tube and i thought i have sucessfully done rooting, but i was wrong bcz when i installed titanium backup and super su app in my mobile and when i start run these app i came to know it was not sucessfully rooted, after few months i got a android update from 5.0.1 to 5.1. after downloaded it asked for restart to install suddenly it took to TWRP and i selected a option bootlader and it started booting contineously and when i again start to boot it in a recovery mode it just says there is no OS installed in ur mobile please give me some solution to resolve this problem
Thank you!!!! Thank you!!! Ive spent hours trying to unroot and was running into all sorts of problems. This works!!!! God bless the internet!!
thanks a lot
hi i am trying this mathod but i am the softwere is unable to extrat 7zip help.....
Share Your Thoughts