
Google has a habit of starting on new projects for Android, then hiding them away if they didn't quite complete them in time for a major release. We saw this with multi-window mode last year (which is now an official Nougat feature), and this year, there was the hidden night mode setting that was easily activated.
Google has also started work on a new menu that lets you completely customize the navigation buttons at the bottom of your screen, but hid it from view as well. Luckily, though, developer Al Iraqi found a way to activate the hidden nav bar tuner in Nougat, and all it takes is one flashable ZIP to try it out.
Requirements
- Nexus 6, Nexus 9, Nexus 5X, or Nexus 6P
- Android 7.0 Nougat installed
- custom recovery installed
- System UI Tuner enabled
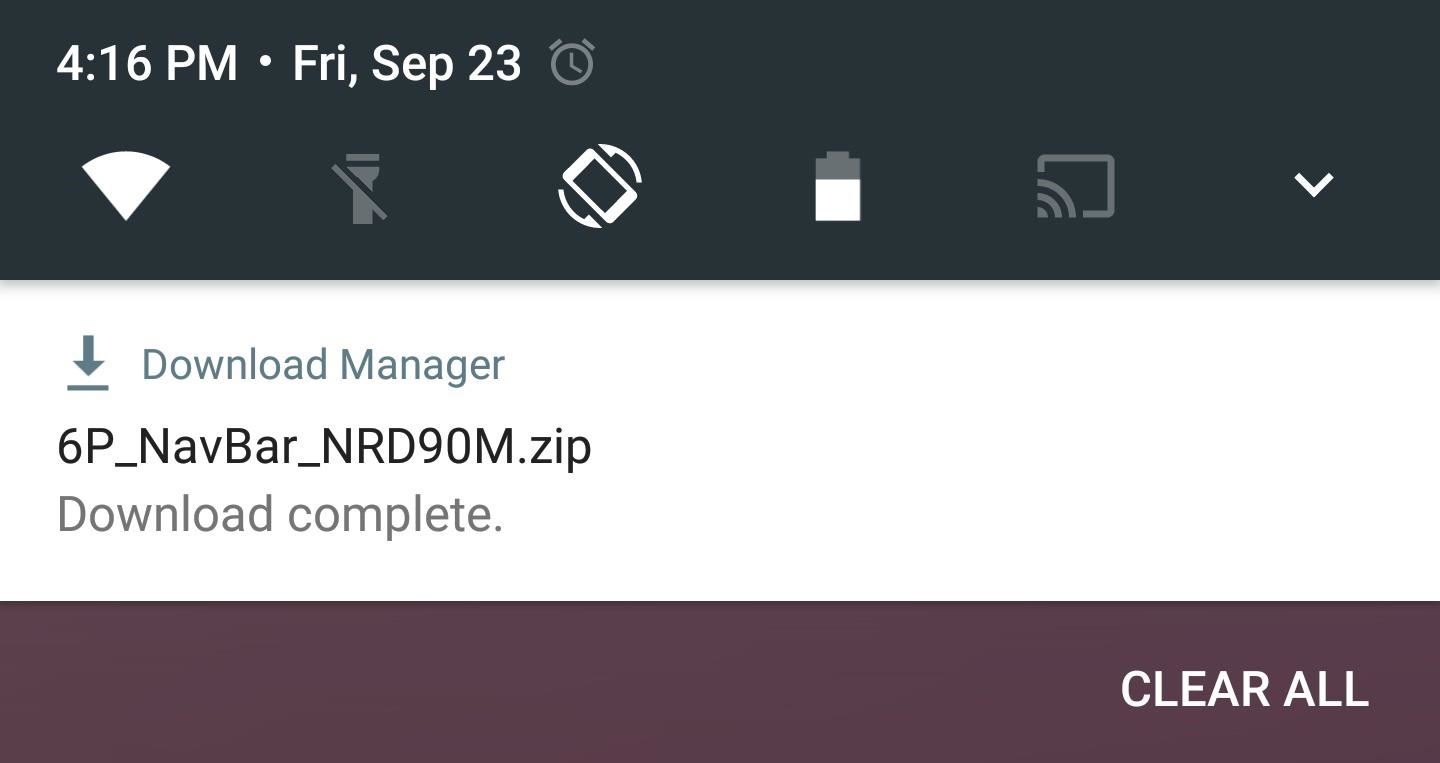
Step 1: Download the Right ZIP for Your Device
You'll need to download the flashable ZIP that enables the nav bar tuner on Android Nougat. These ZIPs are made for specific Android build numbers, so make sure to grab the right one for your particular Android version. If you don't know your build number, you can use this guide for help.
Note: Future versions of this mod can be downloaded from the developer's thread on XDA if the links above are out of date.
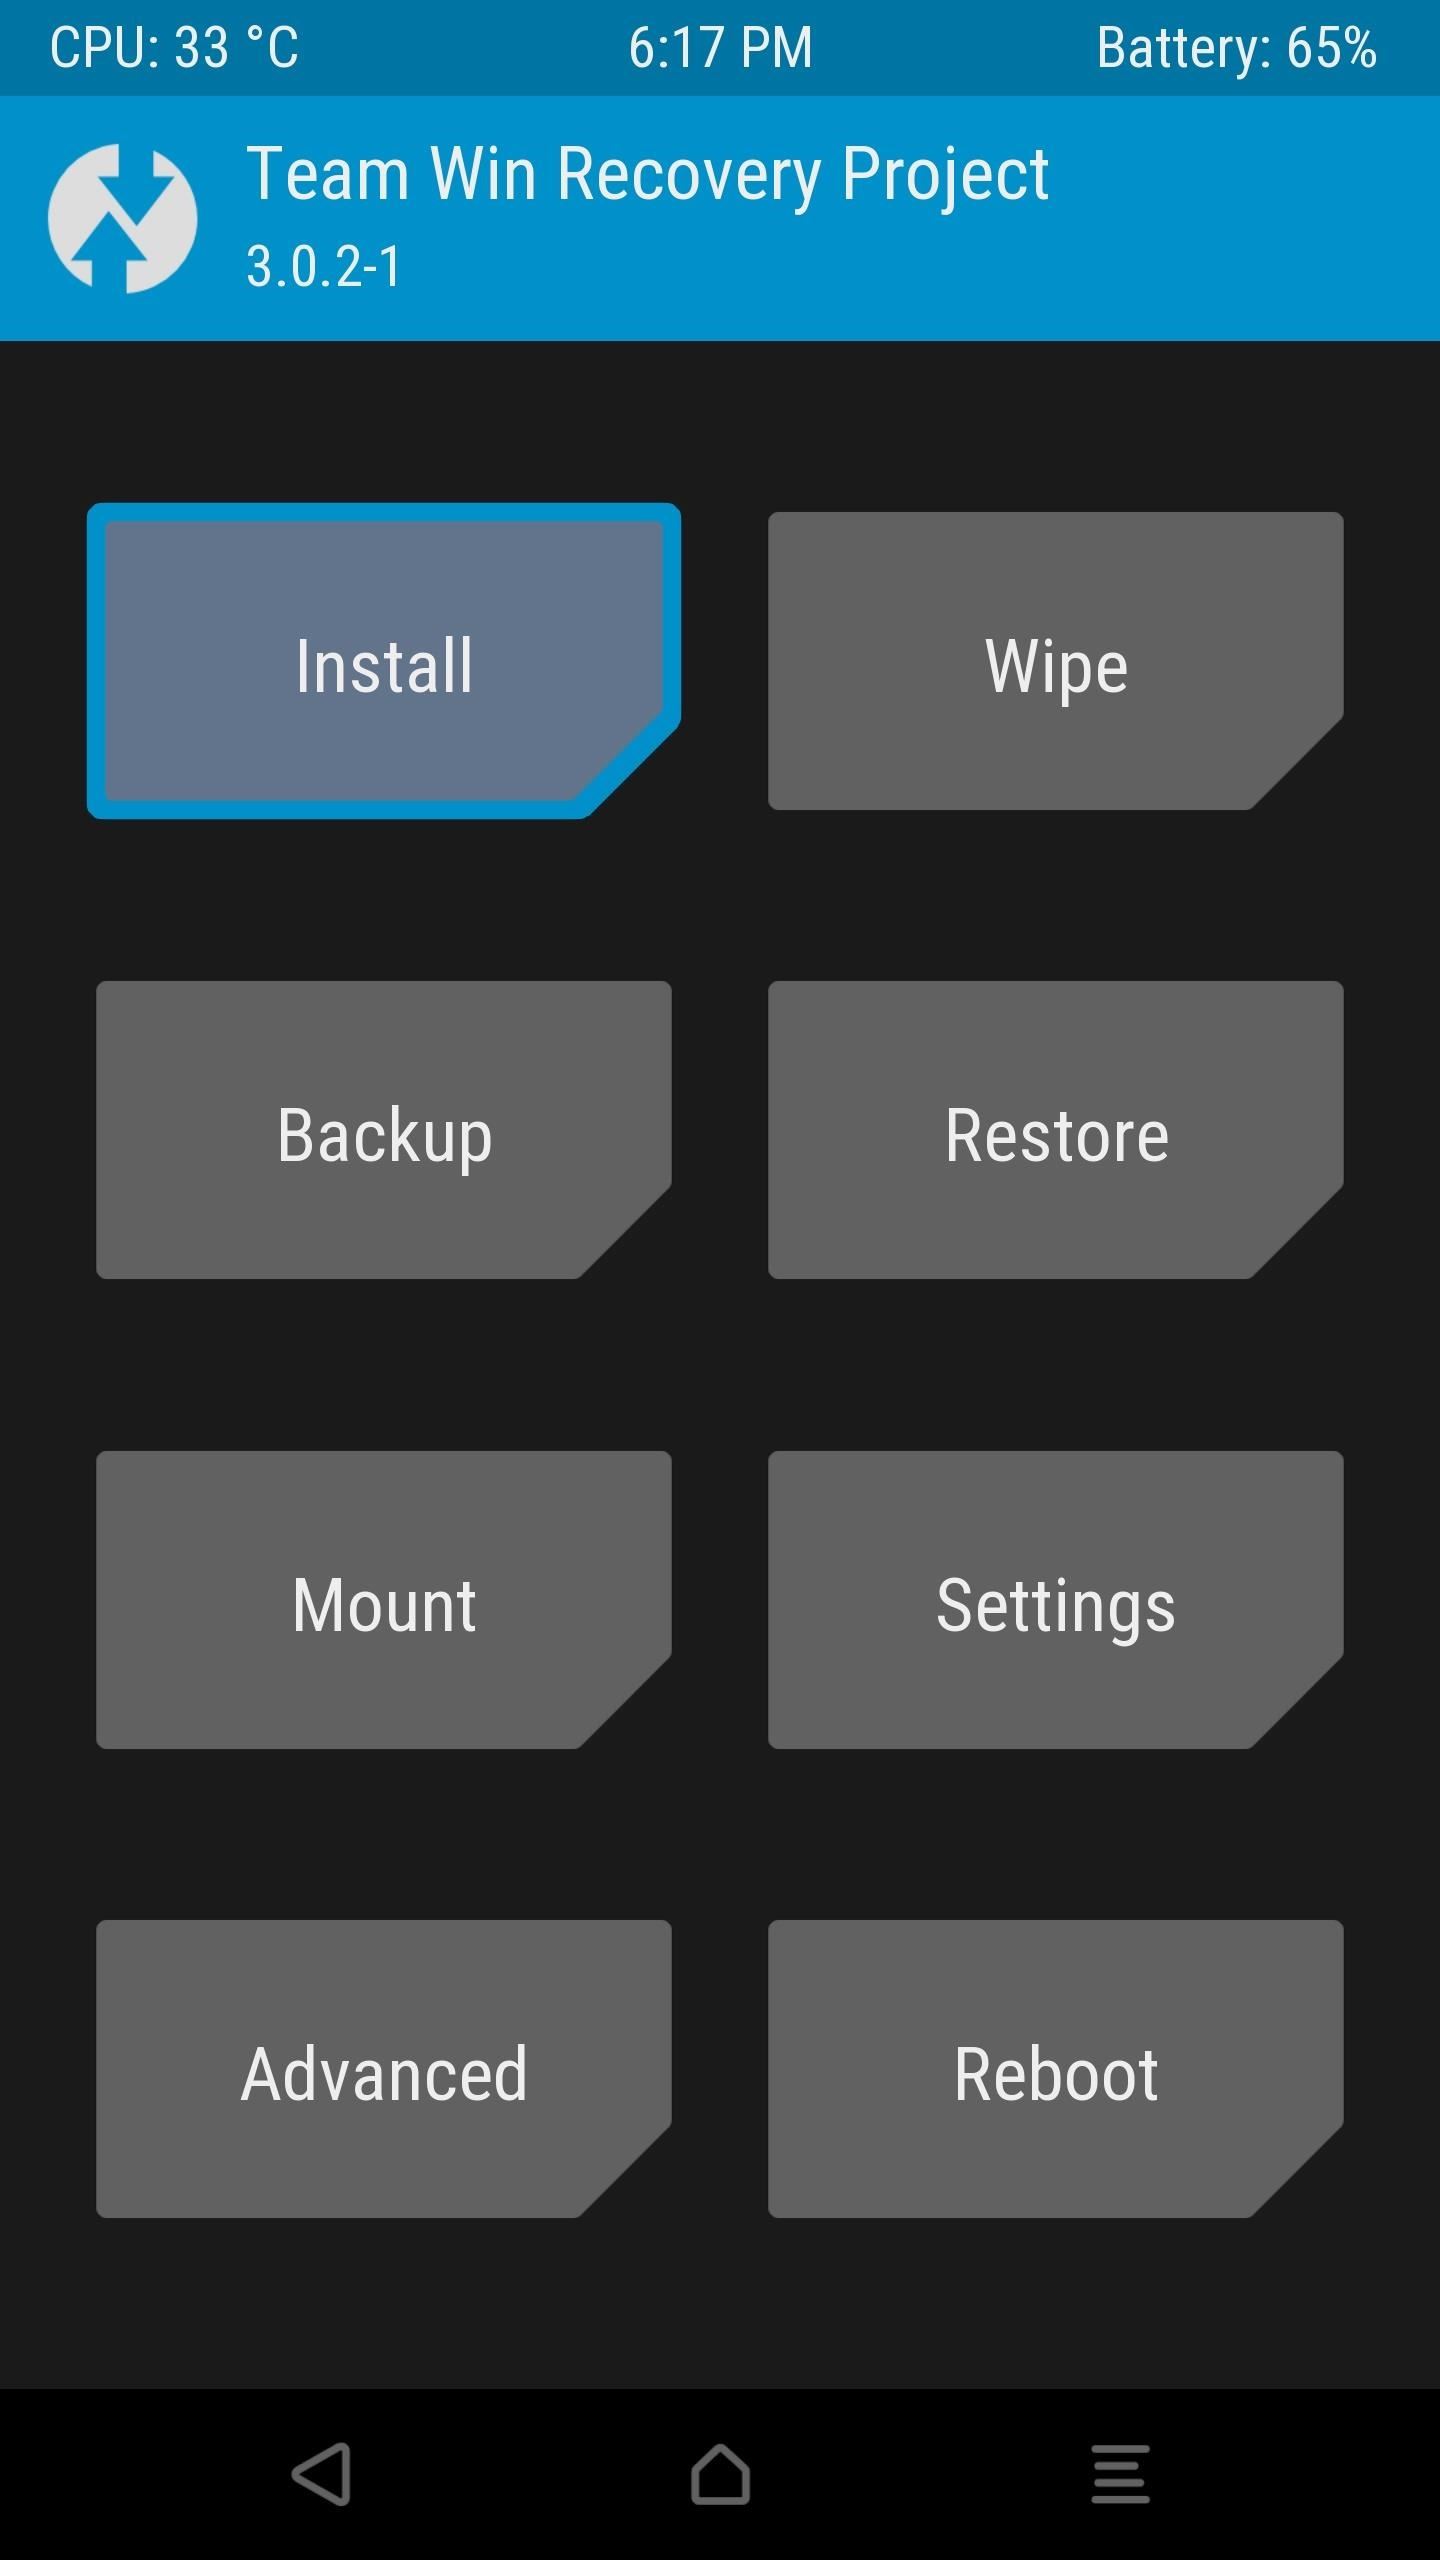
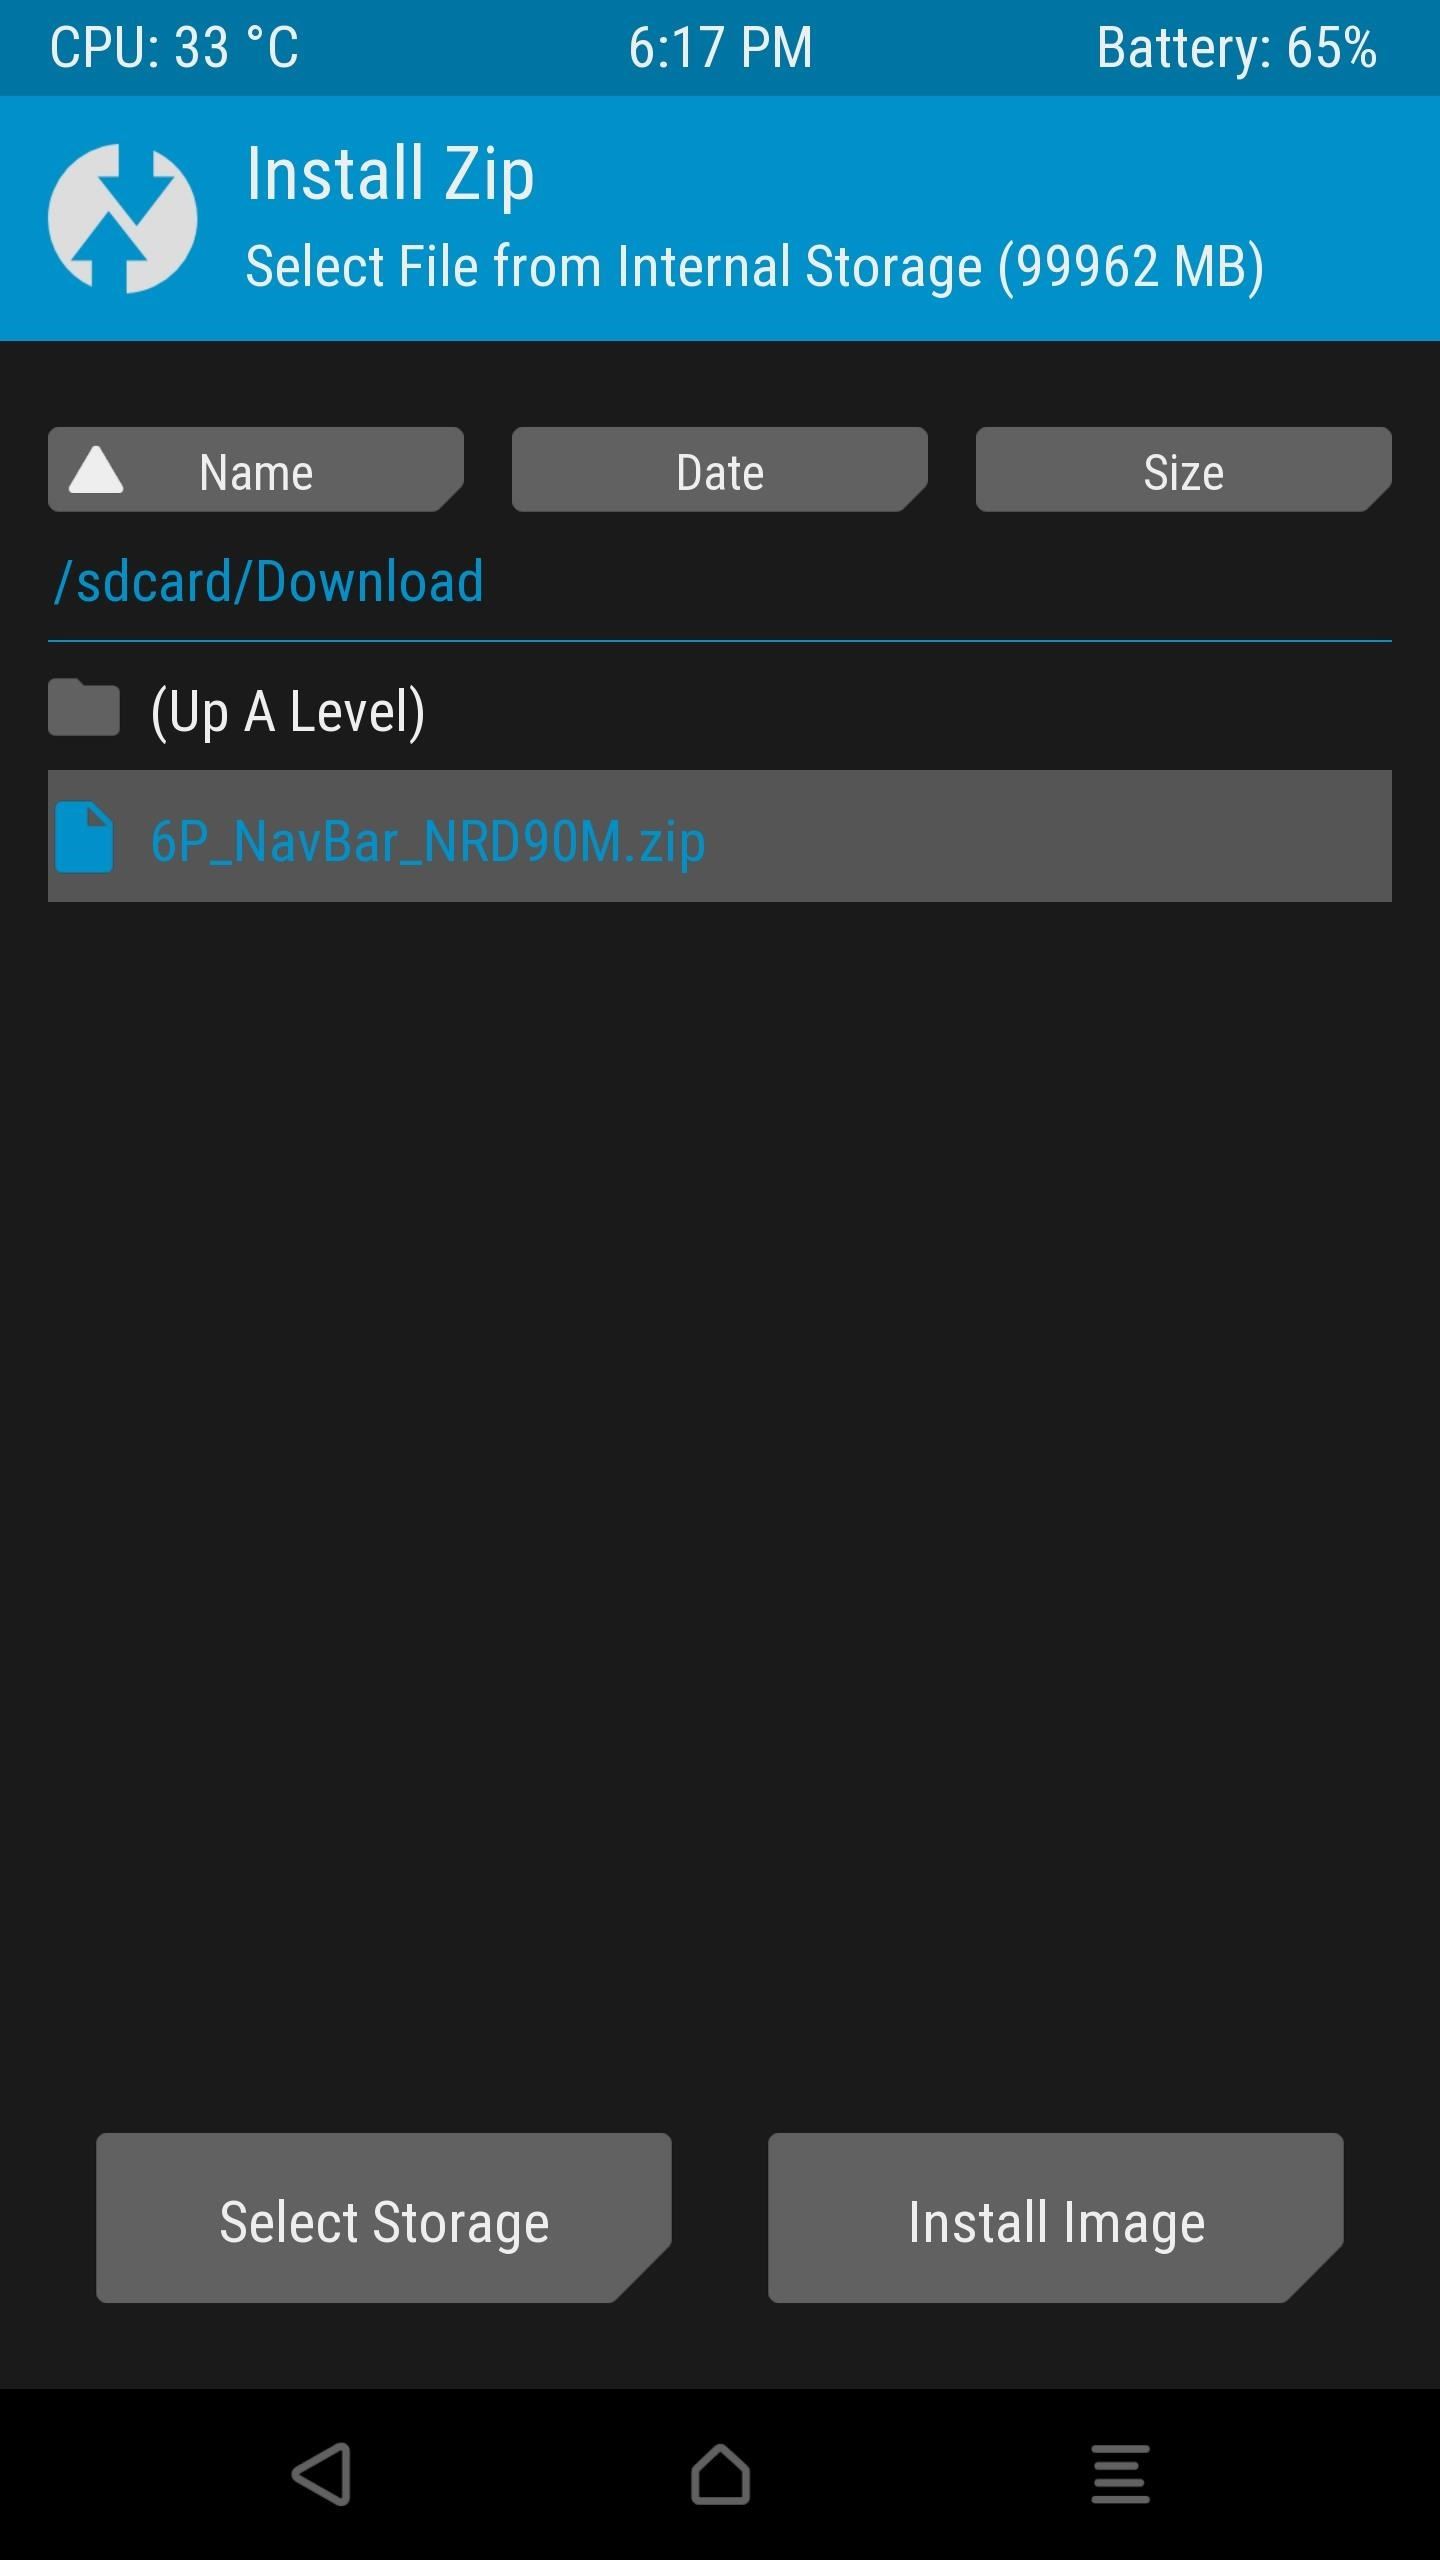
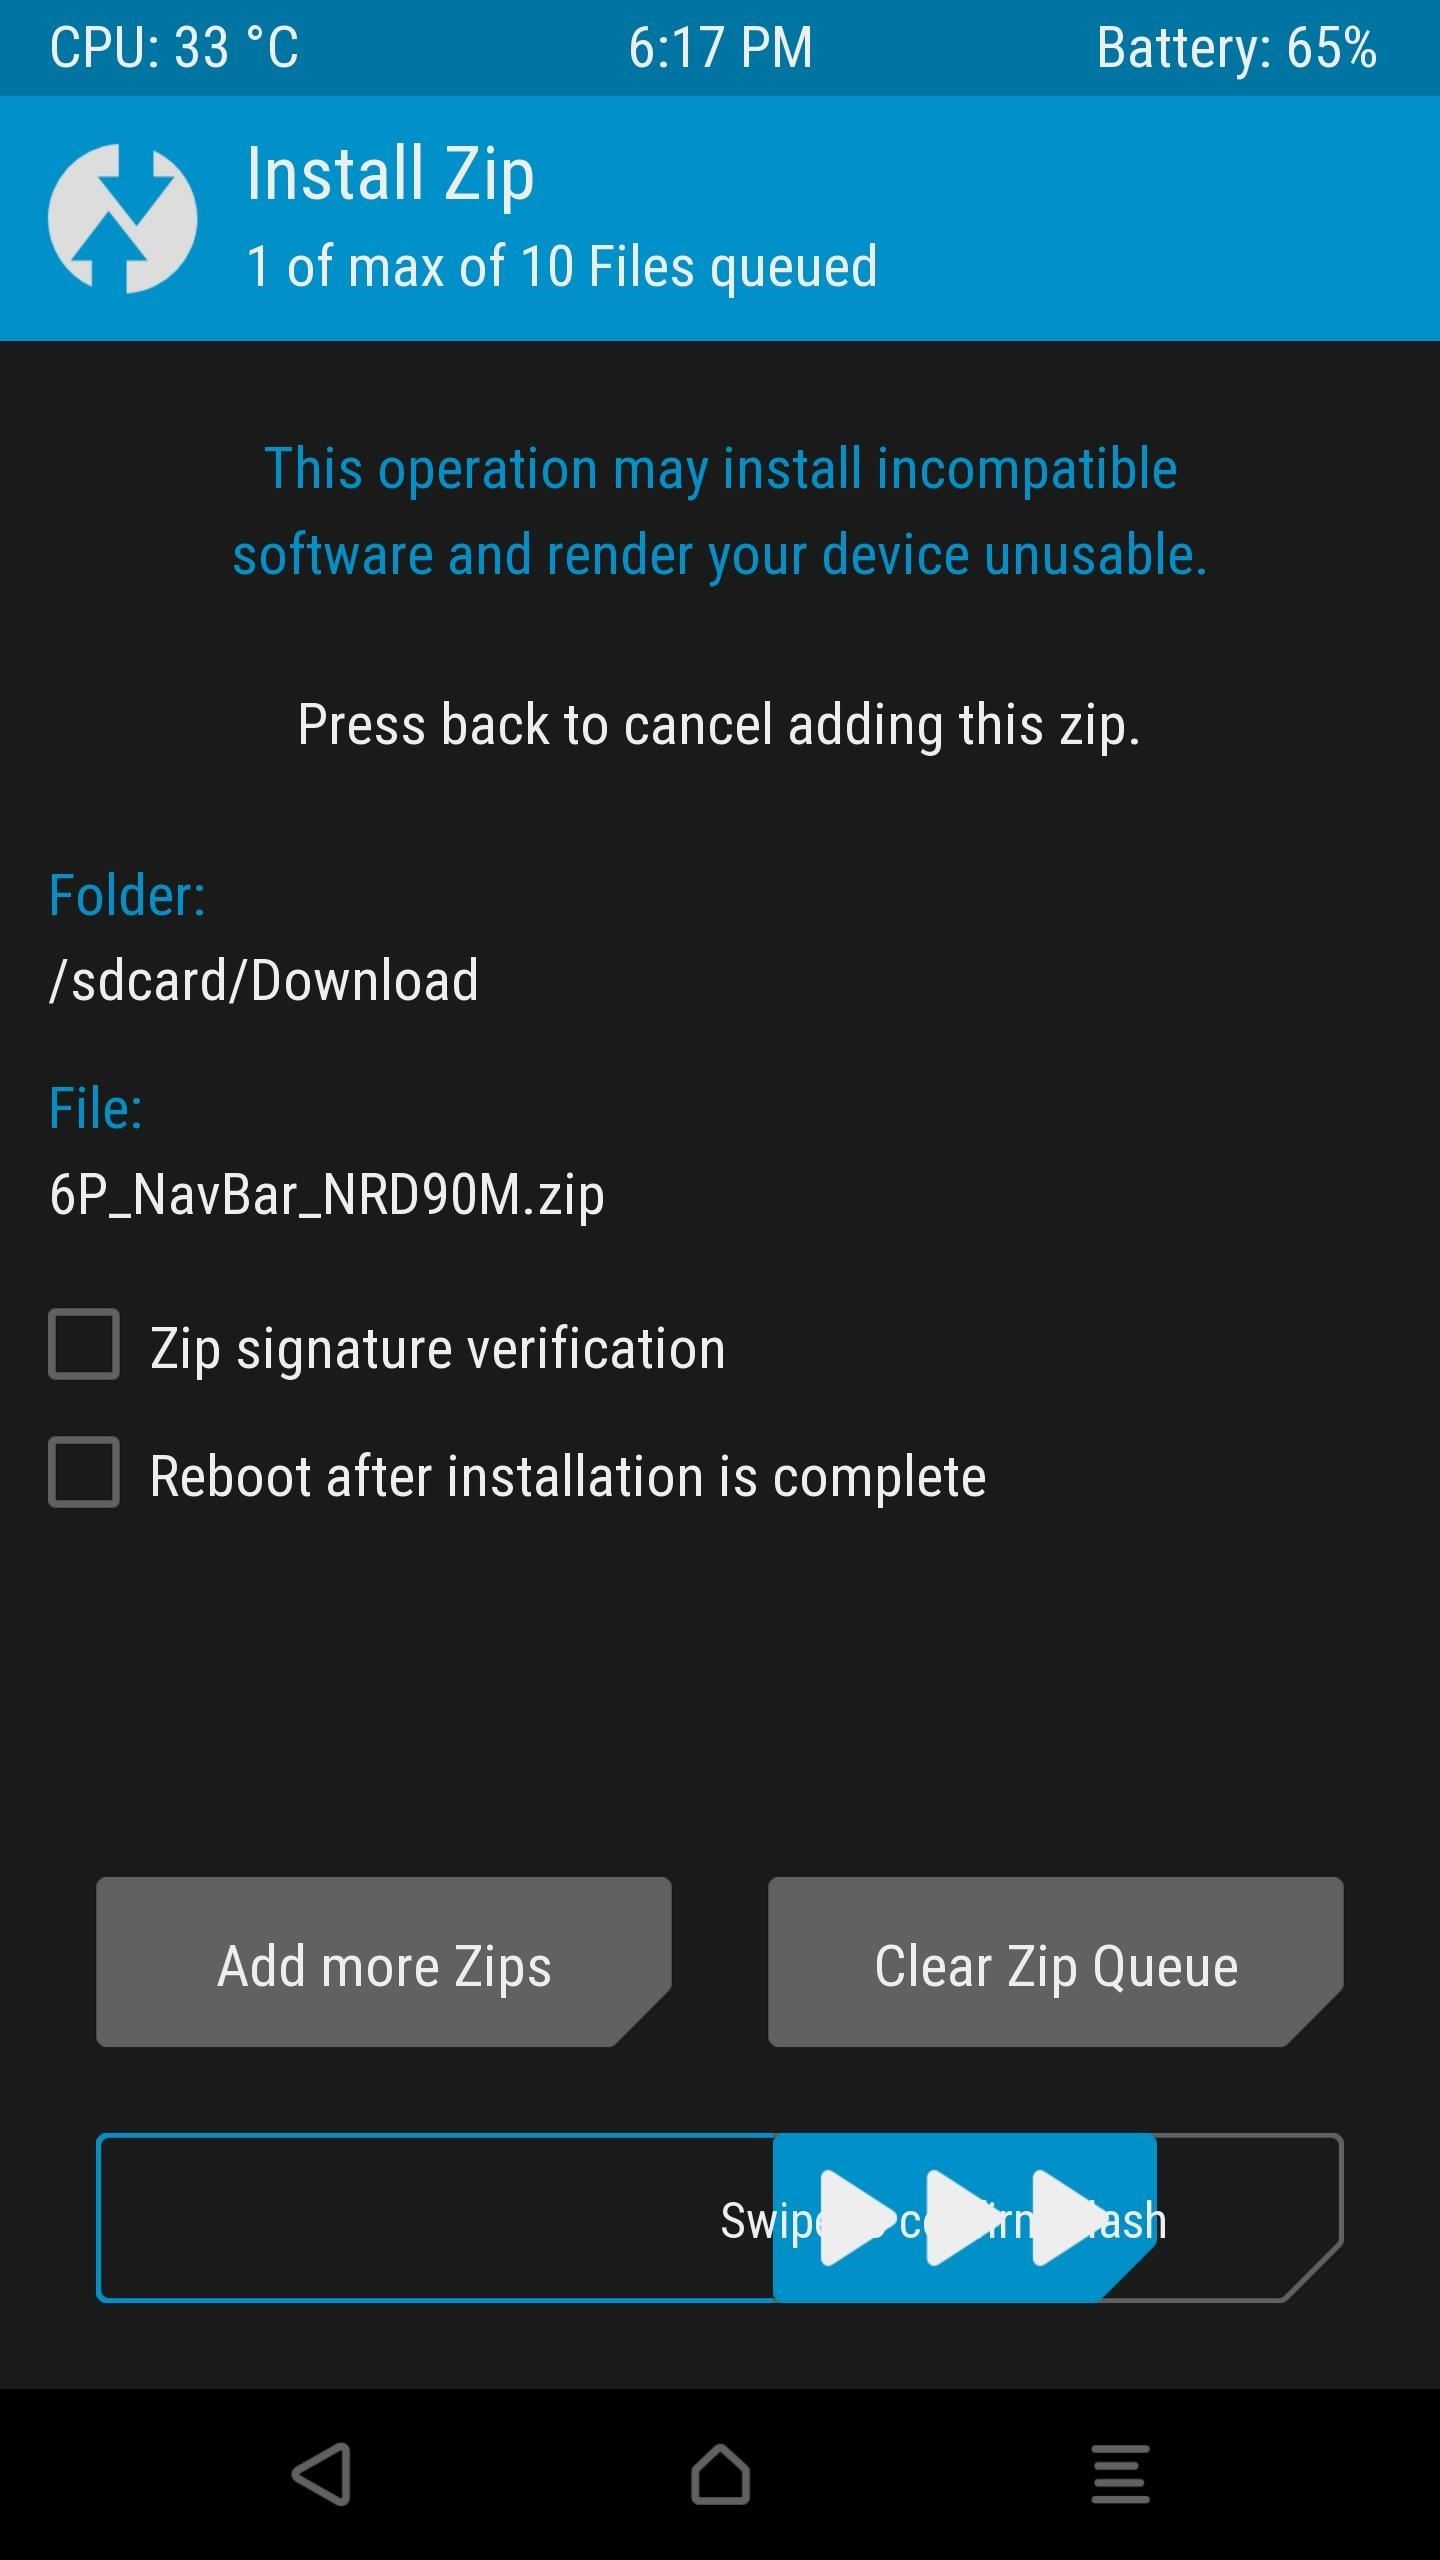
Step 2: Flash the ZIP in Custom Recovery
Once the ZIP file has finished downloading to your device, go ahead and boot into custom recovery. From here, tap the "Install" button, then navigate to your device's Download folder. Next, select the NavBar_XXXXX.zip file, then swipe the slider at the bottom of the screen to install it. When that's finished, tap "Reboot System," then you'll be ready to try it out.
Step 3: Customize Your Navigation Bar
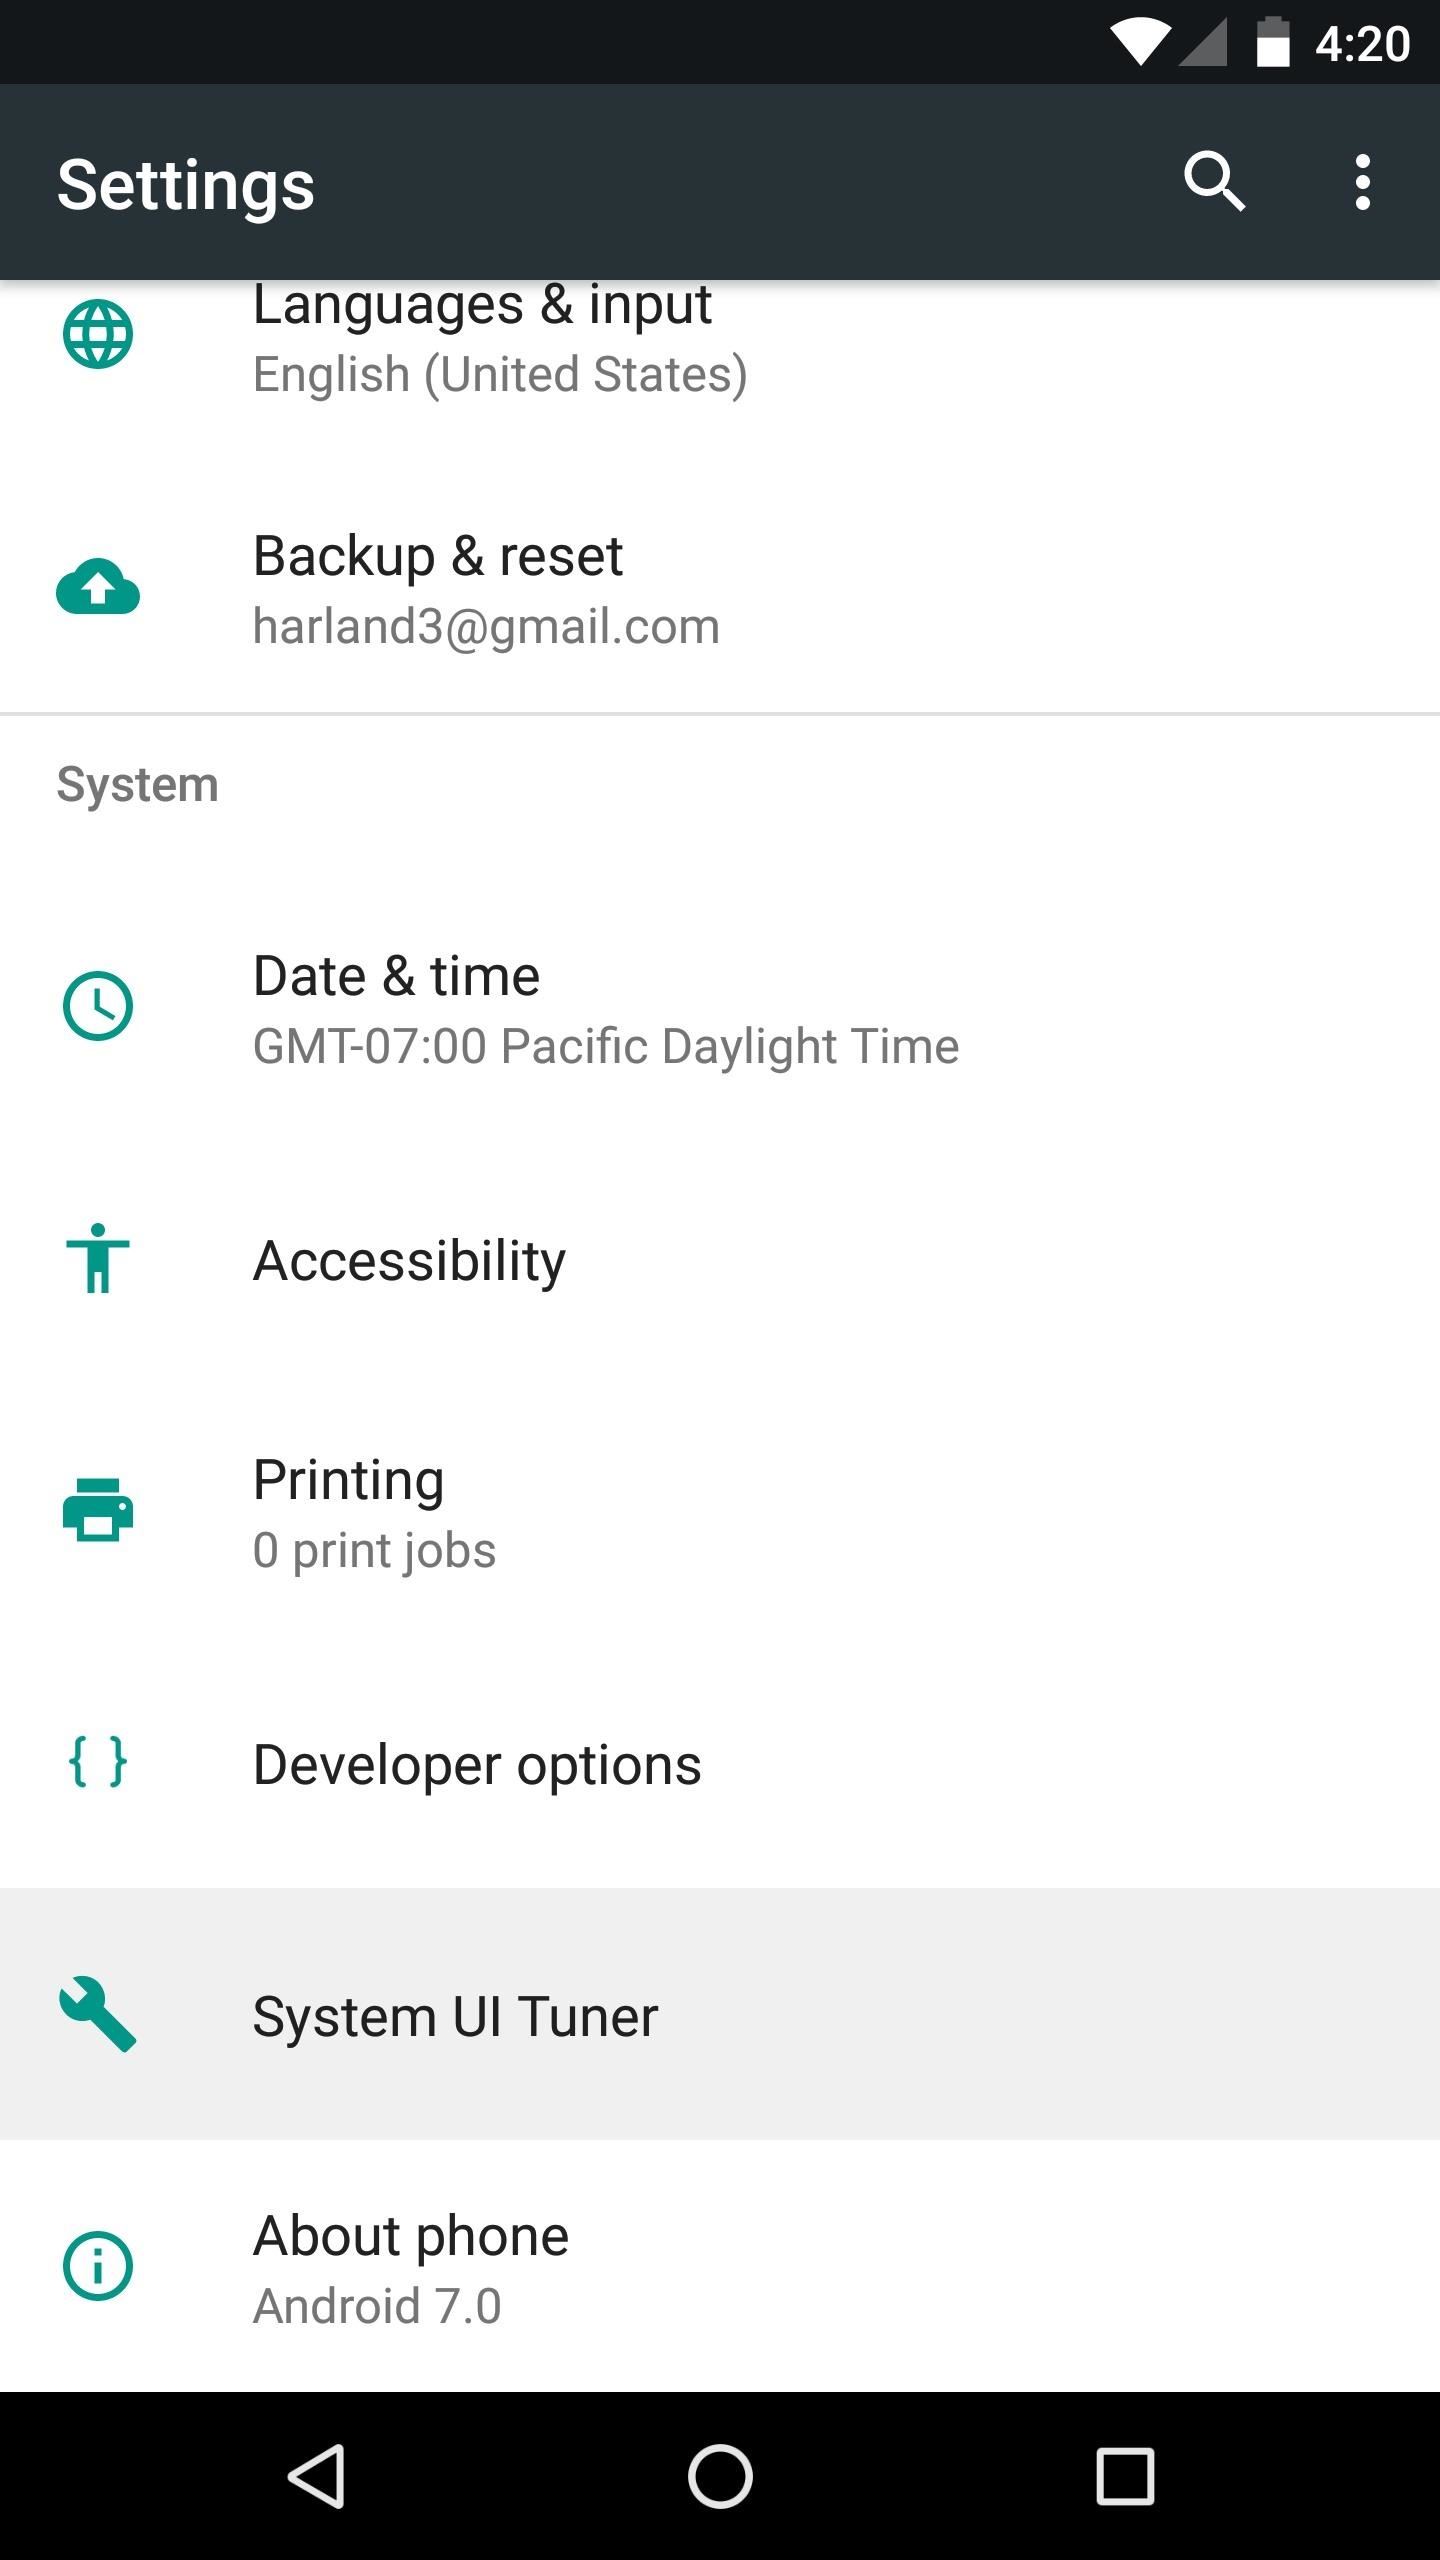
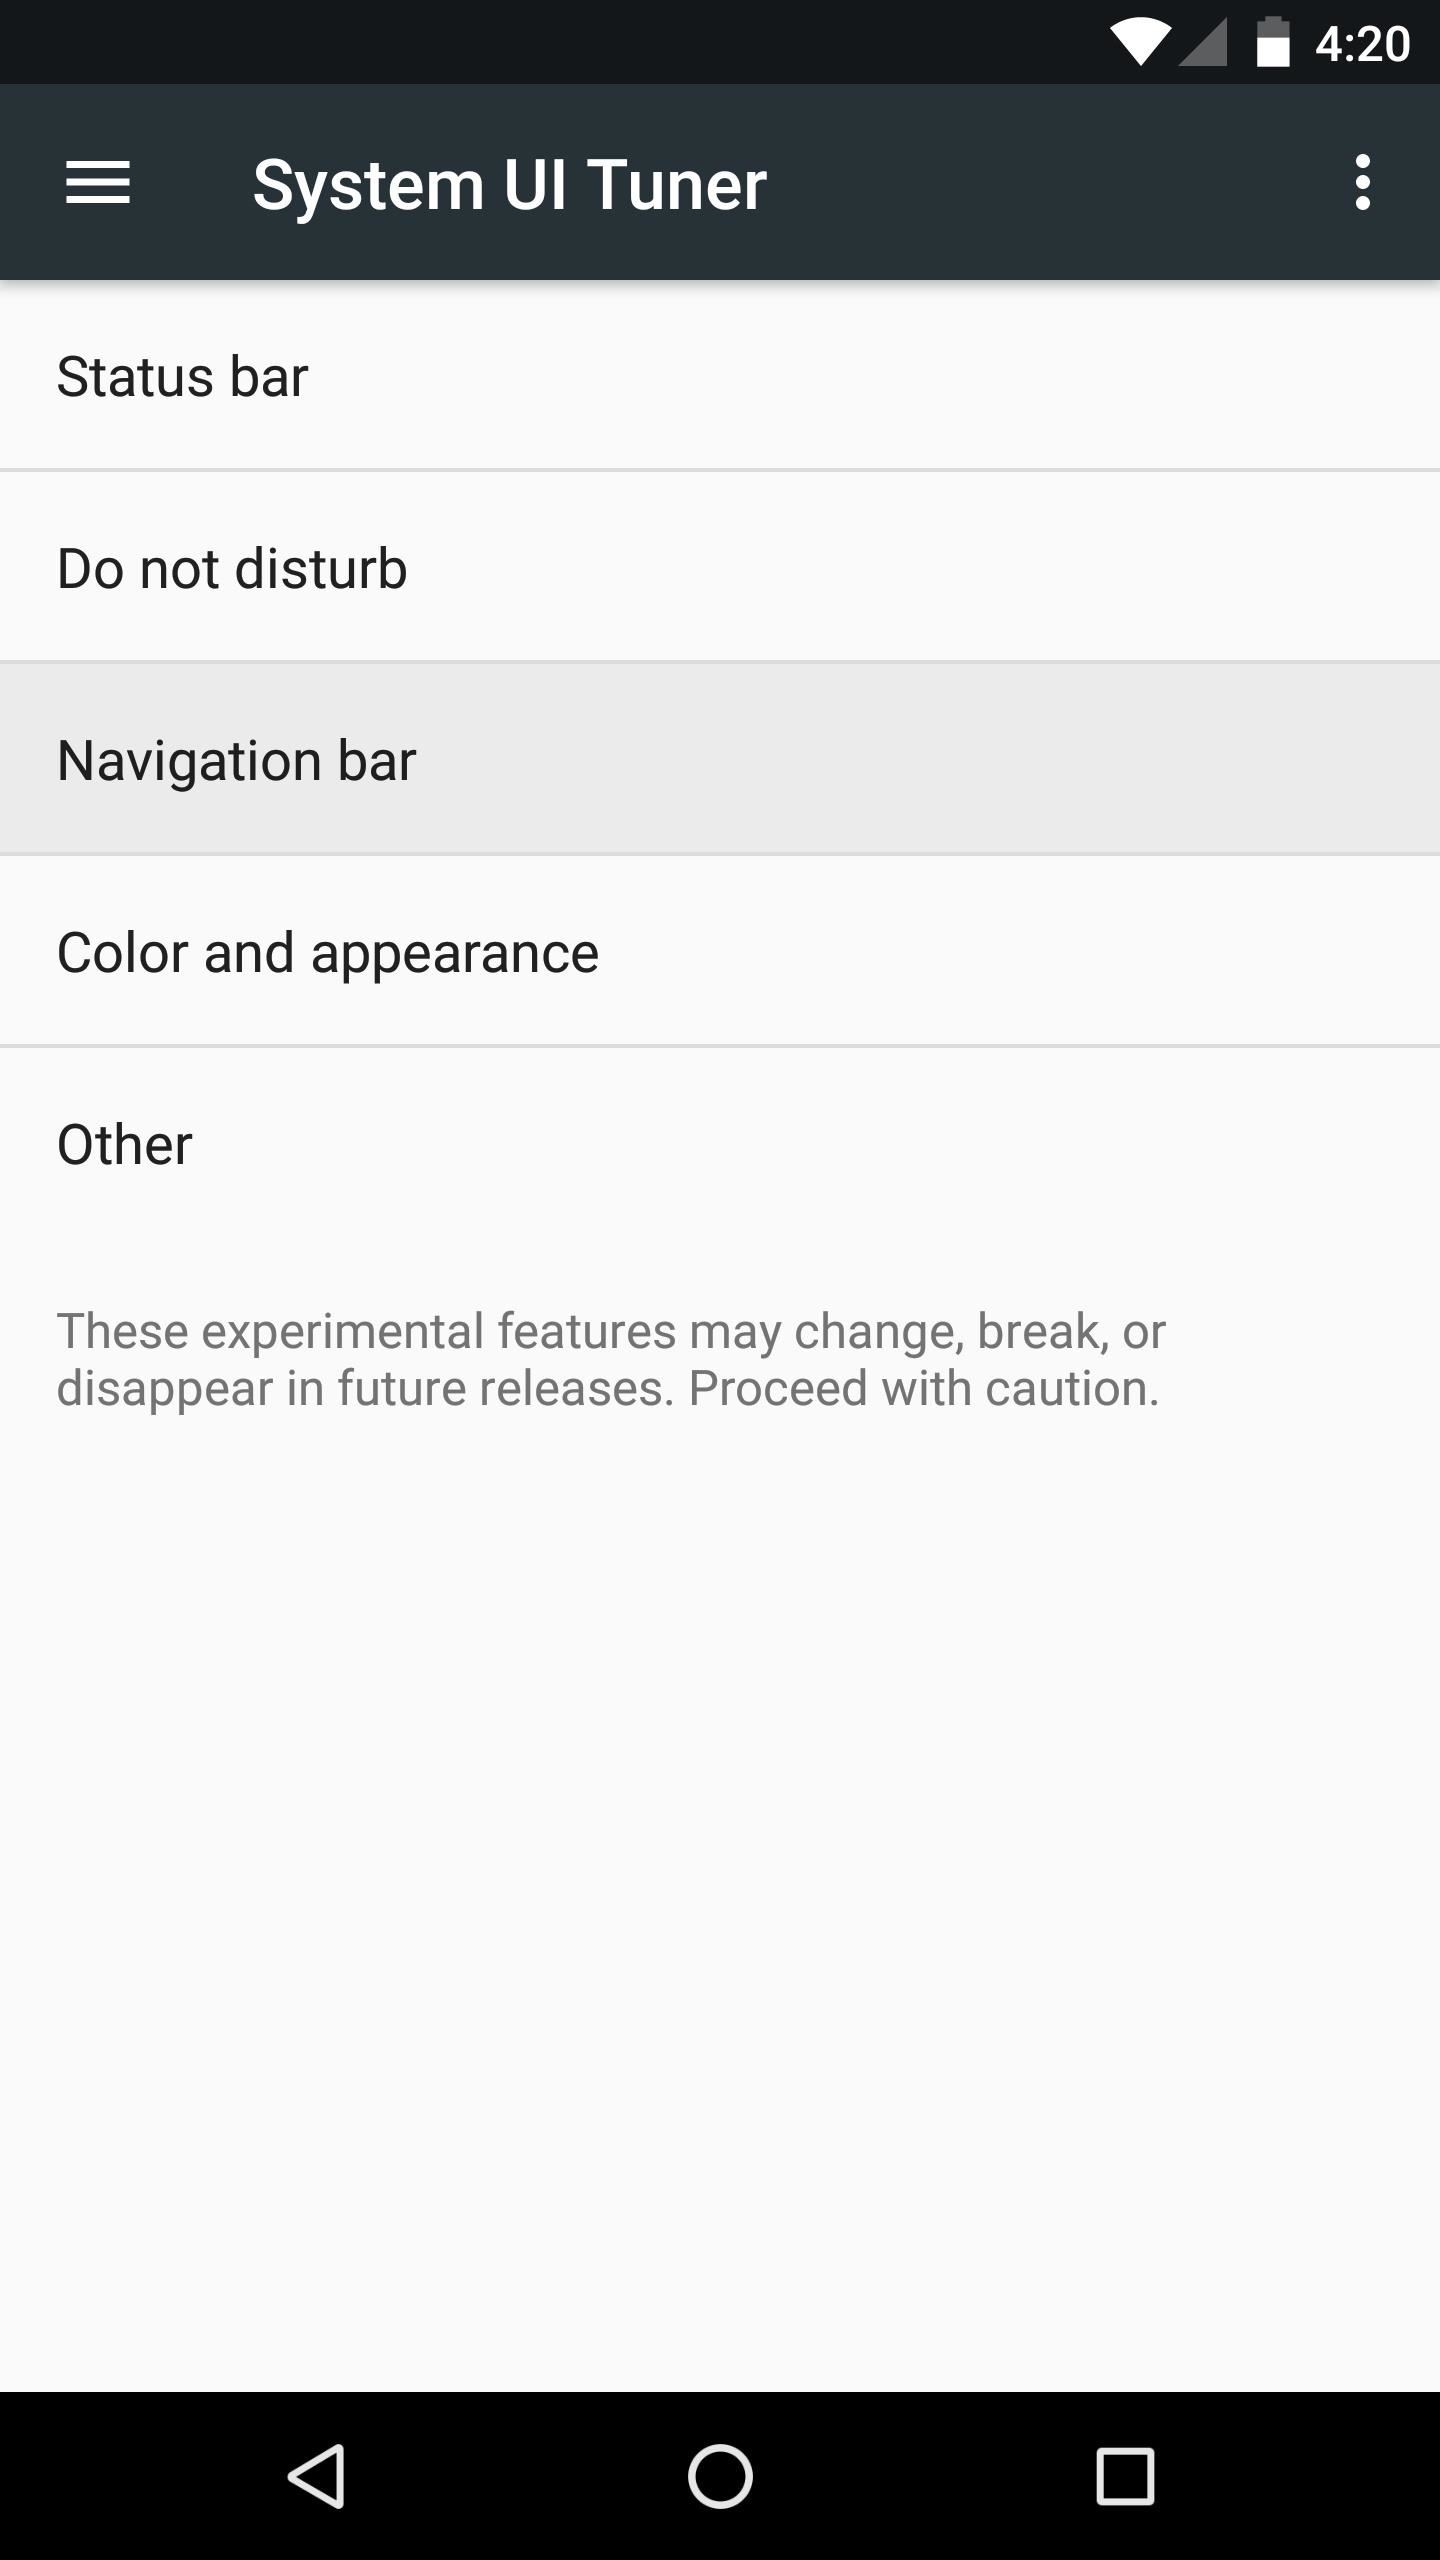
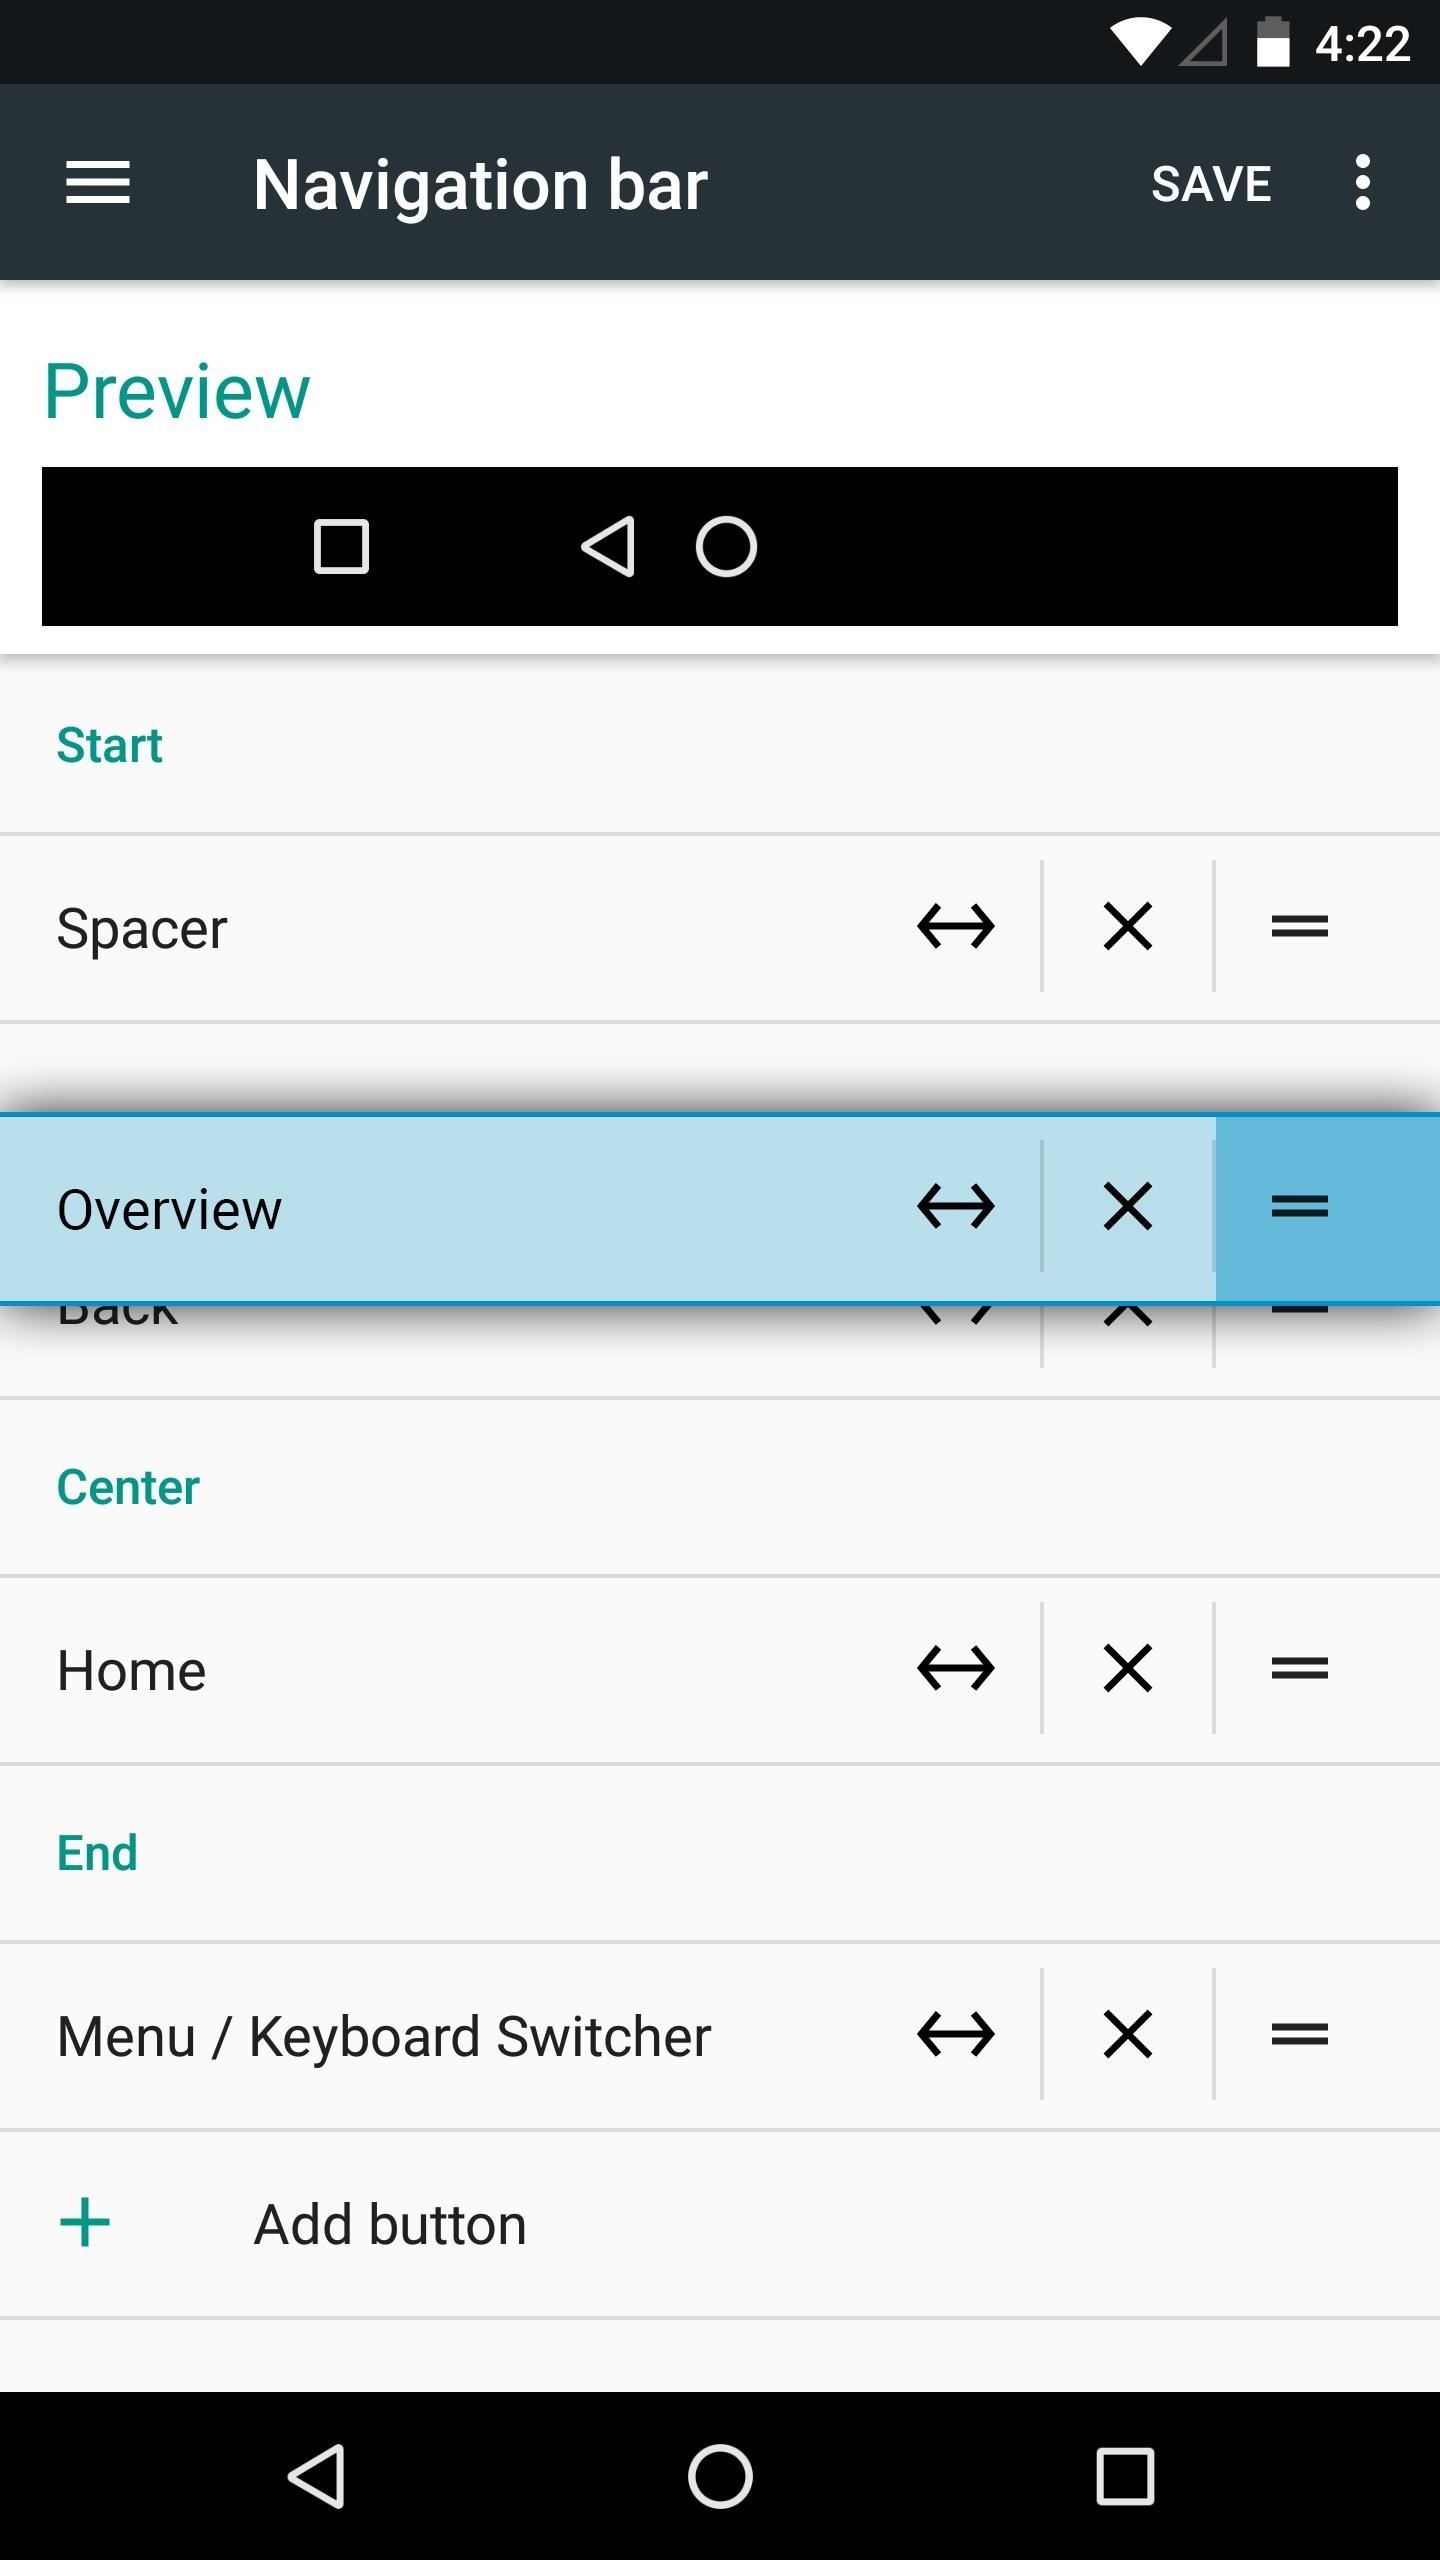
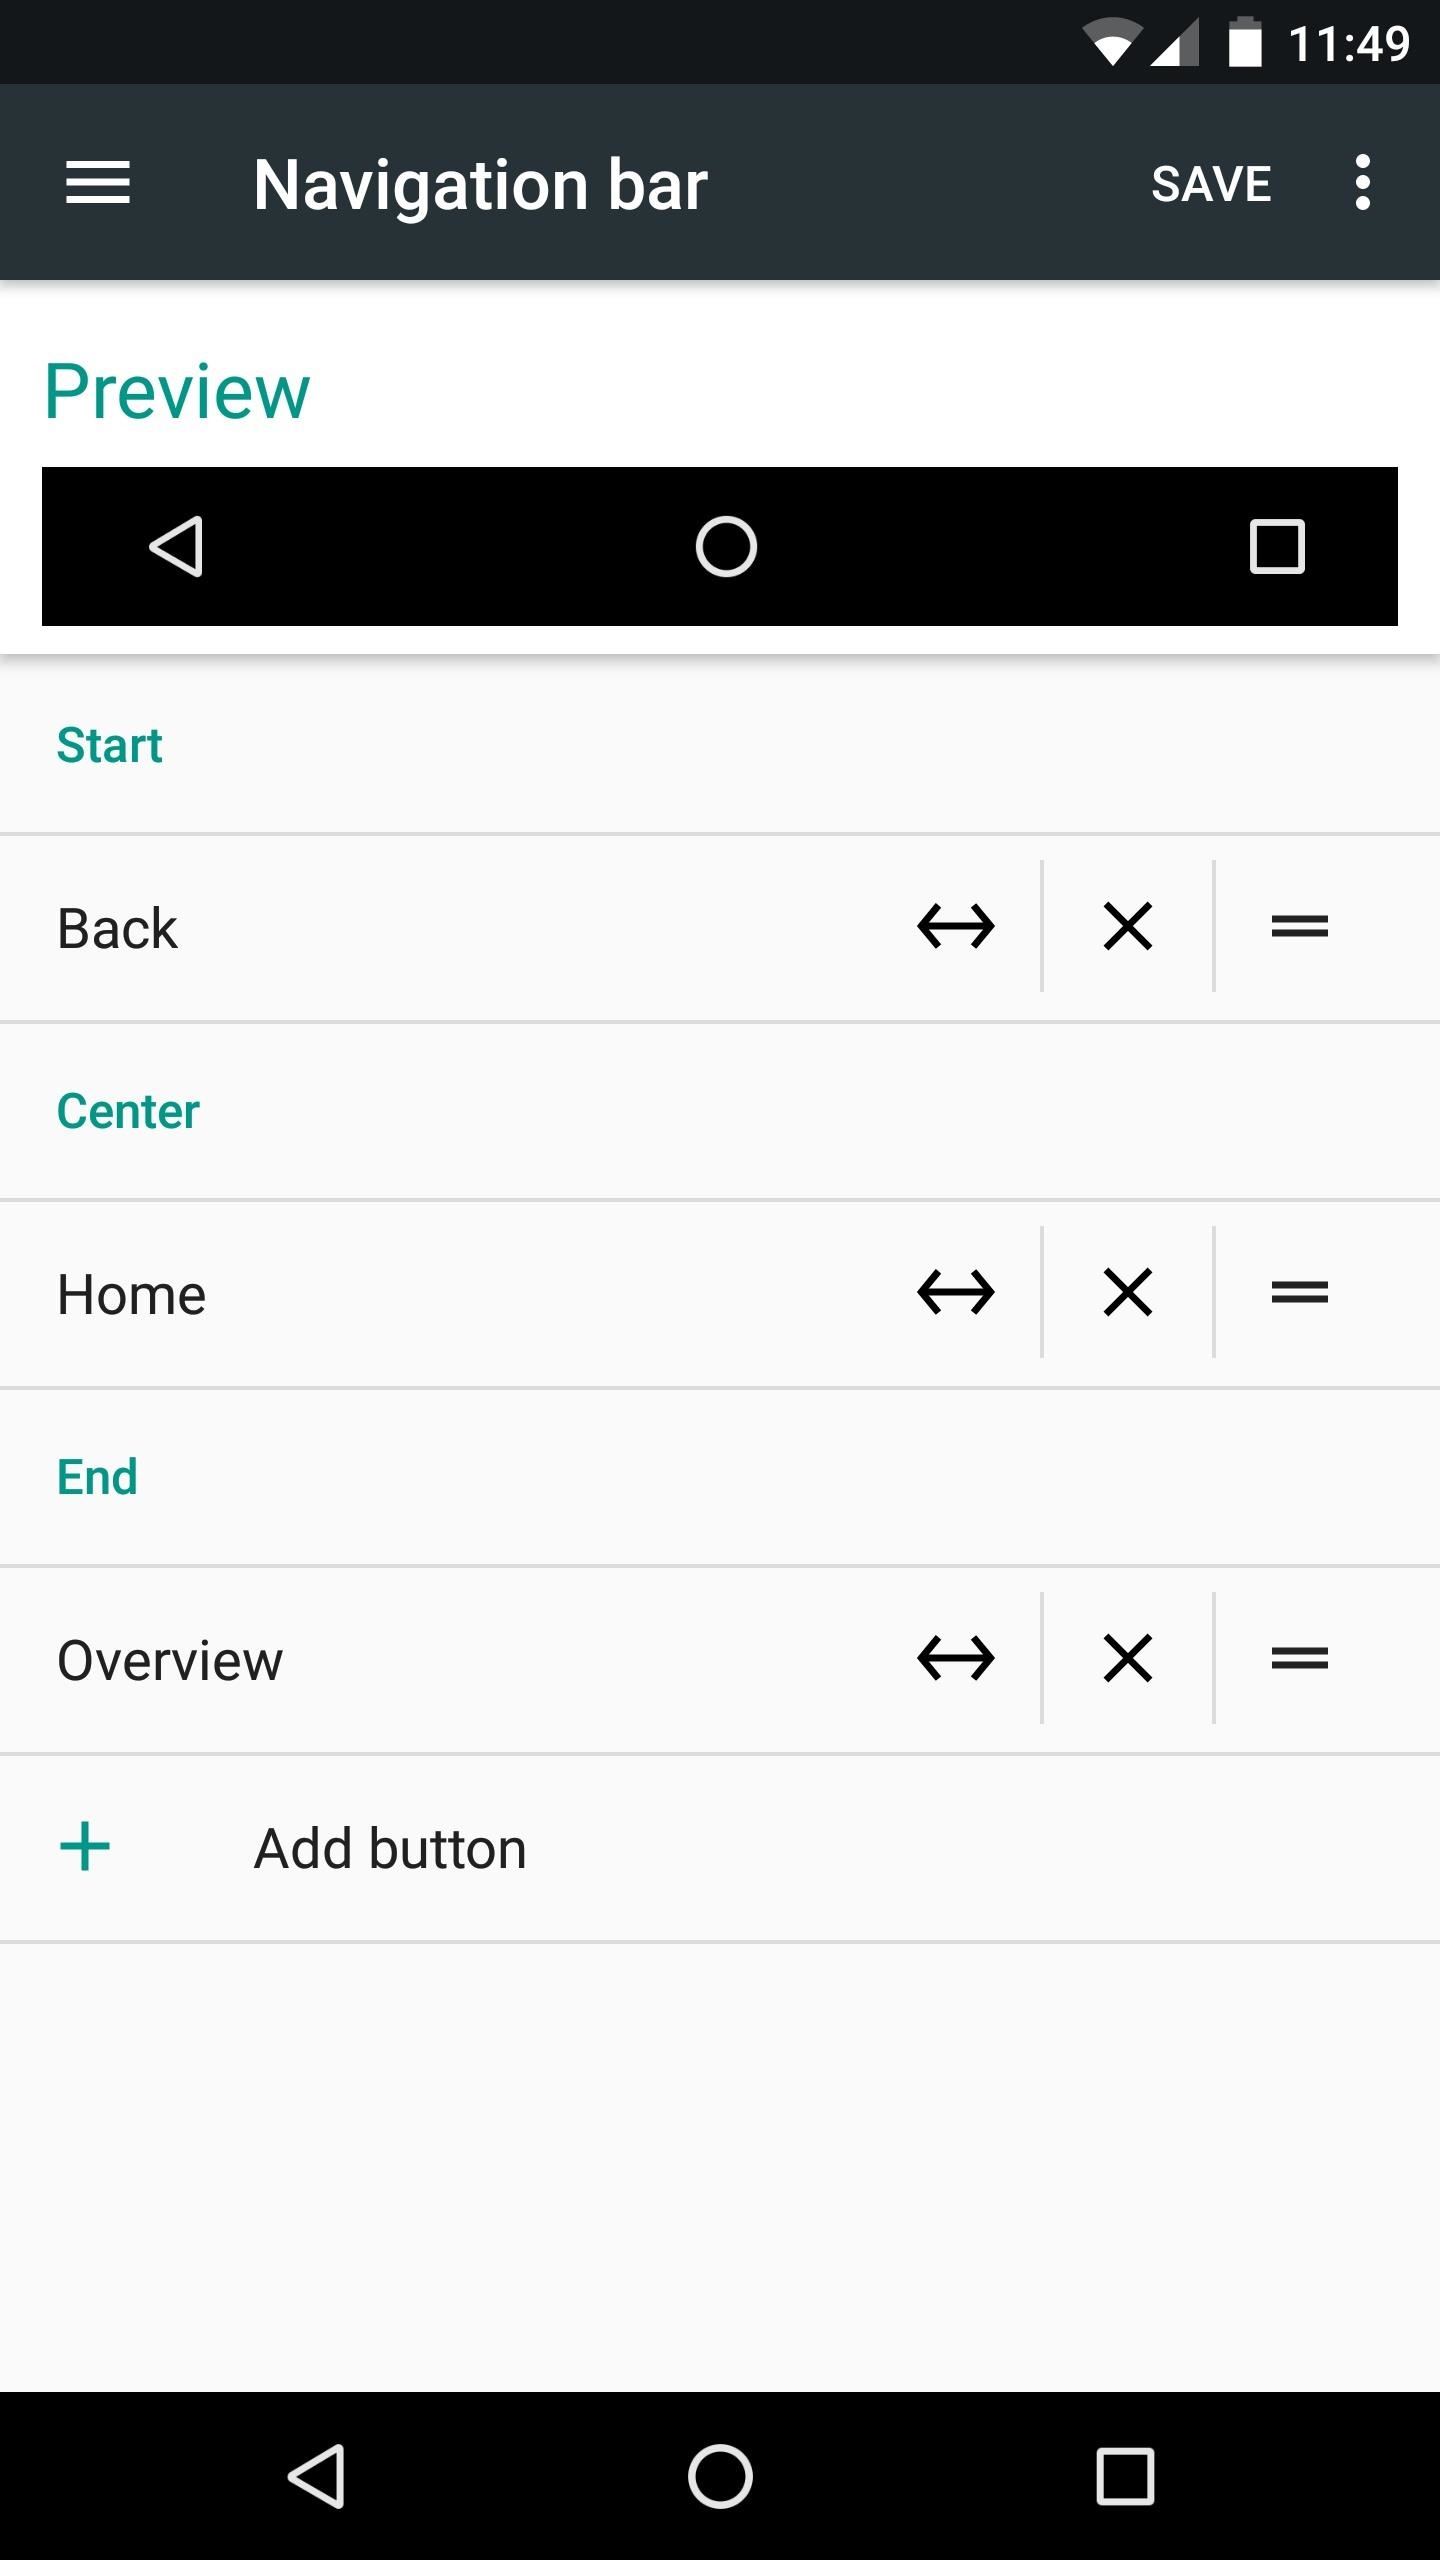
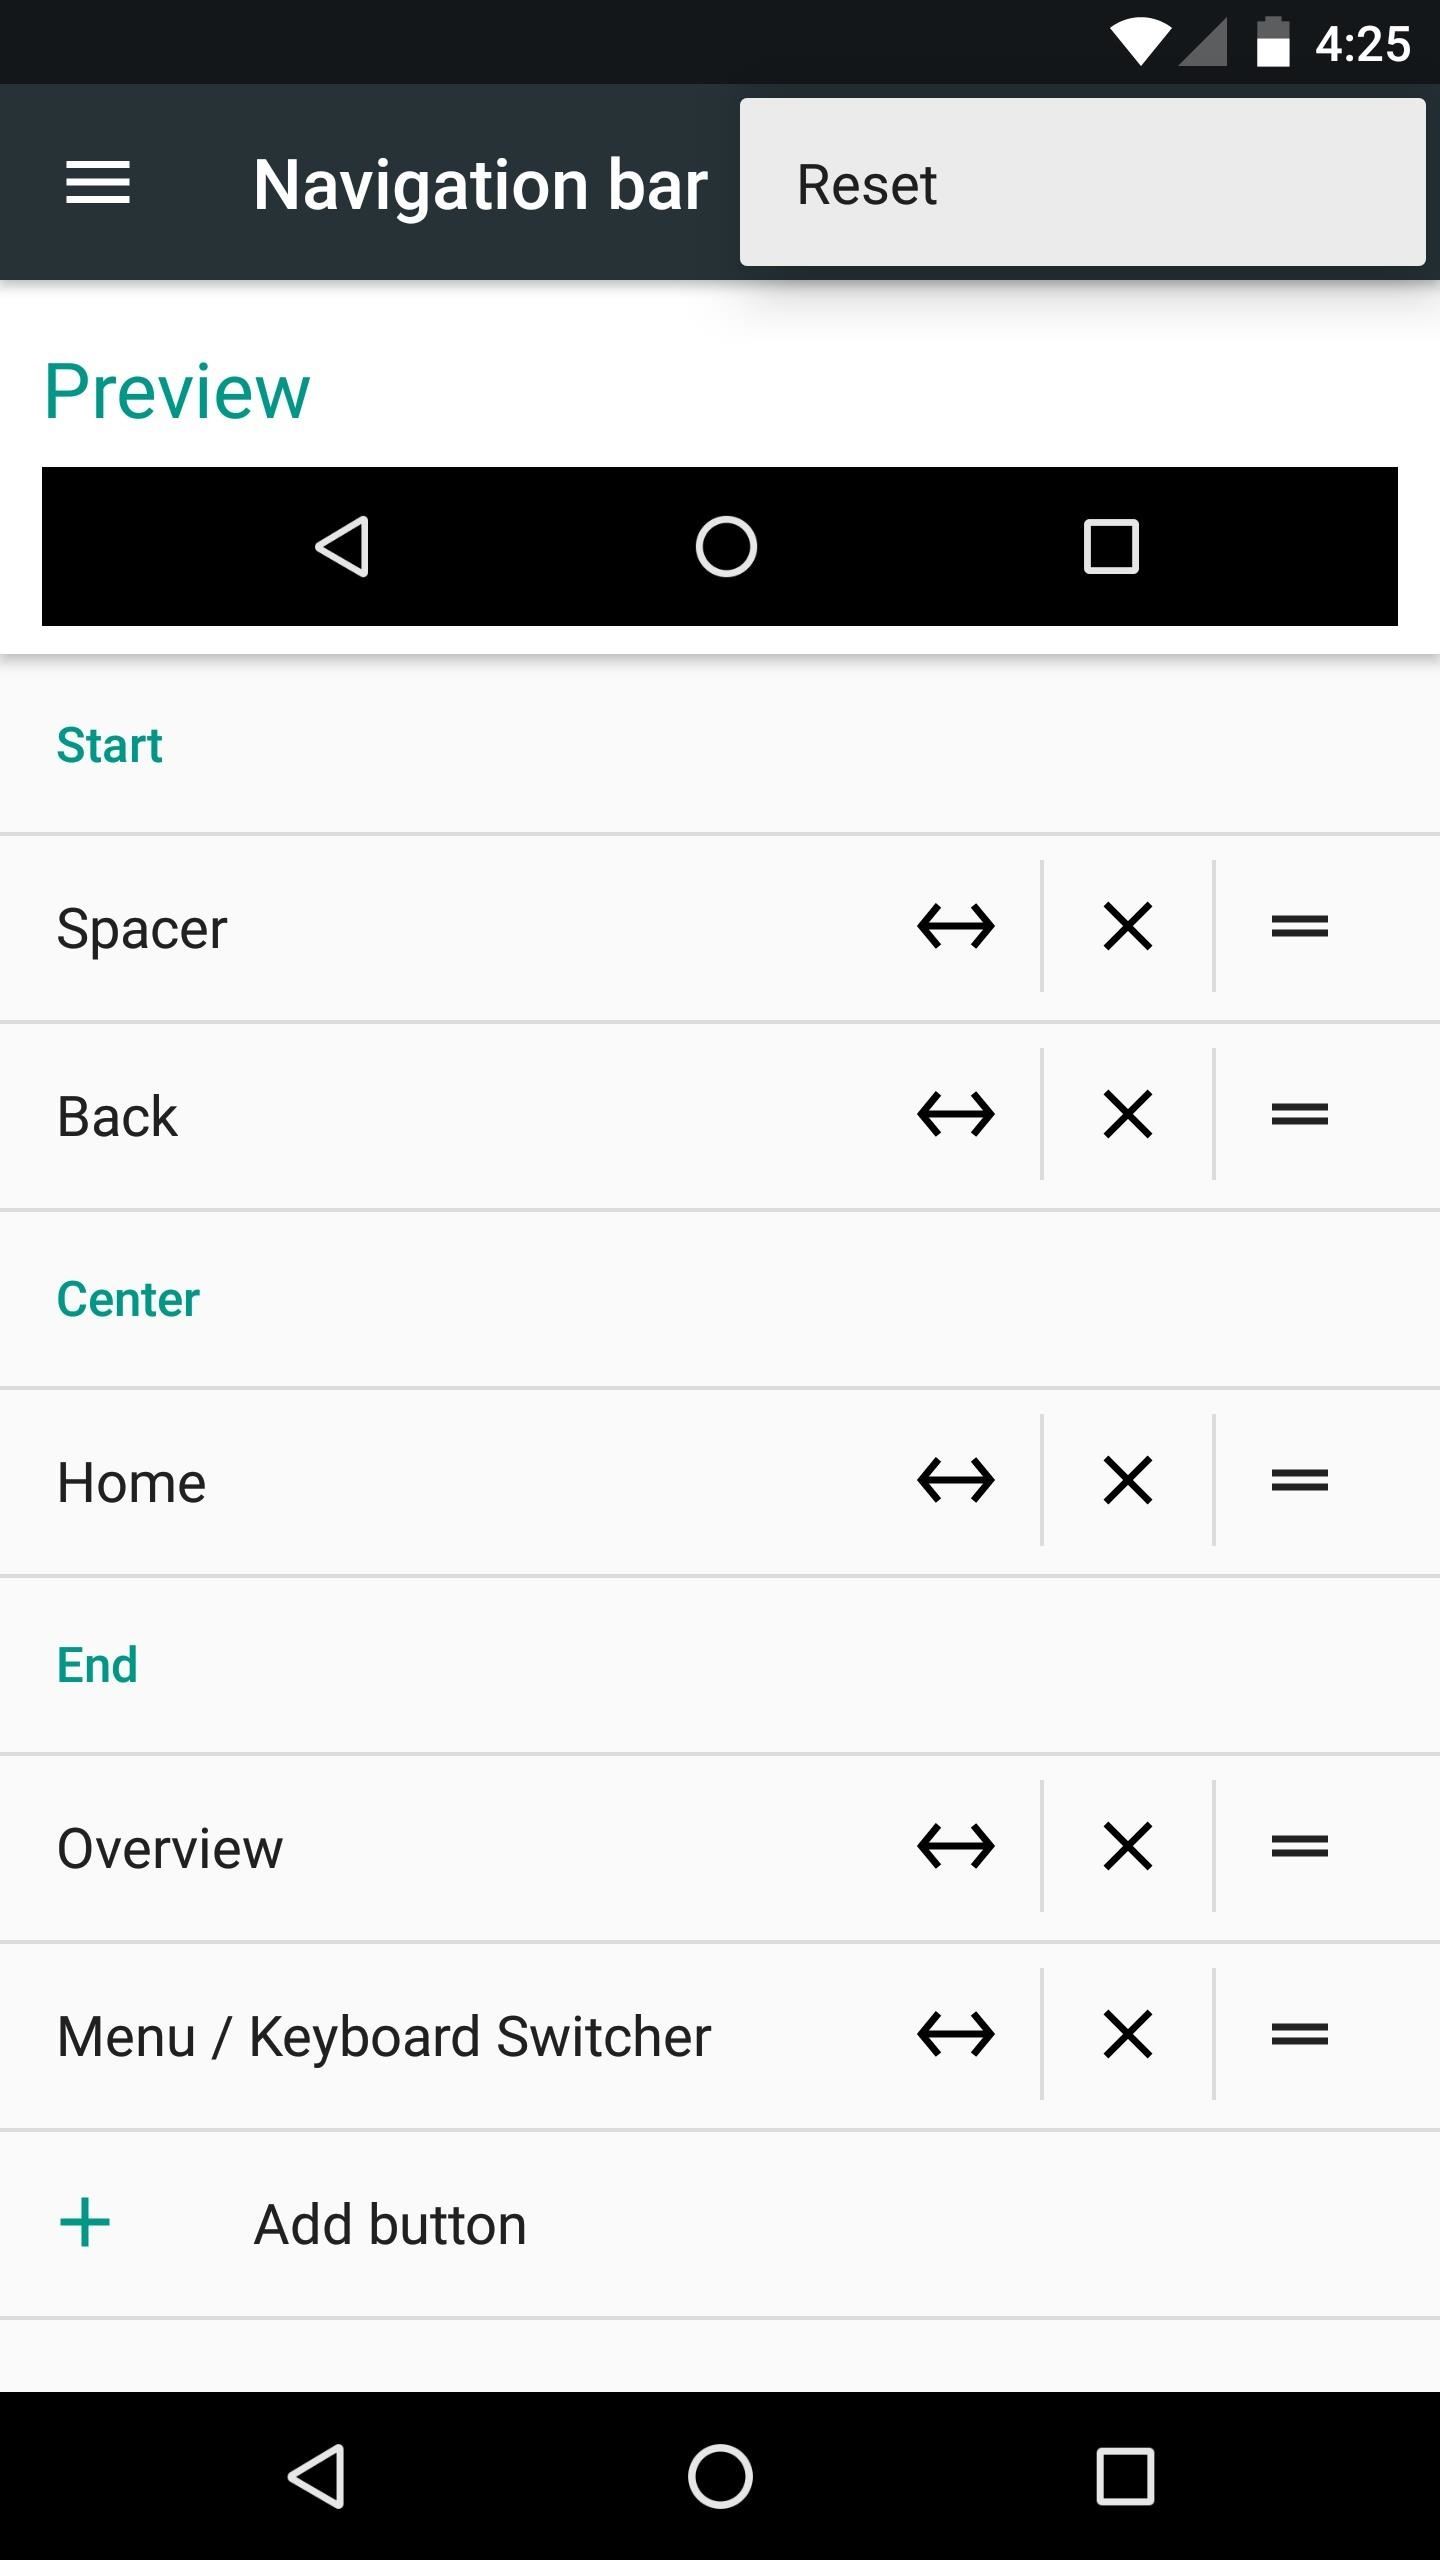
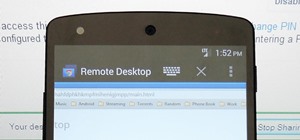
When you get back up, head to the bottom of your Settings menu and select the System UI Tuner entry. From here, you'll notice a new category—go ahead and tap "Navigation bar" to start customizing your navigation buttons.
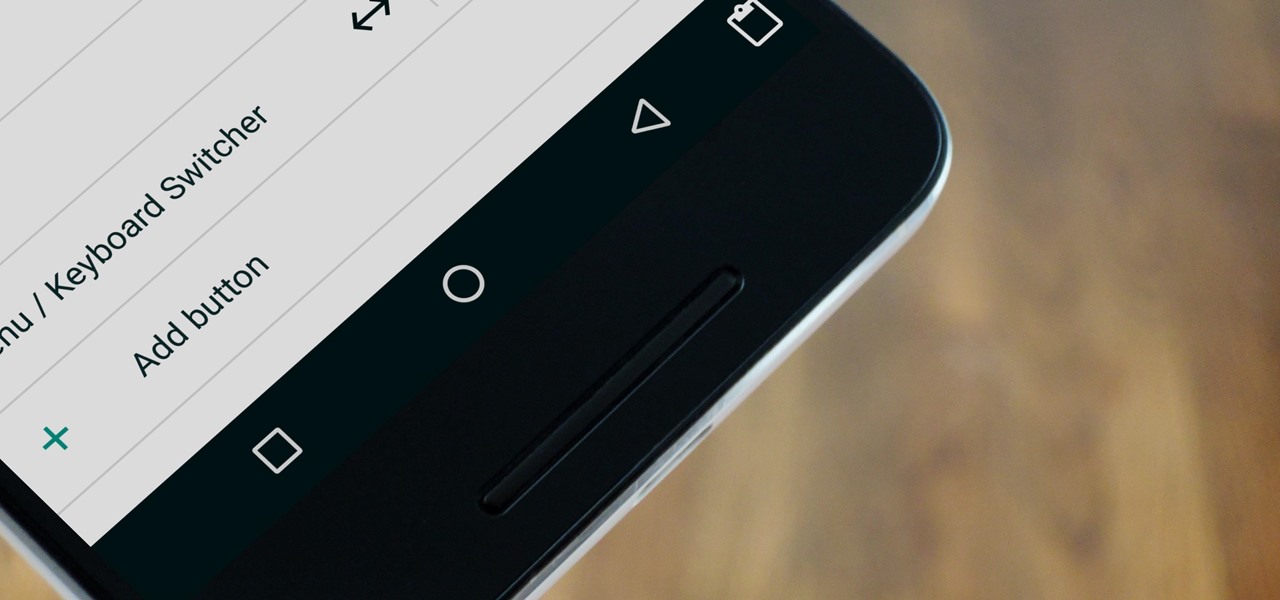
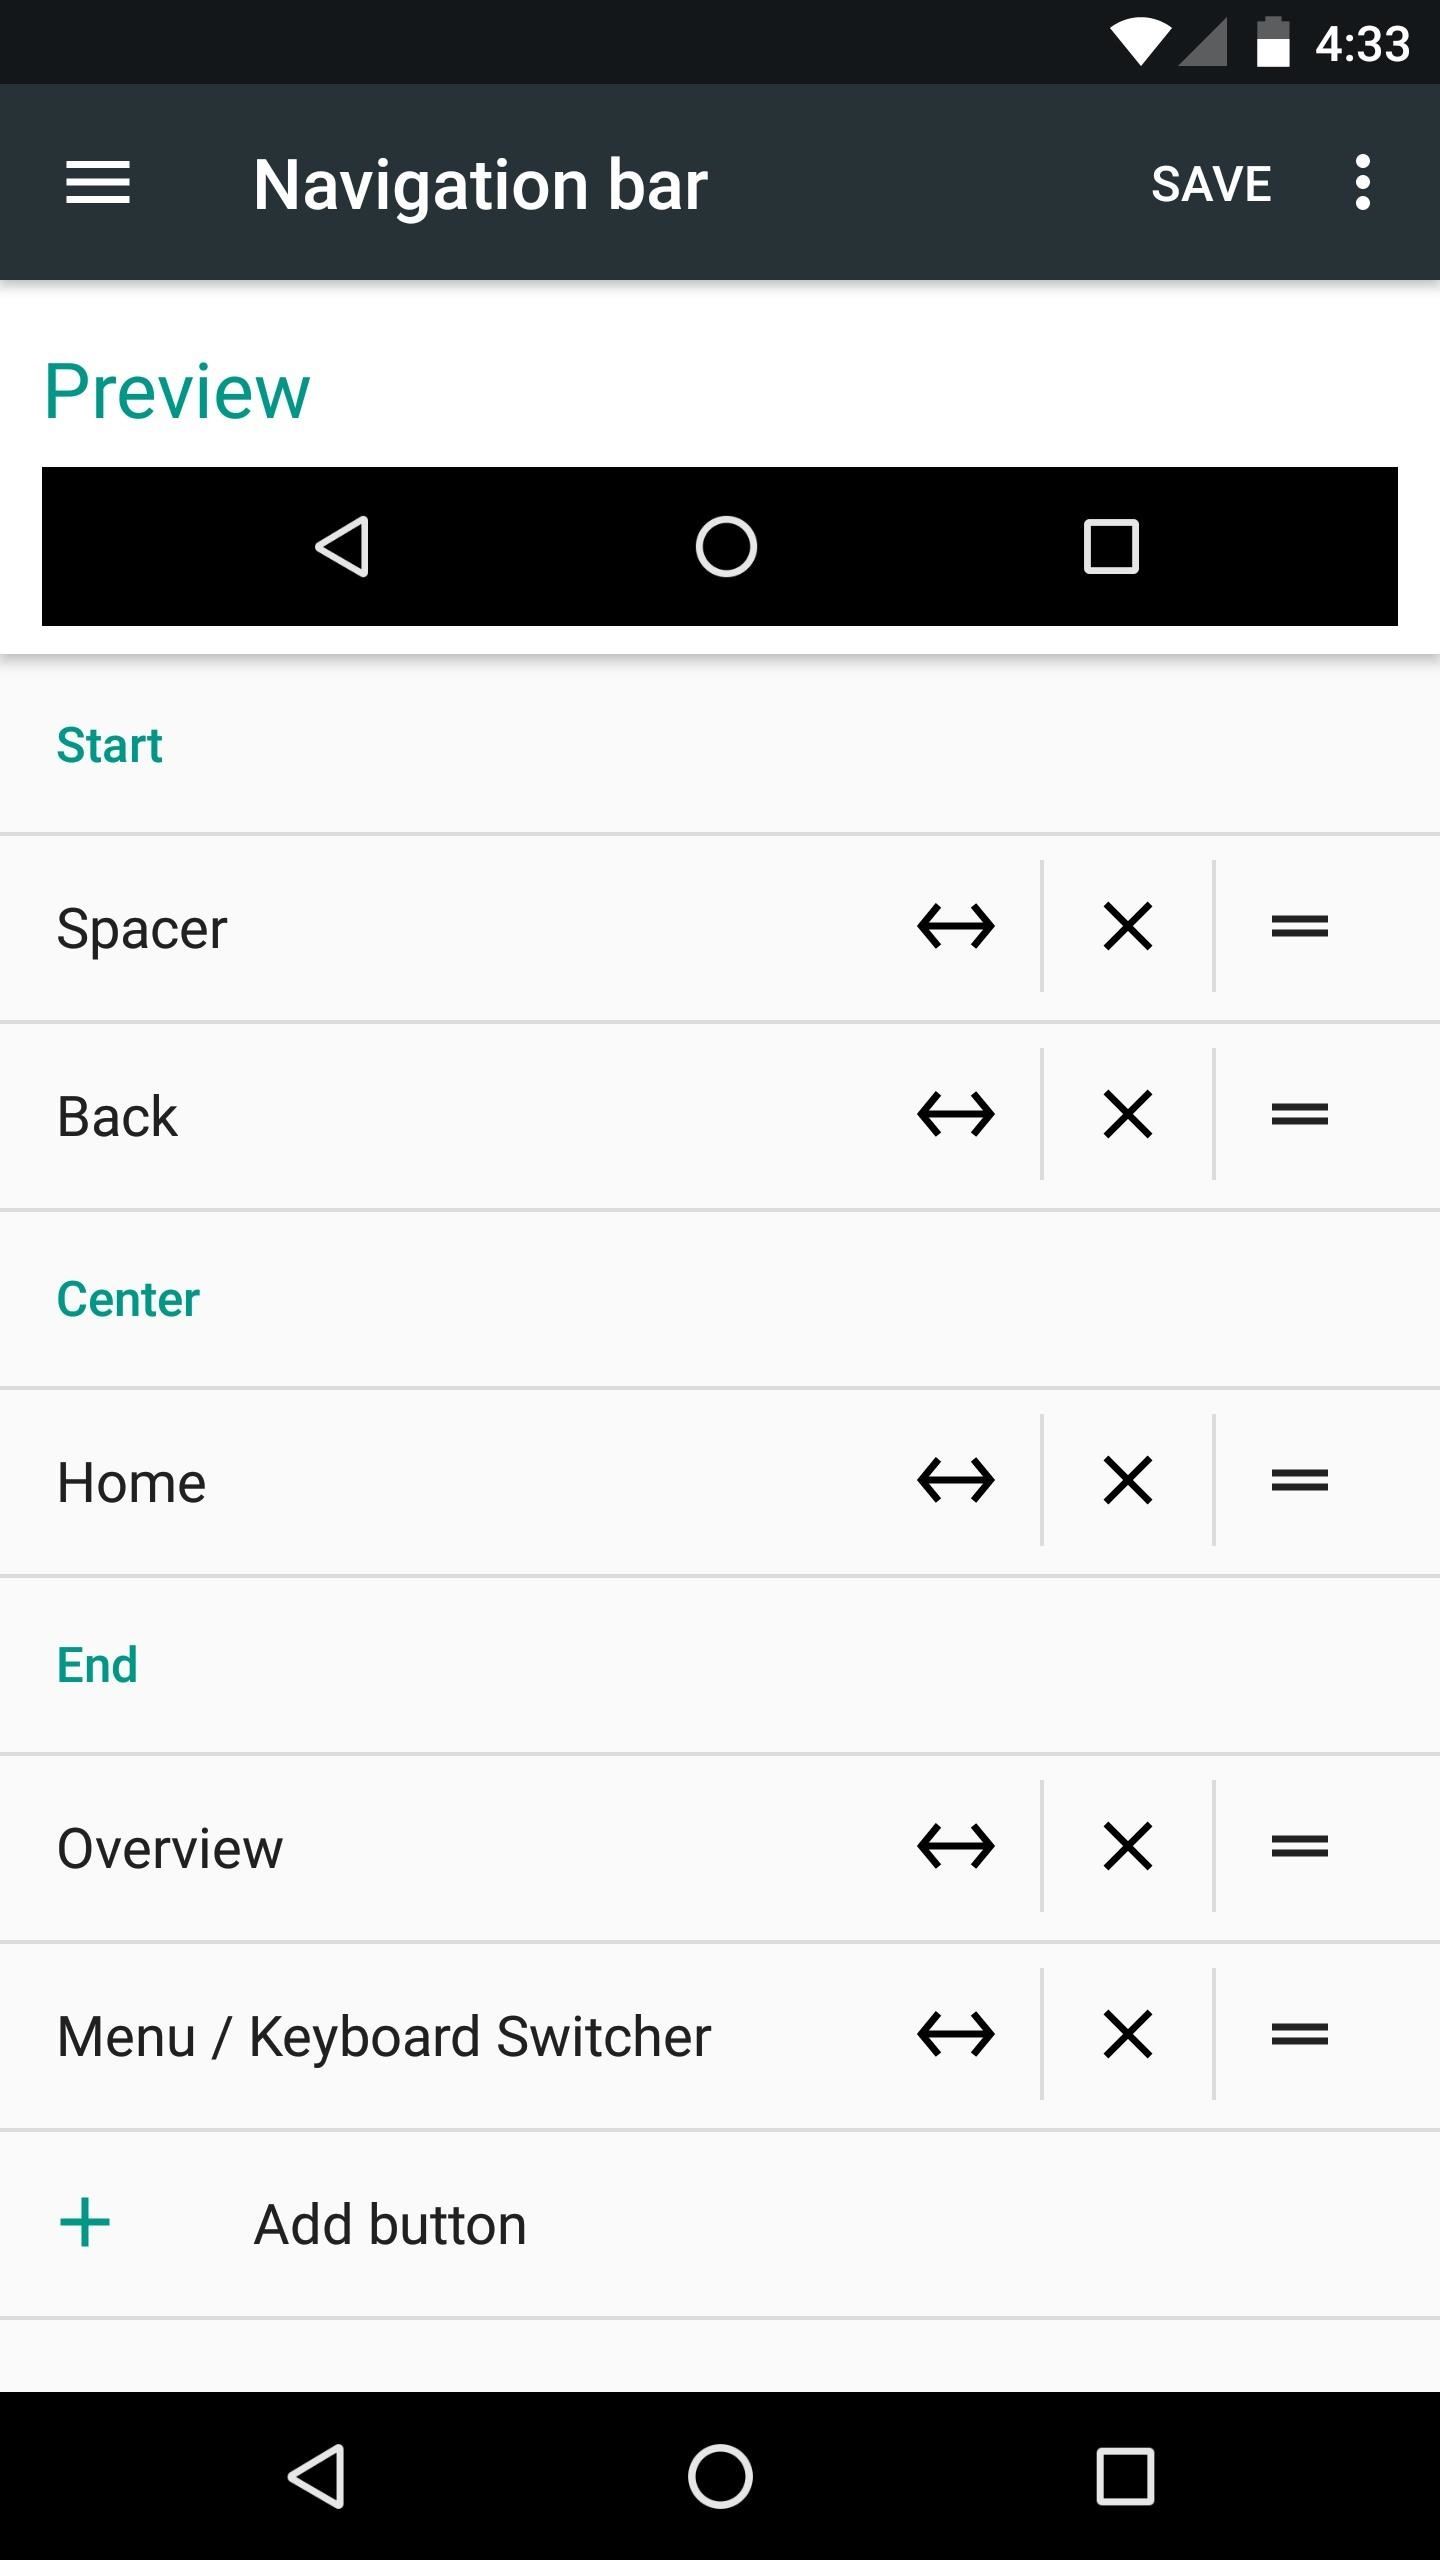
From here, you can tap the double arrow next to an item to resize it, or tap the "X" to completely remove a button. Then you can use the drag handle to the far right of any entry to reorder the buttons—simply drag an item to the top of the list to move it to the lefthand side, or to the bottom to move it over to the right.
This makes it easy to switch back and menu buttons, but there's a lot more you can do here, too.
Once you've played with the existing buttons, you can add new ones by tapping the "Add Button" option at the bottom of the screen. At this point, you'll see a list of available buttons, and when you select one, it will automatically be added (in most cases), and you can reorder or resize it like the rest of them.
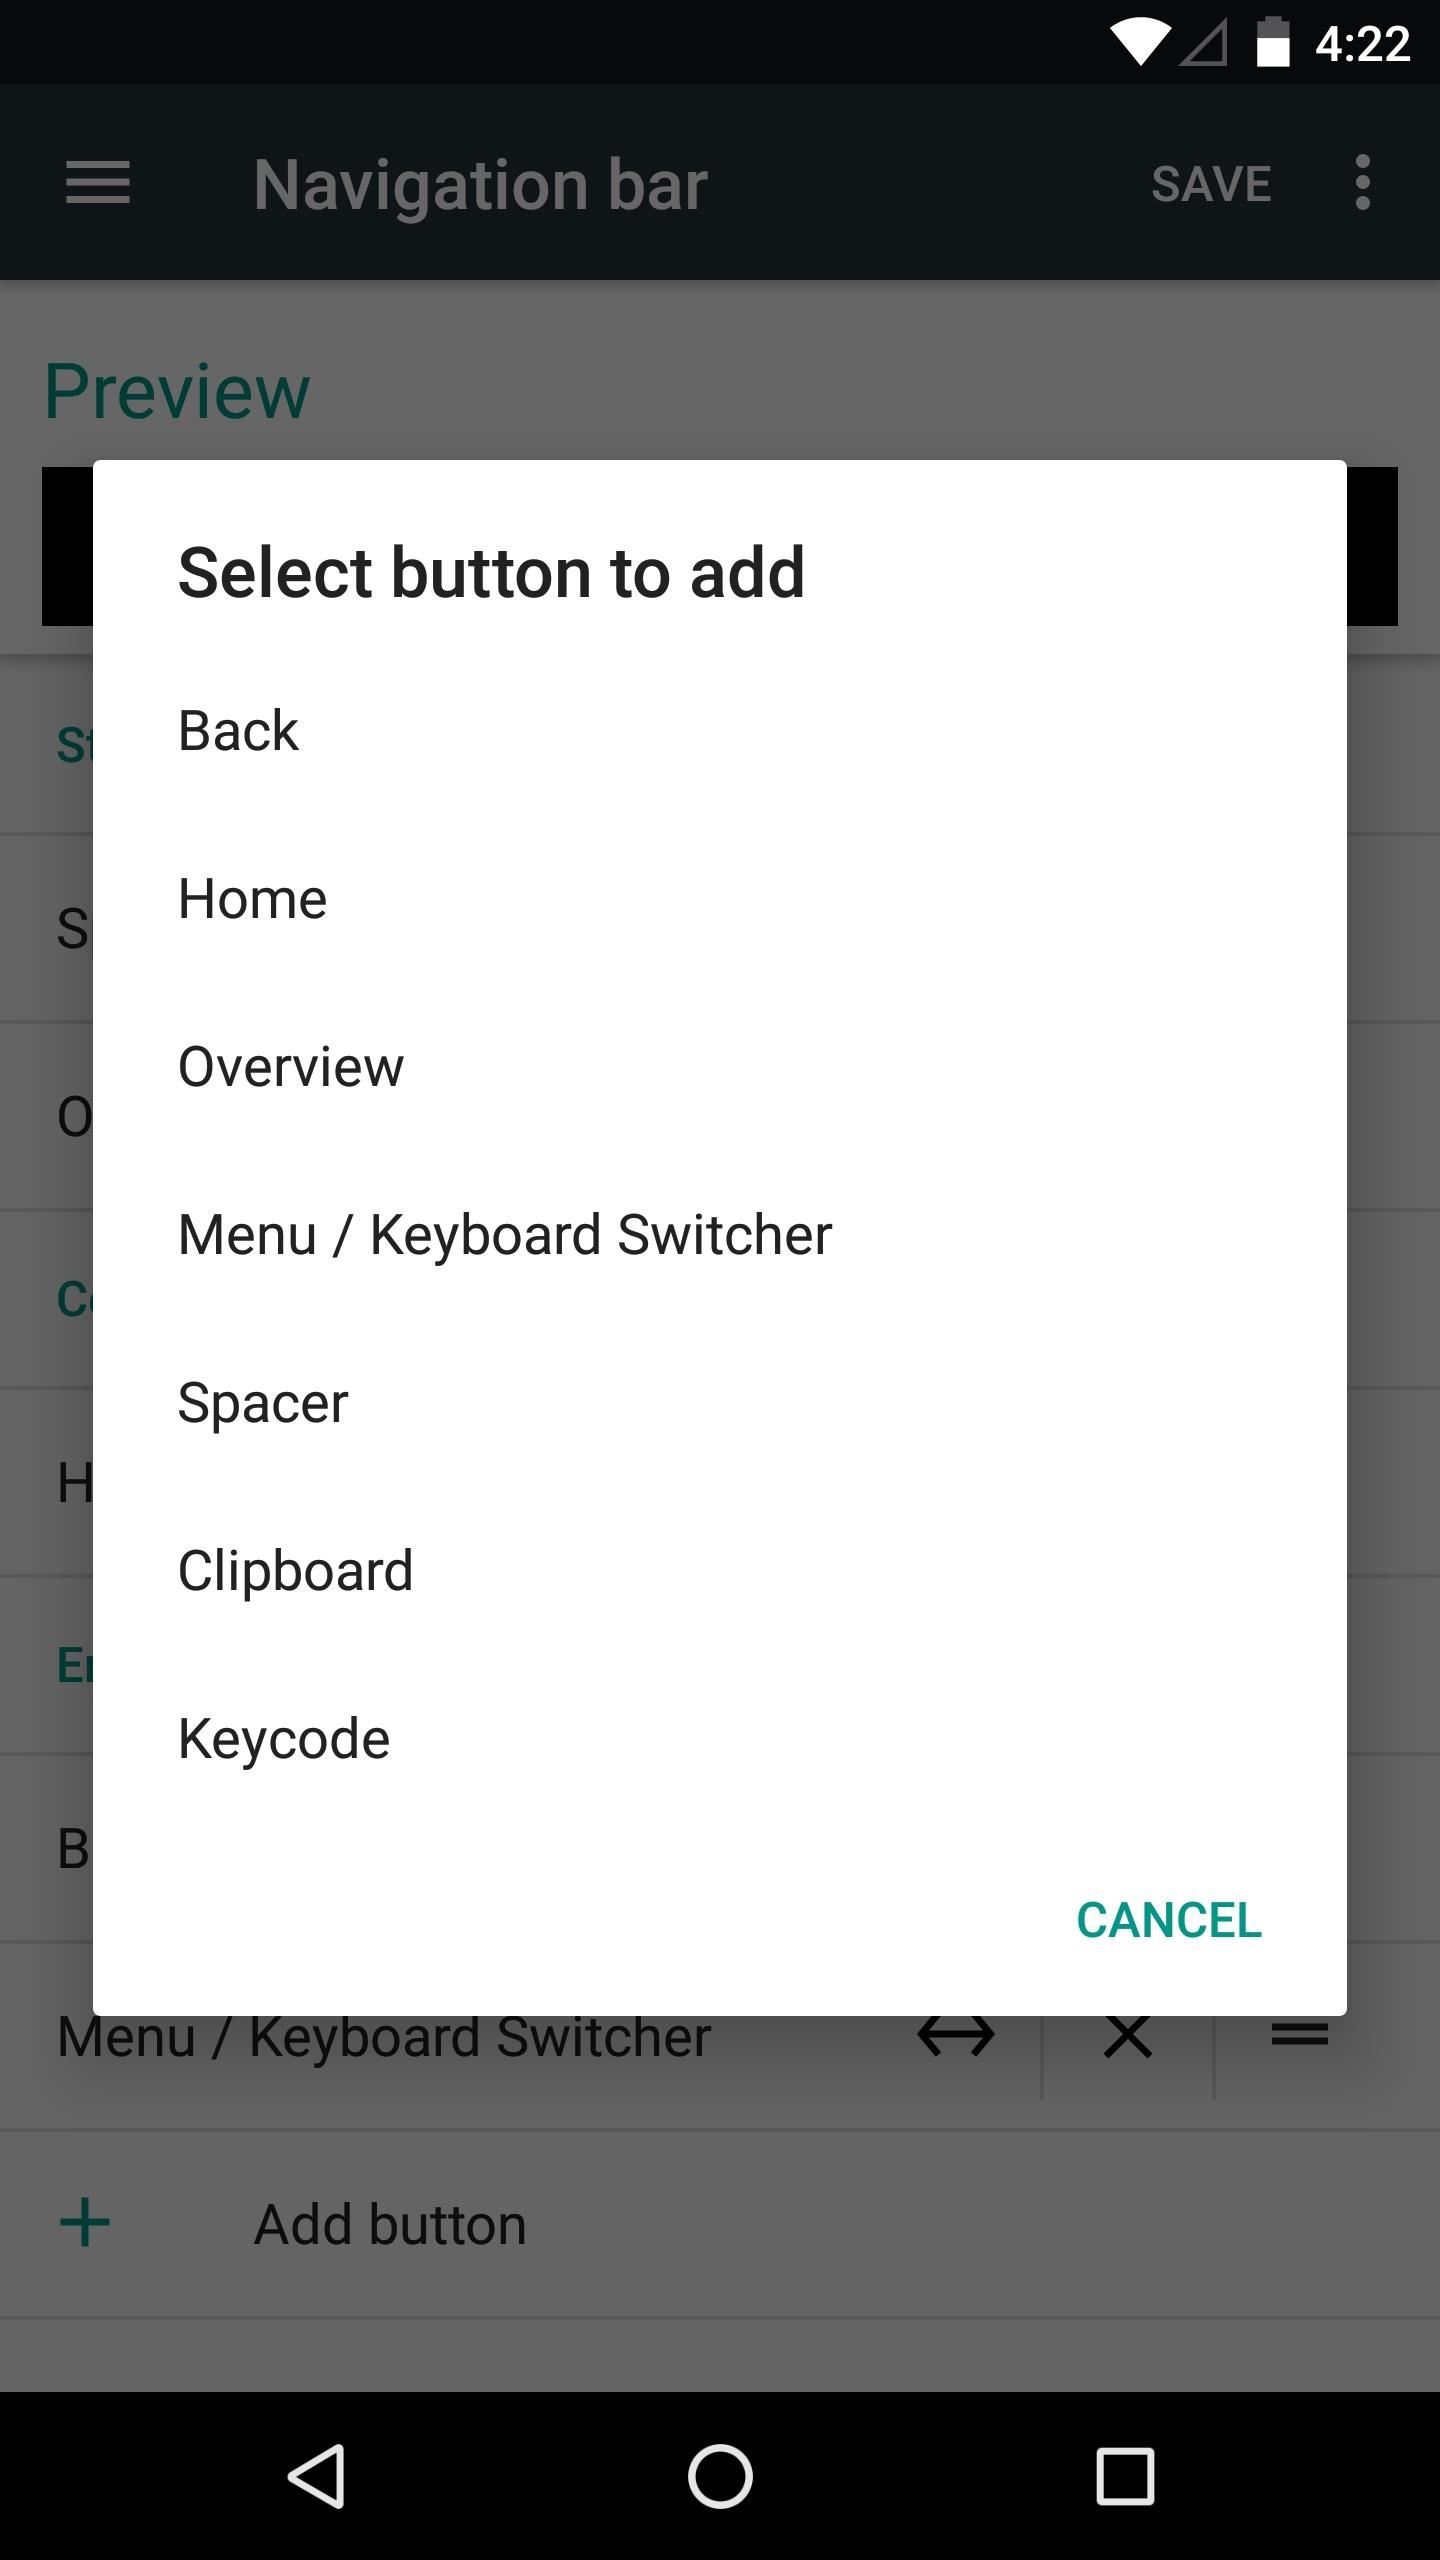
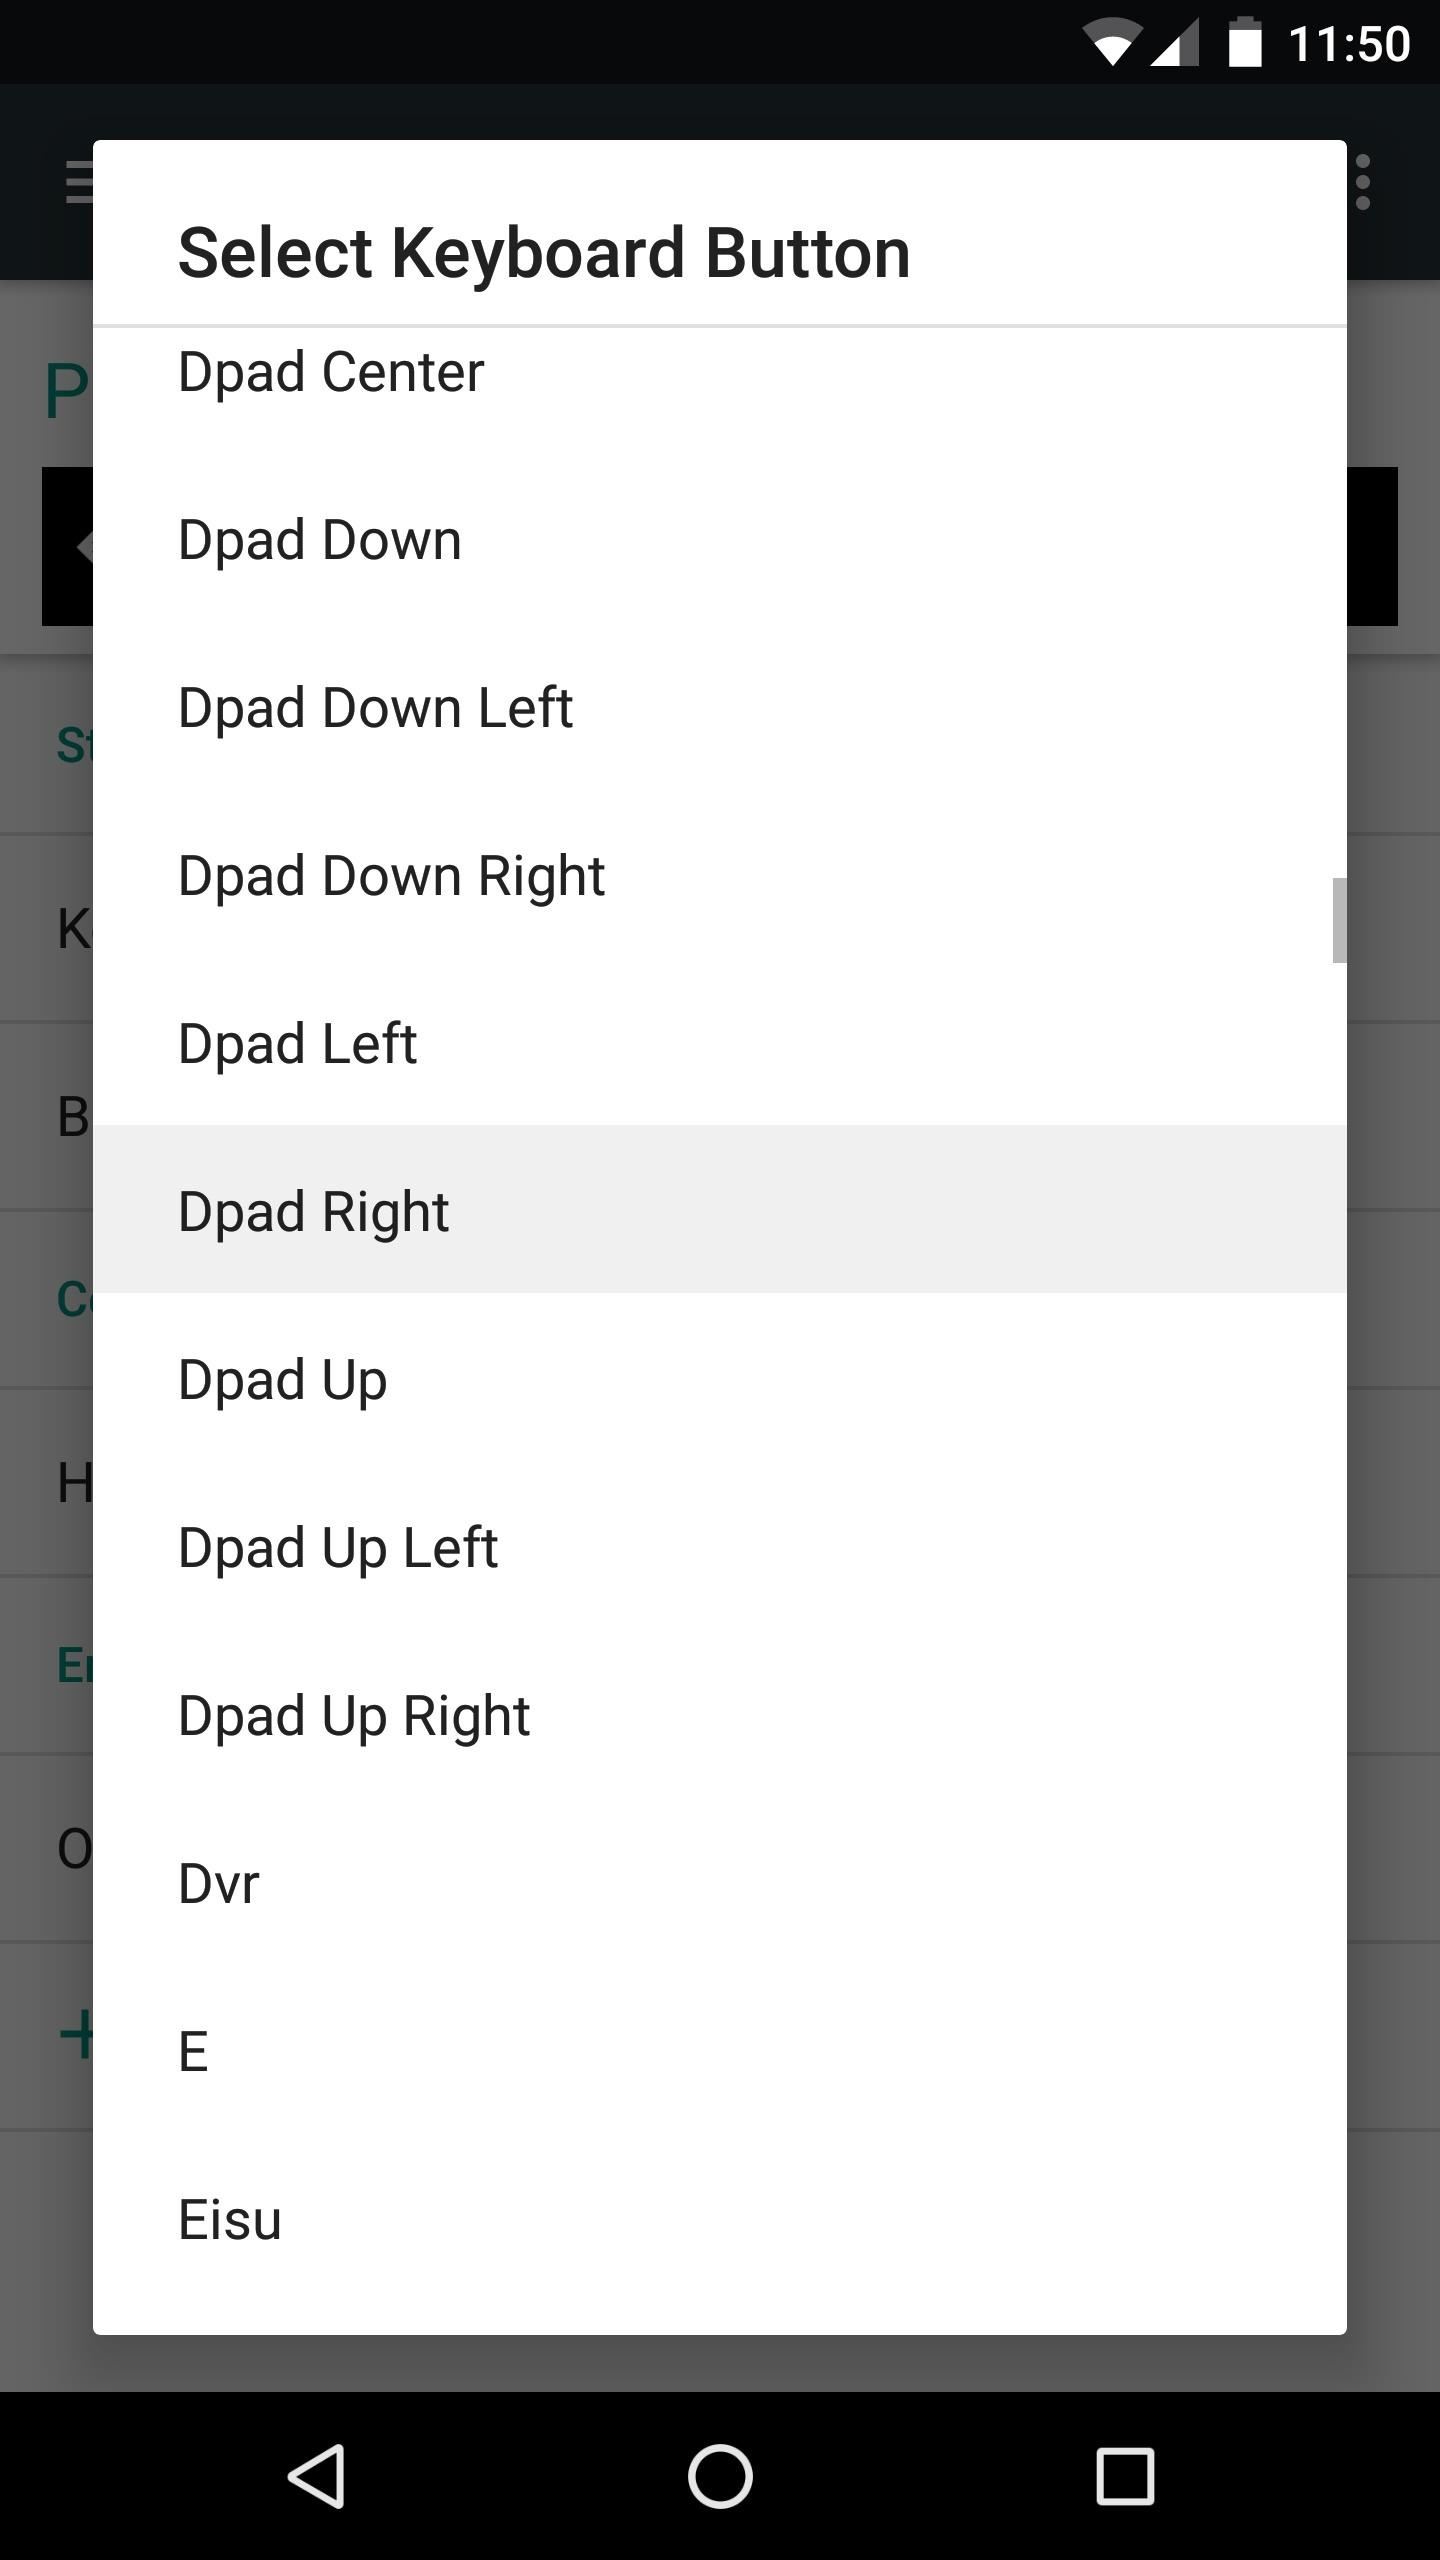
The "Keycode" button can simulate any button on a keyboard, which is useful if you'd like to add arrow keys for moving your cursor, or media control buttons like play, pause, and skip. However, when you select this one, you'll see a different menu.
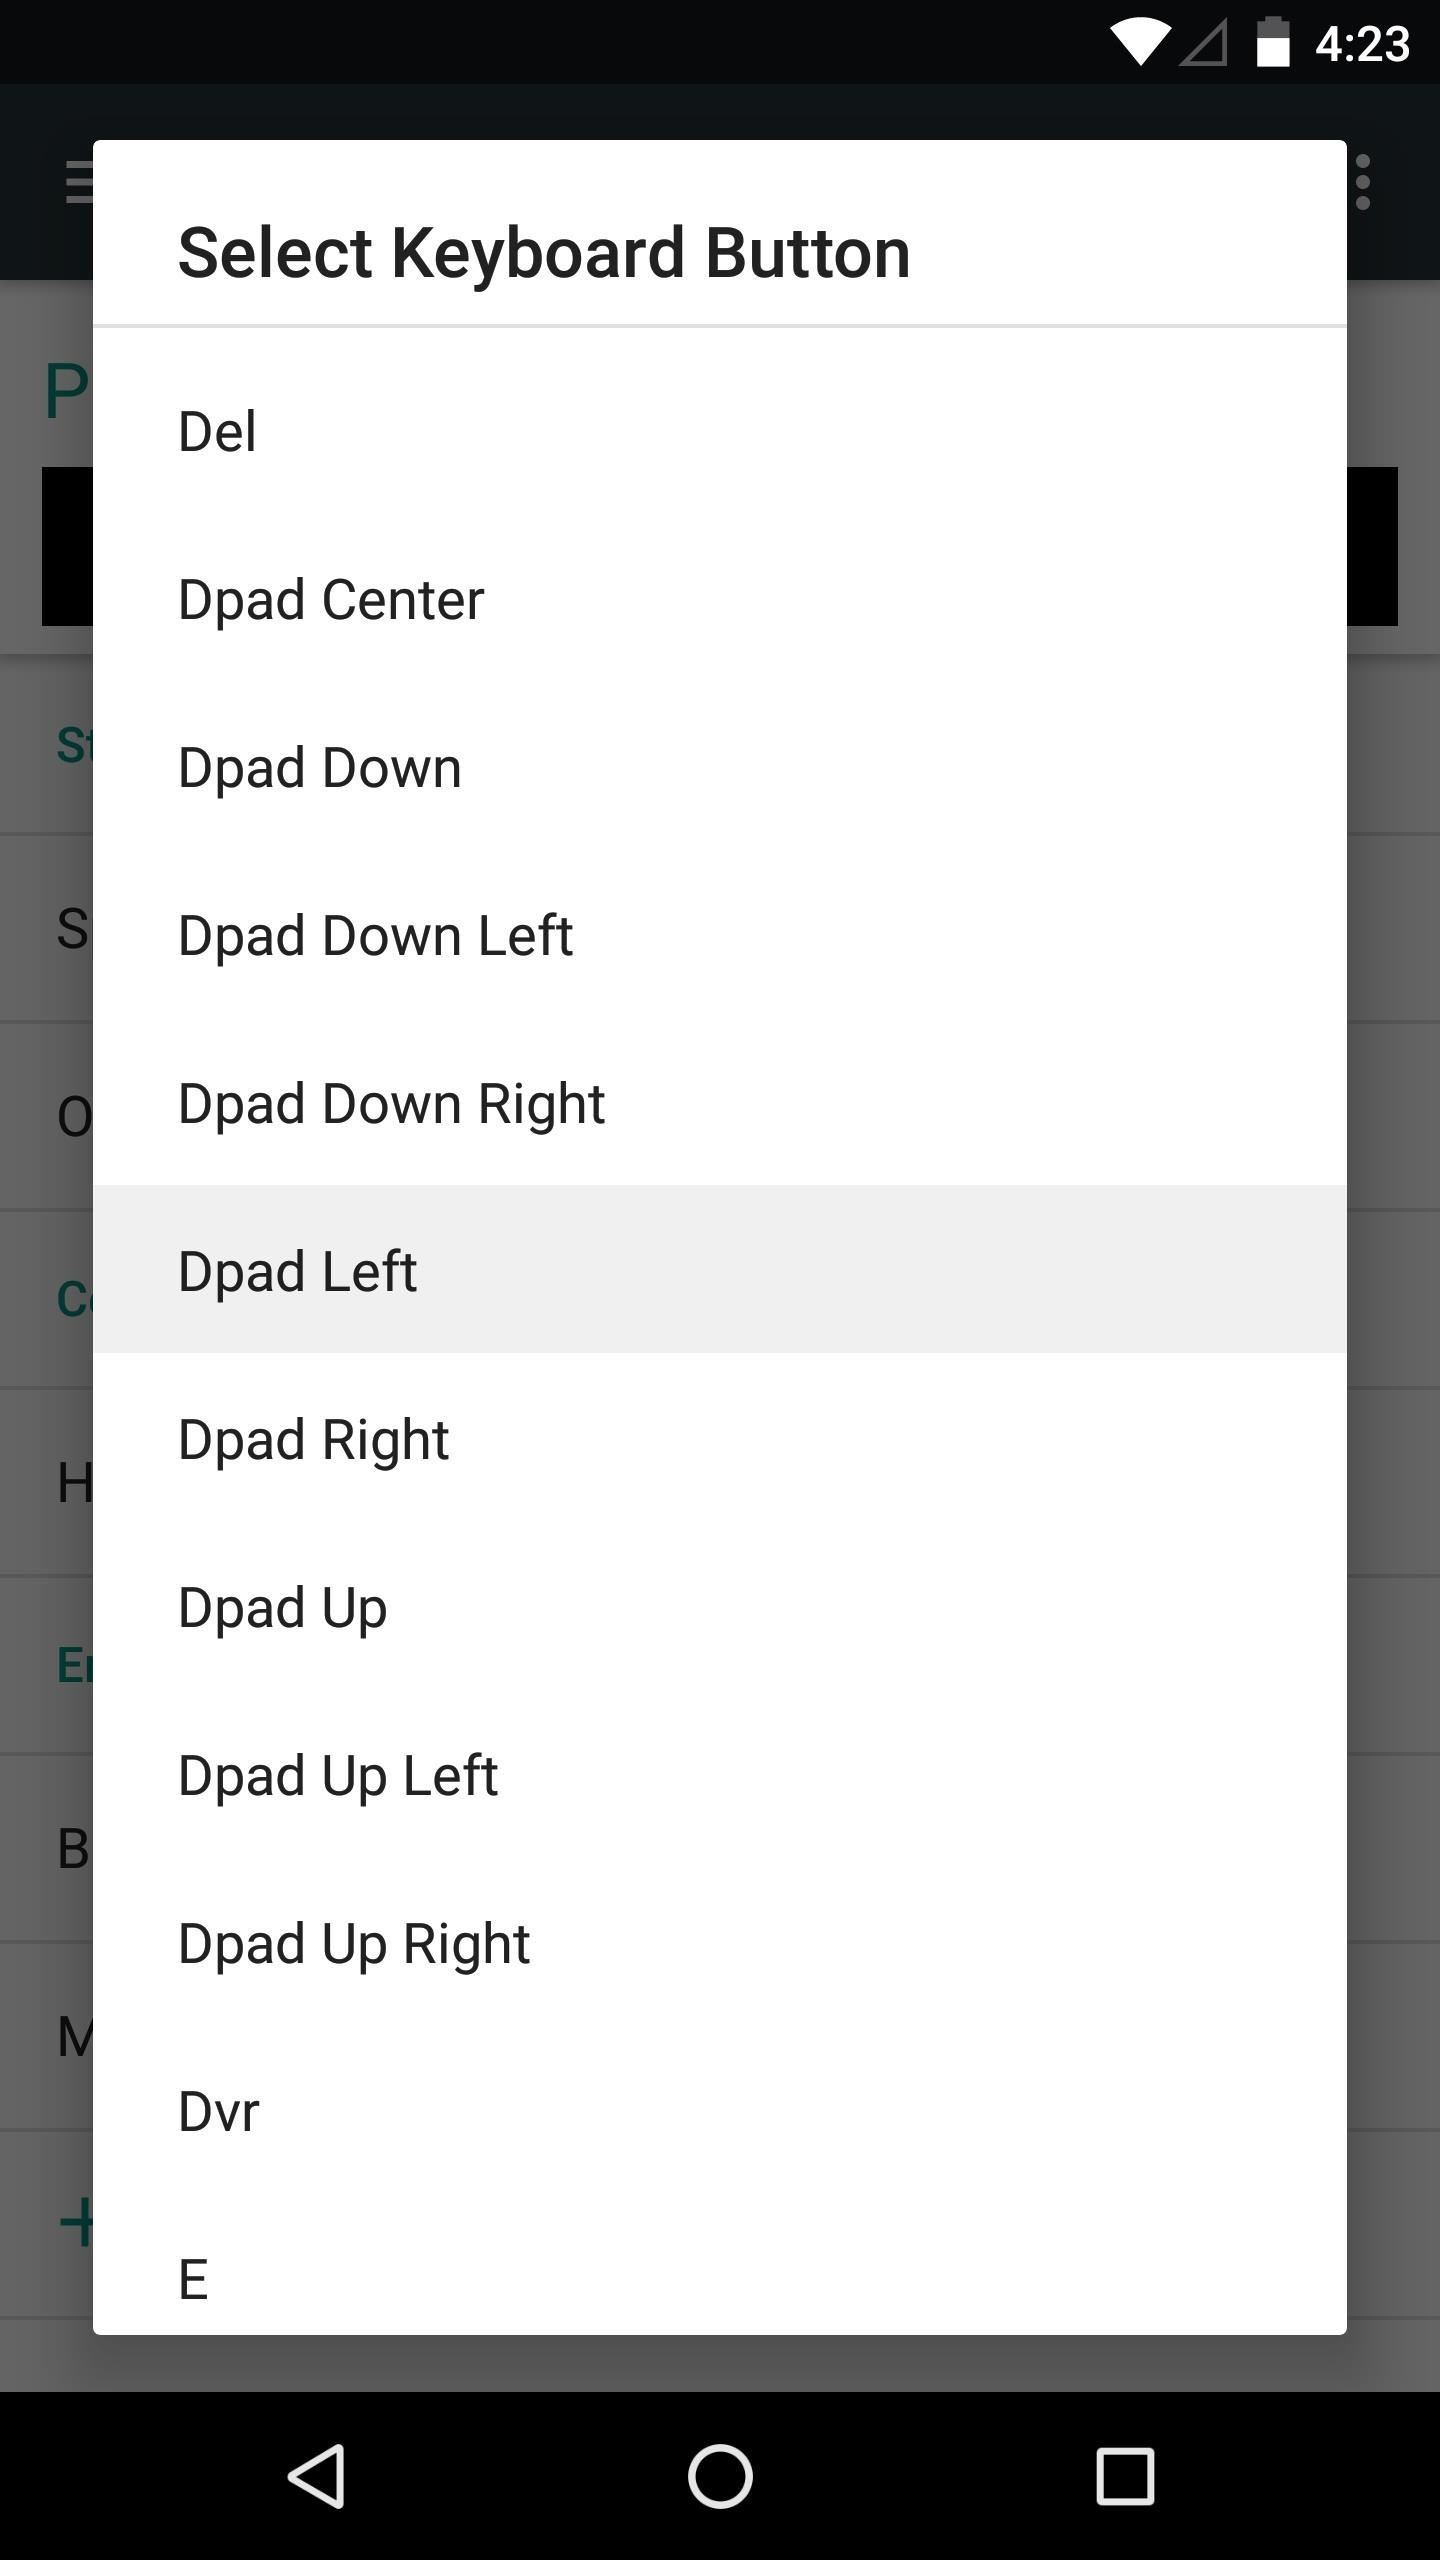
For starters, you'll need to choose the specific keyboard button that you'd like to add to your navigation bar, so select it from the list. After that, you'll be prompted to select an icon for this button—but you'll need to have one saved on your phone, as the Nav Bar Tuner doesn't provide extra icons. If you'd like a good place to find new icons, I'd suggest using IconsDB, as they have free icons available in white.
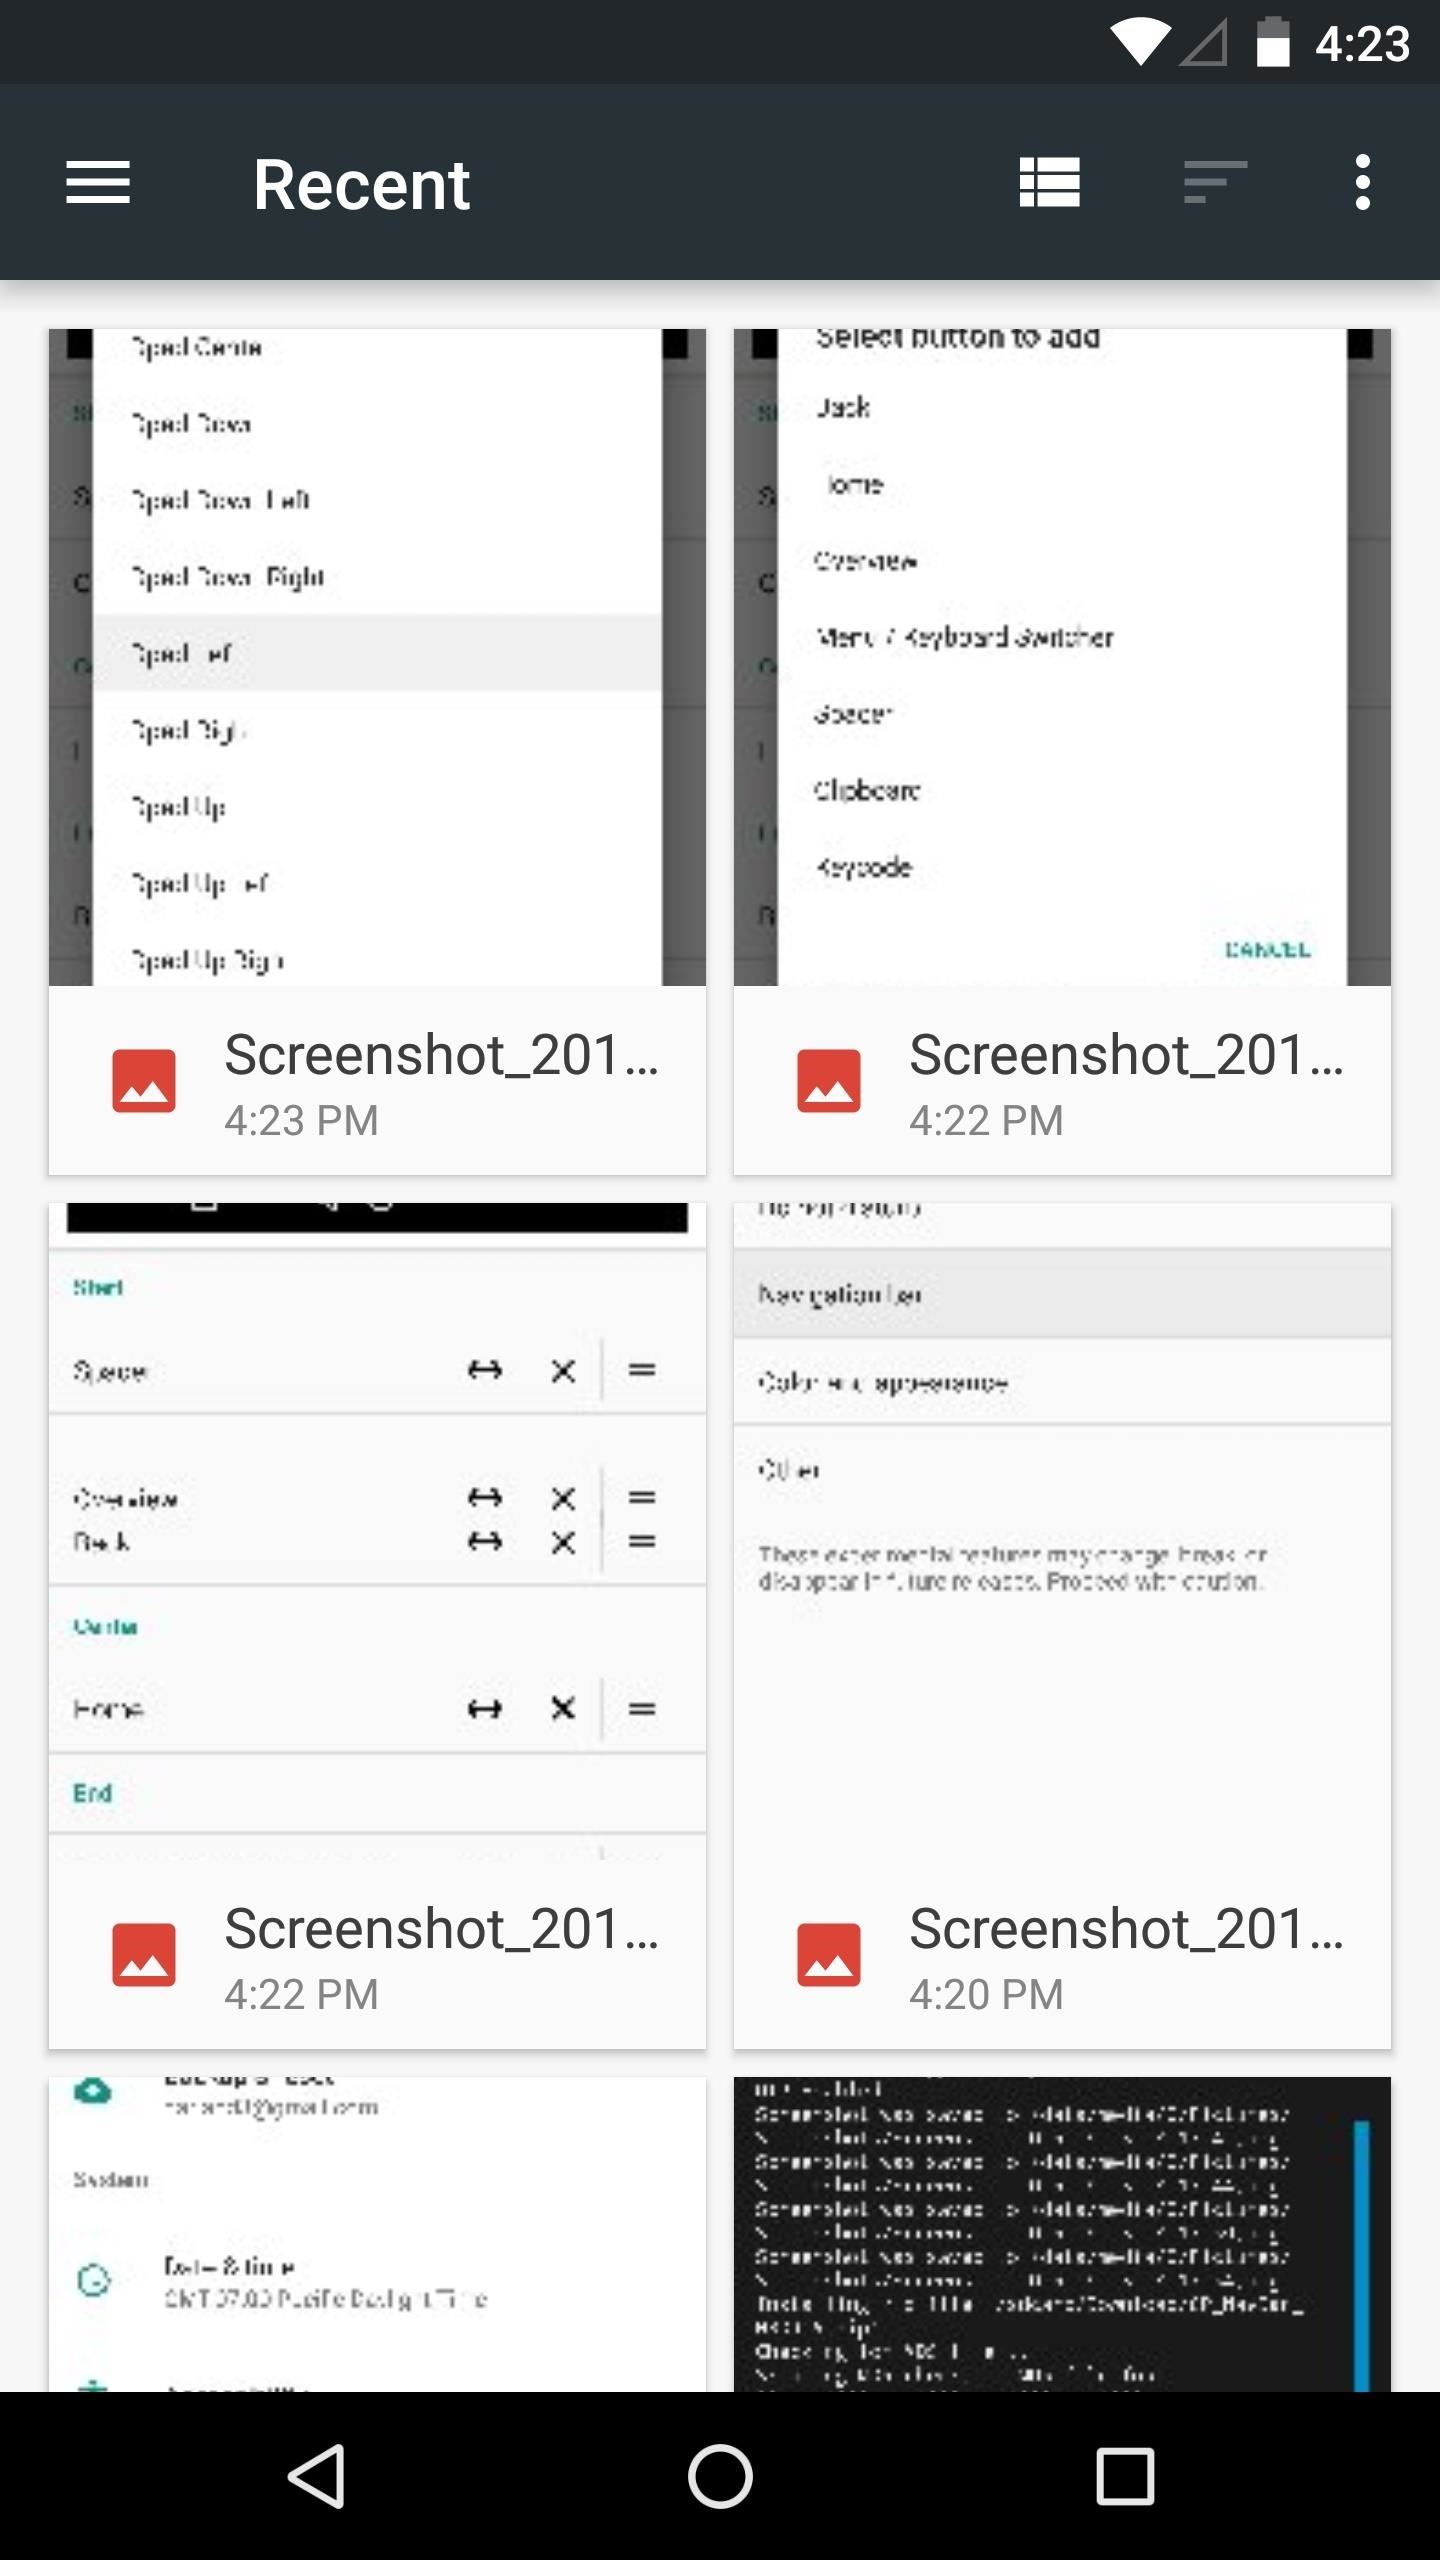
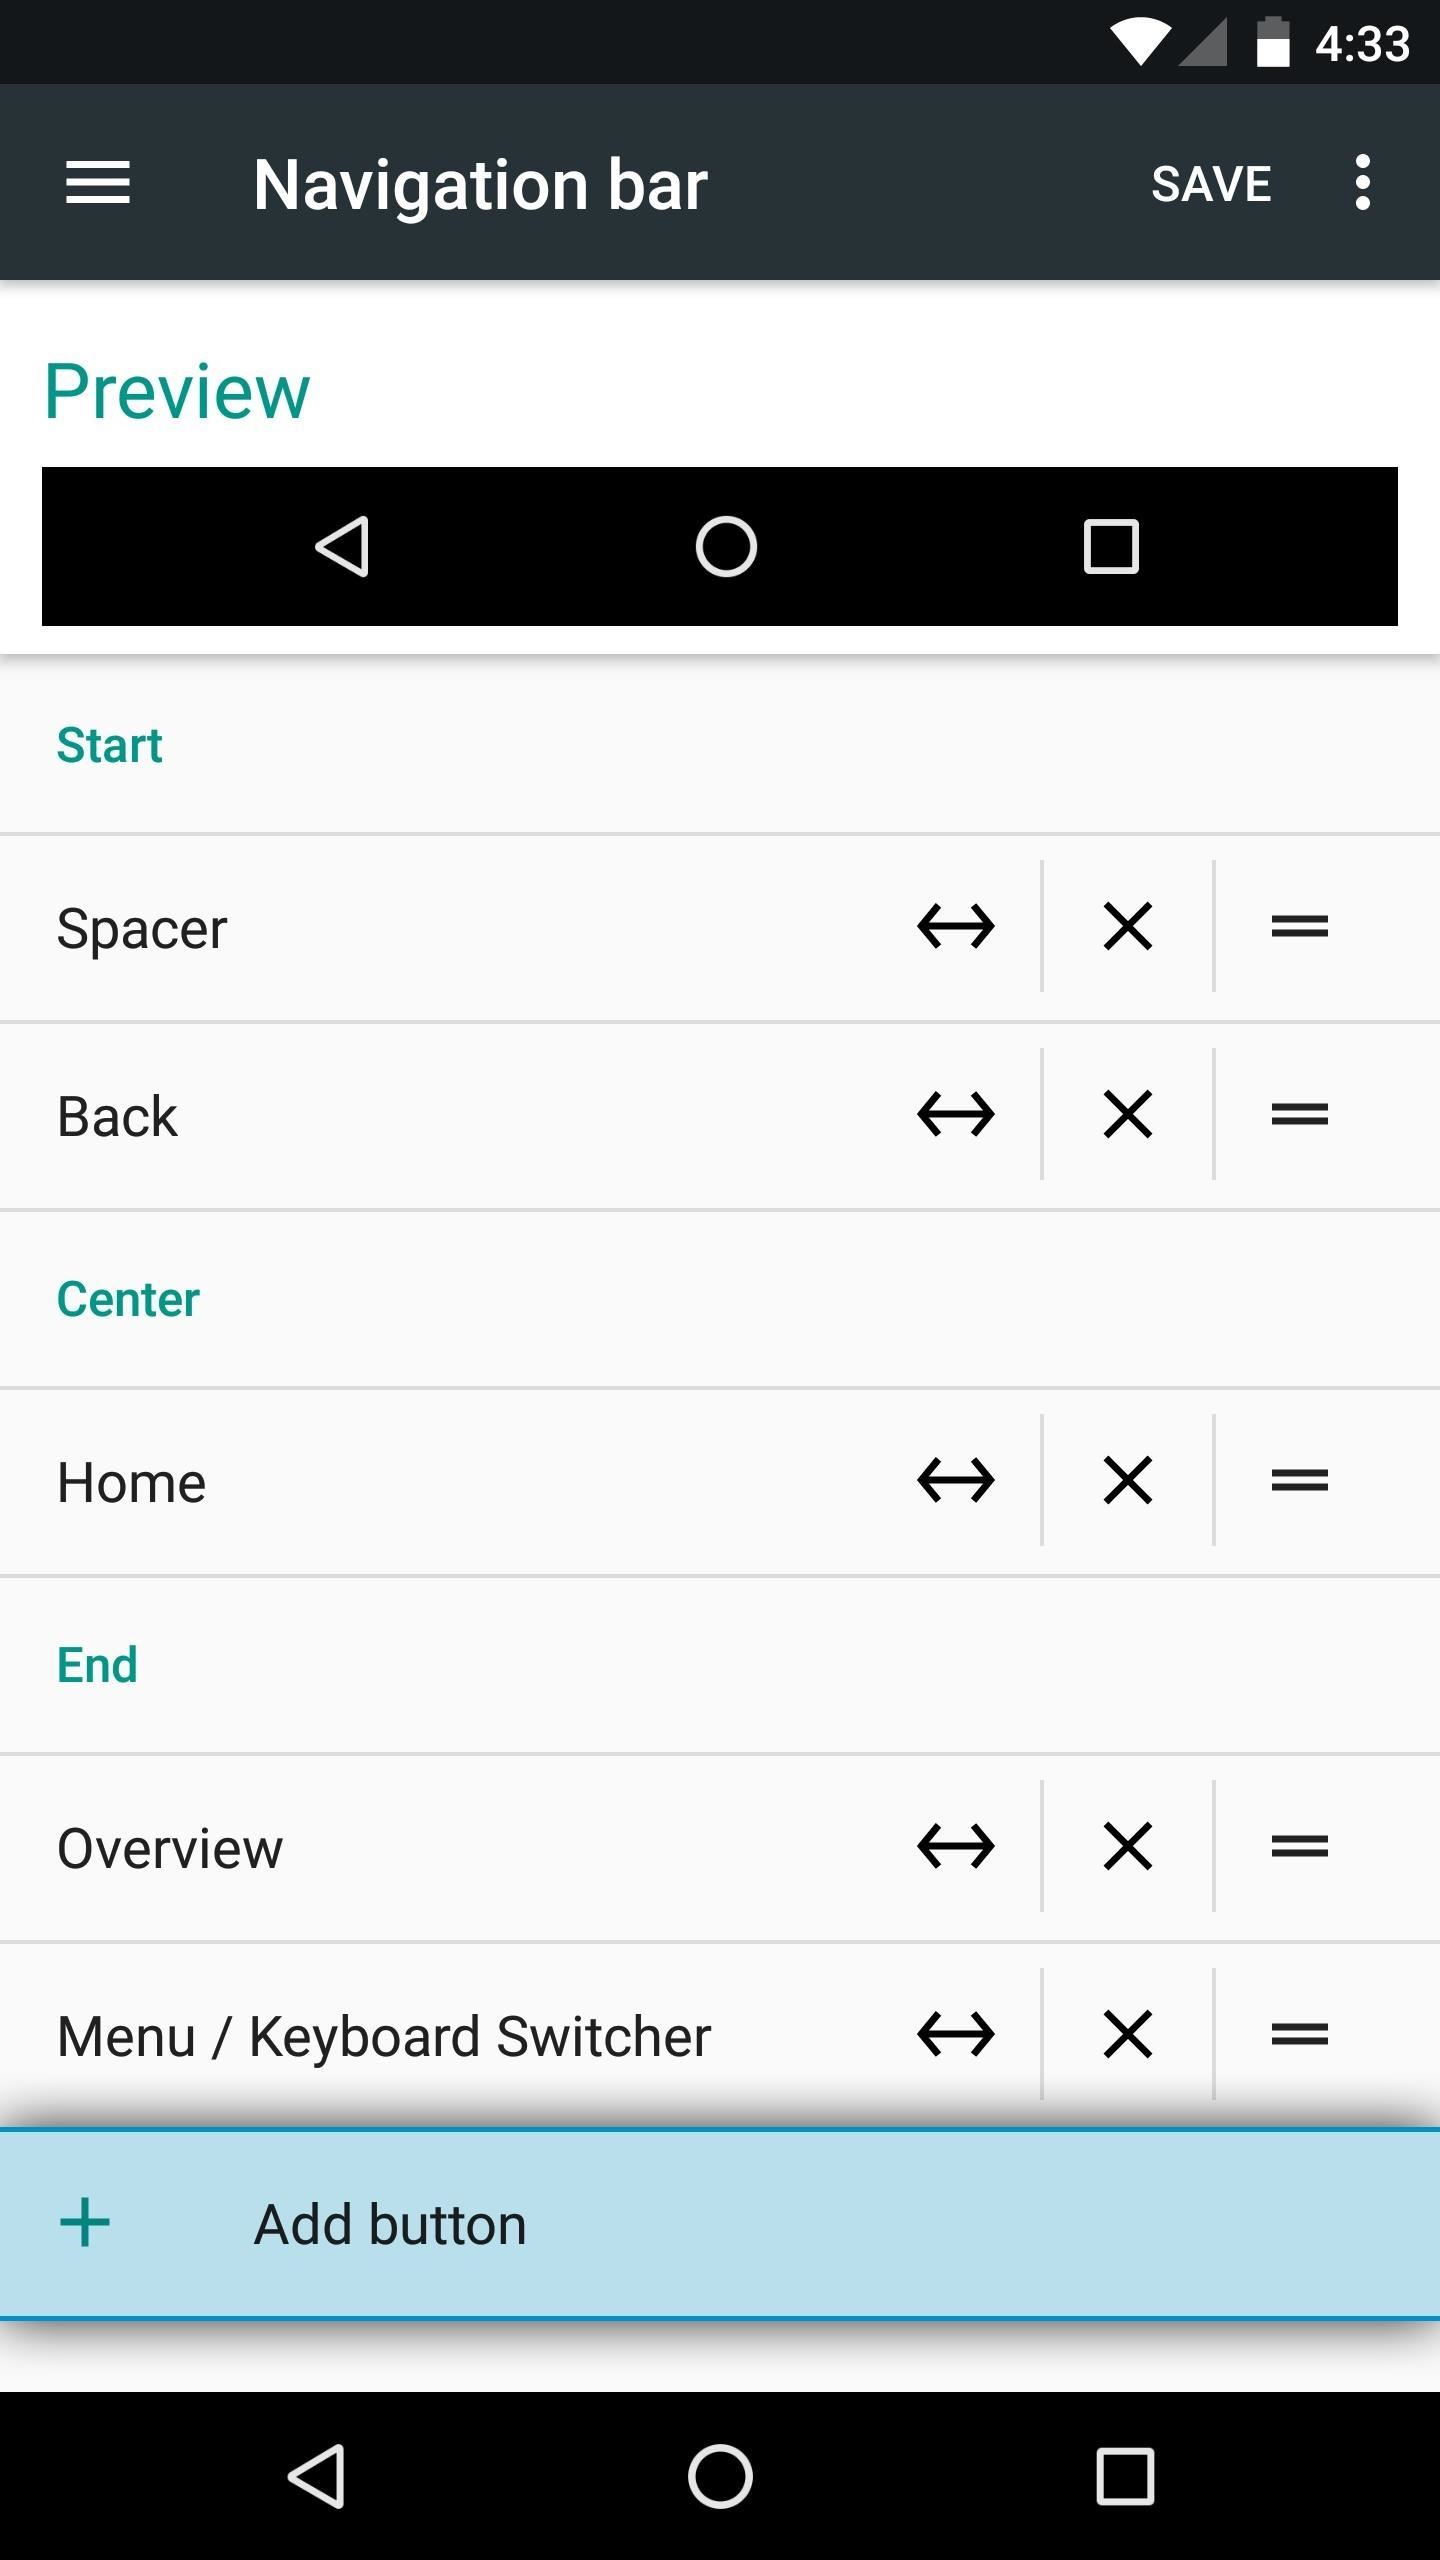
Once you've got everything set up to your liking, just tap the "Save" button at the top of the screen, and your newly-redesigned navigation bar will be functional right away. In the example image below, I've swapped the back and recent apps buttons, then added the clipboard button, which lets me drag selected text from this icon into any text input field.
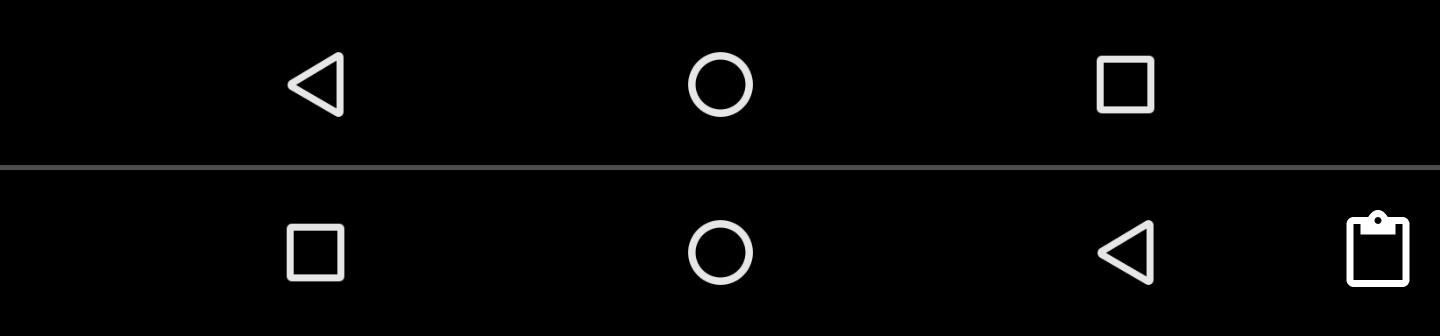
For another example, I'll add arrow keys to either side of my regular navigation buttons. This will be handy when trying to reposition the cursor when I'm typing.
For starters, I removed the "Spacer" entry from the Start section, and the "Menu/Keyboard Switcher" entry from the End section, just to make room for the buttons I'm adding. Next, I tapped "Add Button," then selected "Dpad Left" and "Dpad Right" from the Keycode section.
After that, I selected two arrow key icons that I downloaded from IconsDB, then reordered the new buttons to put them into place. Finally, I adjusted the padding to position the new buttons a bit better, then tapped "Save" to wrap things up. In the end, I can now use these arrow keys to move the keyboard cursor, which is something that's always been a point of frustration for me on touchscreen devices.


Disabling Nav Bar Customization
In the future, if you decide that you'd like to disable the nav bar tuner menu altogether and revert back to stock, the first thing you'll need to do is reset your navigation buttons. To do that, head to the Navigation bar entry in the System UI Tuner again, then tap the three-dot menu button, press "Reset," and hit "Save" when you're done.

Once you've reset the settings in System UI Tuner, download the revert ZIP for your device and build number, then flash it in custom recovery. This will undo all changes that the original ZIP made, so you'll be back where you started at the beginning of this article.
Just updated your iPhone? You'll find new emoji, enhanced security, podcast transcripts, Apple Cash virtual numbers, and other useful features. There are even new additions hidden within Safari. Find out what's new and changed on your iPhone with the iOS 17.4 update.


7 Comments
I have a Build Number NRD90U, except that my device is not a Nexus 9 as listed here. Would it be safe to install that zip?
No, this ZIP replaces your SystemUI with a modified version, so it would cause bootloops on any other device.
Thank you for this wonderful article. I am running a custom ROM on my Nexus 5. Here is it's XDA thread link-
http://forum.xda-developers.com/google-nexus-5/orig-development/wip-aosp-nougat-nexus-5-t3446875
Its stock AOSP ROM and very stable. Is there any mod for my phone to enable this?
There isn't one that works with the Nexus 5 right now, but you can try asking the developer in his thread on XDA. He might be able to whip one up for you if you provide the SystemUI.apk file from your ROM. It should be in the /system/priv-app/ folder, and it should be easy to grab with a root file browser.
I am using Nexus 6 & its buld number is NBD90Z..what i have to download now?
You can try the one for NRD90M, but make sure to do a NANDroid backup before you flash it (in TWRP, touch "Backup," then swipe the slider). It's not a perfect match, so it might have some bugs. Likely minor and maybe none at all. Worst case, if it causes your phone to say "Unfortunately, SystemUI has stopped working," just reboot into recovery mode and restore the backup.
My build number is NPF10C. is that work for me?
Share Your Thoughts