
Google's latest Nexus device is big, bold, and beautiful—and now it's got root. Thanks to some quick work by legendary Android developer Chainfire, the Nexus 6 already had a clear-cut root method before most stores even had it in stock.
CF Auto Root is a wonderful tool that has already helped root thousands of devices in one simple click. And since the utility works on Windows, Mac, and Linux, almost any Nexus 6 owner can have Superuser privileges in just a few minutes.
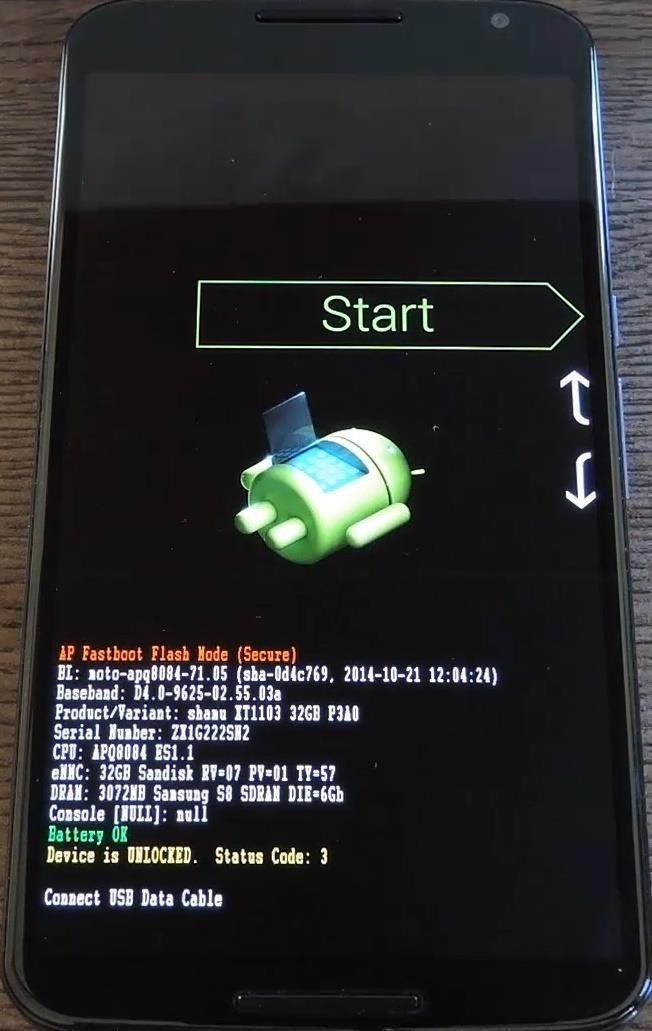
Step 1: Put Your Phone into Bootloader Mode
To begin, power your Nexus 6 completely off. When the screen goes black, press and hold the Volume Down and Power buttons simultaneously. This will bring up Android's Bootloader menu, and at this point, you should connect your phone to your computer with a USB data cable.

Step 2: Ensure That You Have the Proper Drivers Installed
In order for CF Auto Root to work its magic, your computer and your Nexus 6 need to be able to communicate properly. Most systems will automatically download the necessary device drivers to make this happen, but others will require that you do this manually. If you're not sure if you have the proper drivers installed already, I'd advise that you install them yourself.
If you own a Windows PC, you can download the proper drivers at this link. Simply run the file, then follow the prompts, and you'll be all set up.
If you're a Linux user, download and extract this ZIP file, then run the script with Terminal.
For Mac users, the process of installing the proper drivers is a bit more involved. Refer to our guide on the topic for more information.
Step 3: Download & Extract CF Auto Root
Chainfire's awesome root tool can be downloaded at this link. Once you have the ZIP file saved to your computer, extract its contents to any folder on your system.

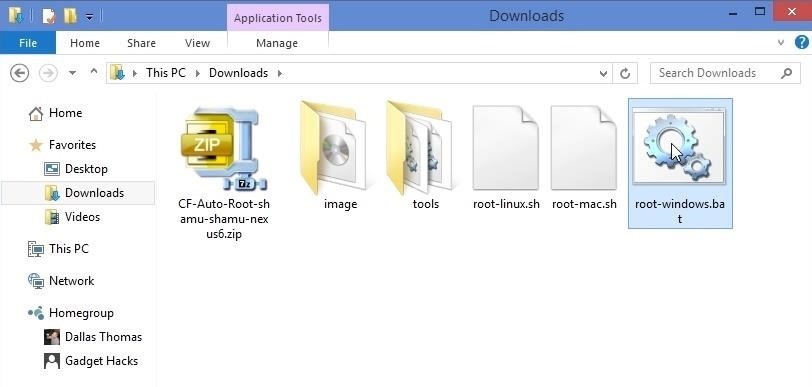
Step 4: Run CF Auto Root
With the ZIP extracted, you'll find 2 folders and 3 files—root-linux.sh, root-mac.sh, and root-windows.bat. Double-click the file that corresponds to your computer's operating system to begin.
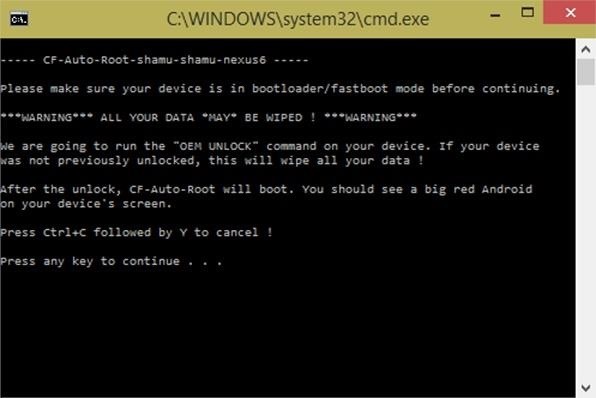
From here, a command prompt window will inform you that CF Auto Root will unlock your device's bootloader before it performs the rooting procedure. If your bootloader is not already unlocked, this process will wipe your device, so make sure you have everything backed up.
When you're ready, press any key on your keyboard to execute the script.
If your bootloader was previously locked, you should see a red Android logo on your phone's screen for about a minute. Otherwise, CF Auto Root will skip directly to the rooting process, and you'll see a wall of text scrolling by on your phone's screen for about 10 seconds.
When the process is complete, your phone will automatically reboot, and you'll be rooted. At this point, it's safe to unplug your Nexus 6 from your computer.
Step 5: Verify Root
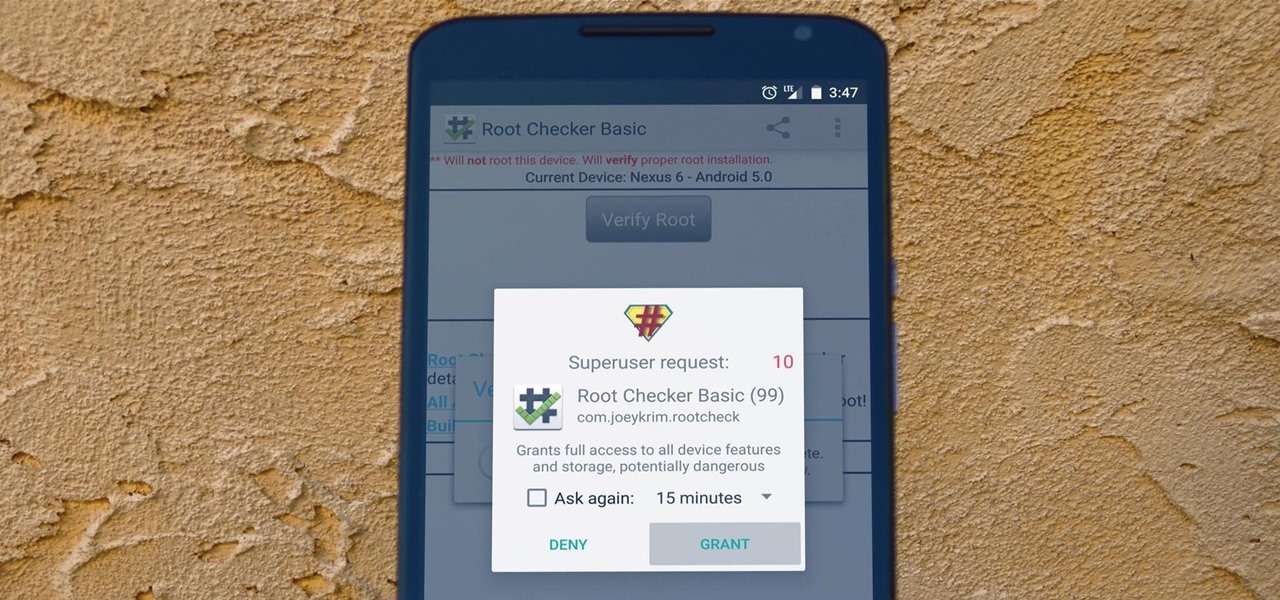
To verify that your Nexus 6 is indeed rooted, download Root Checker from the Google Play Store for free.
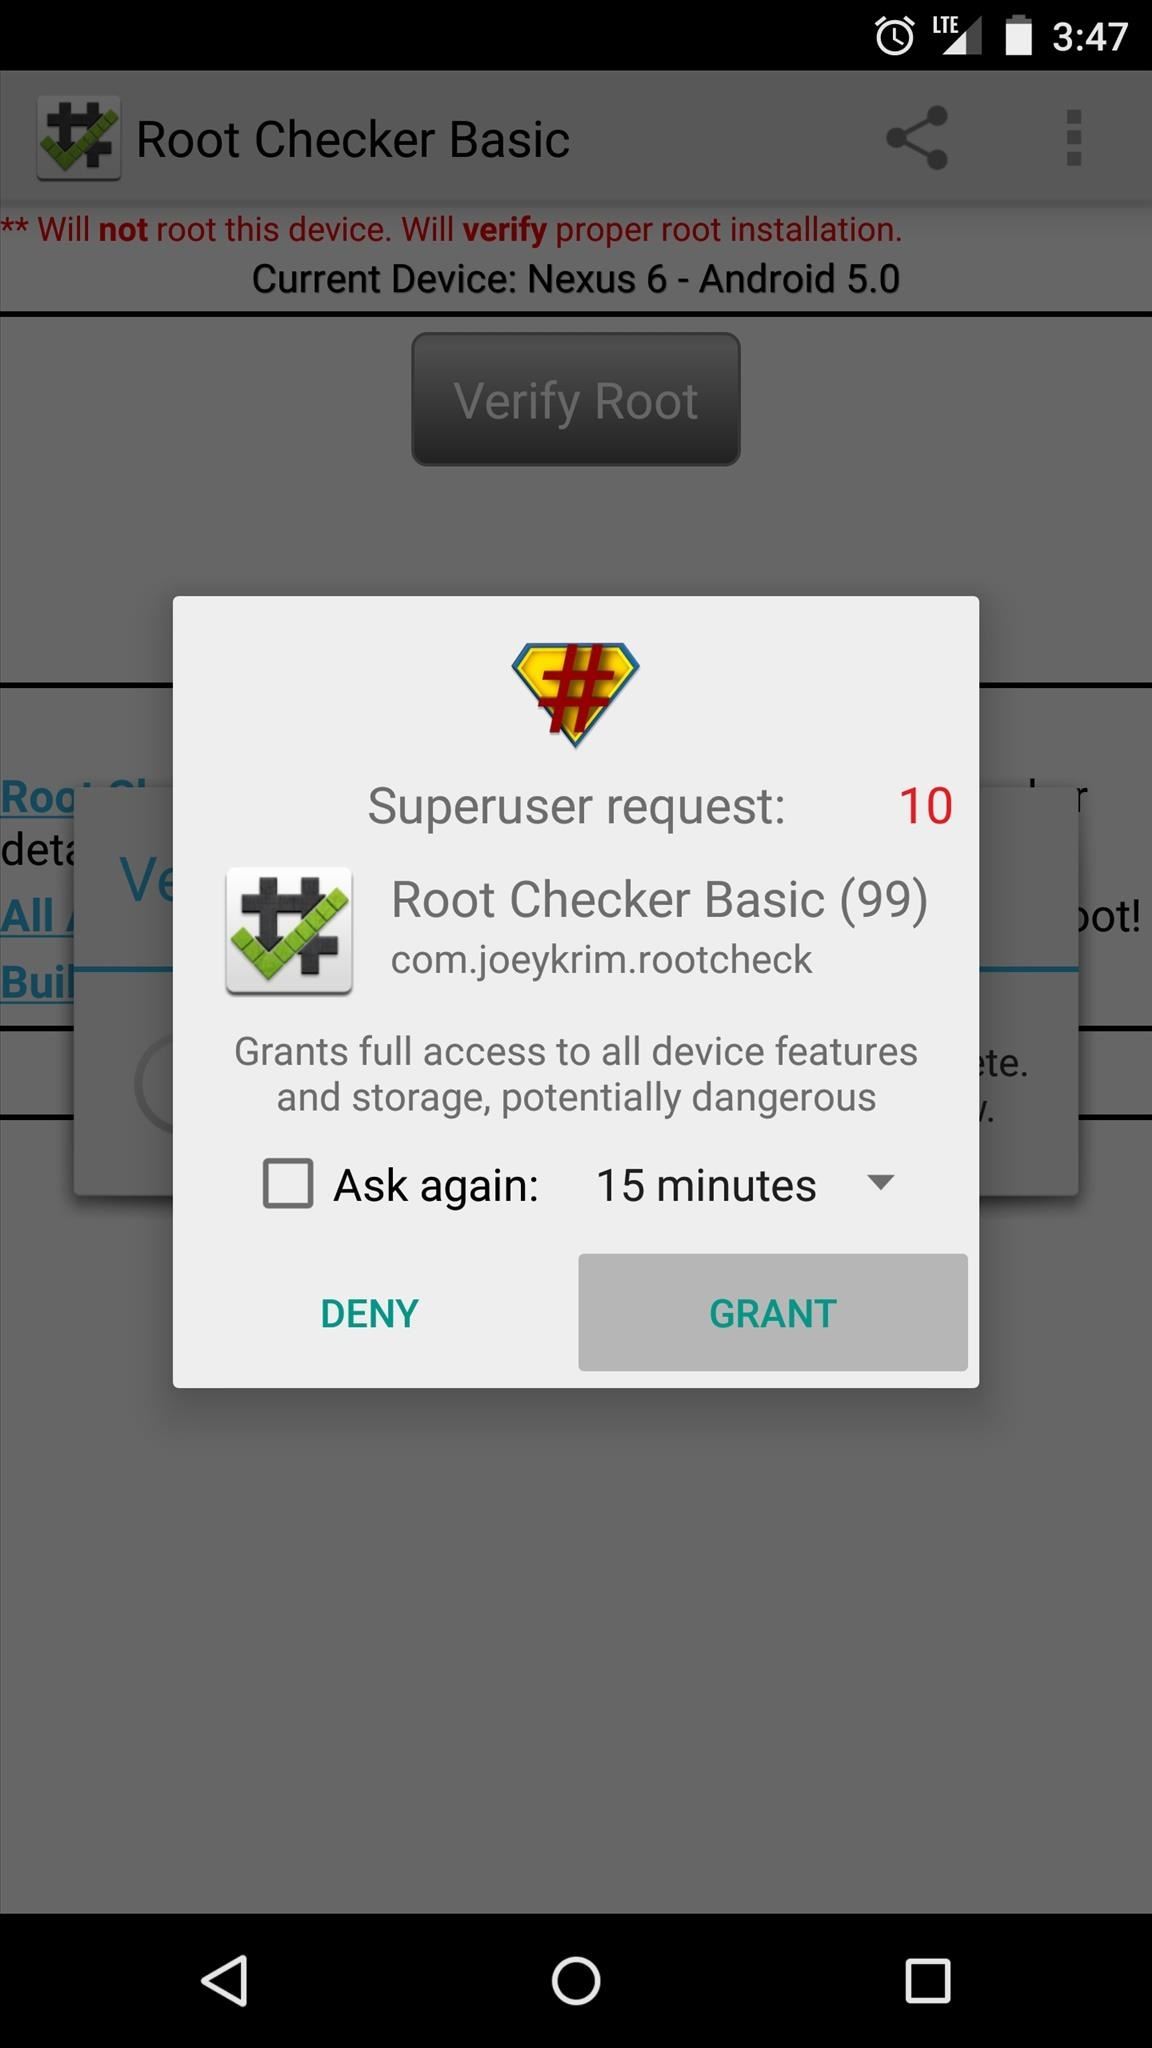
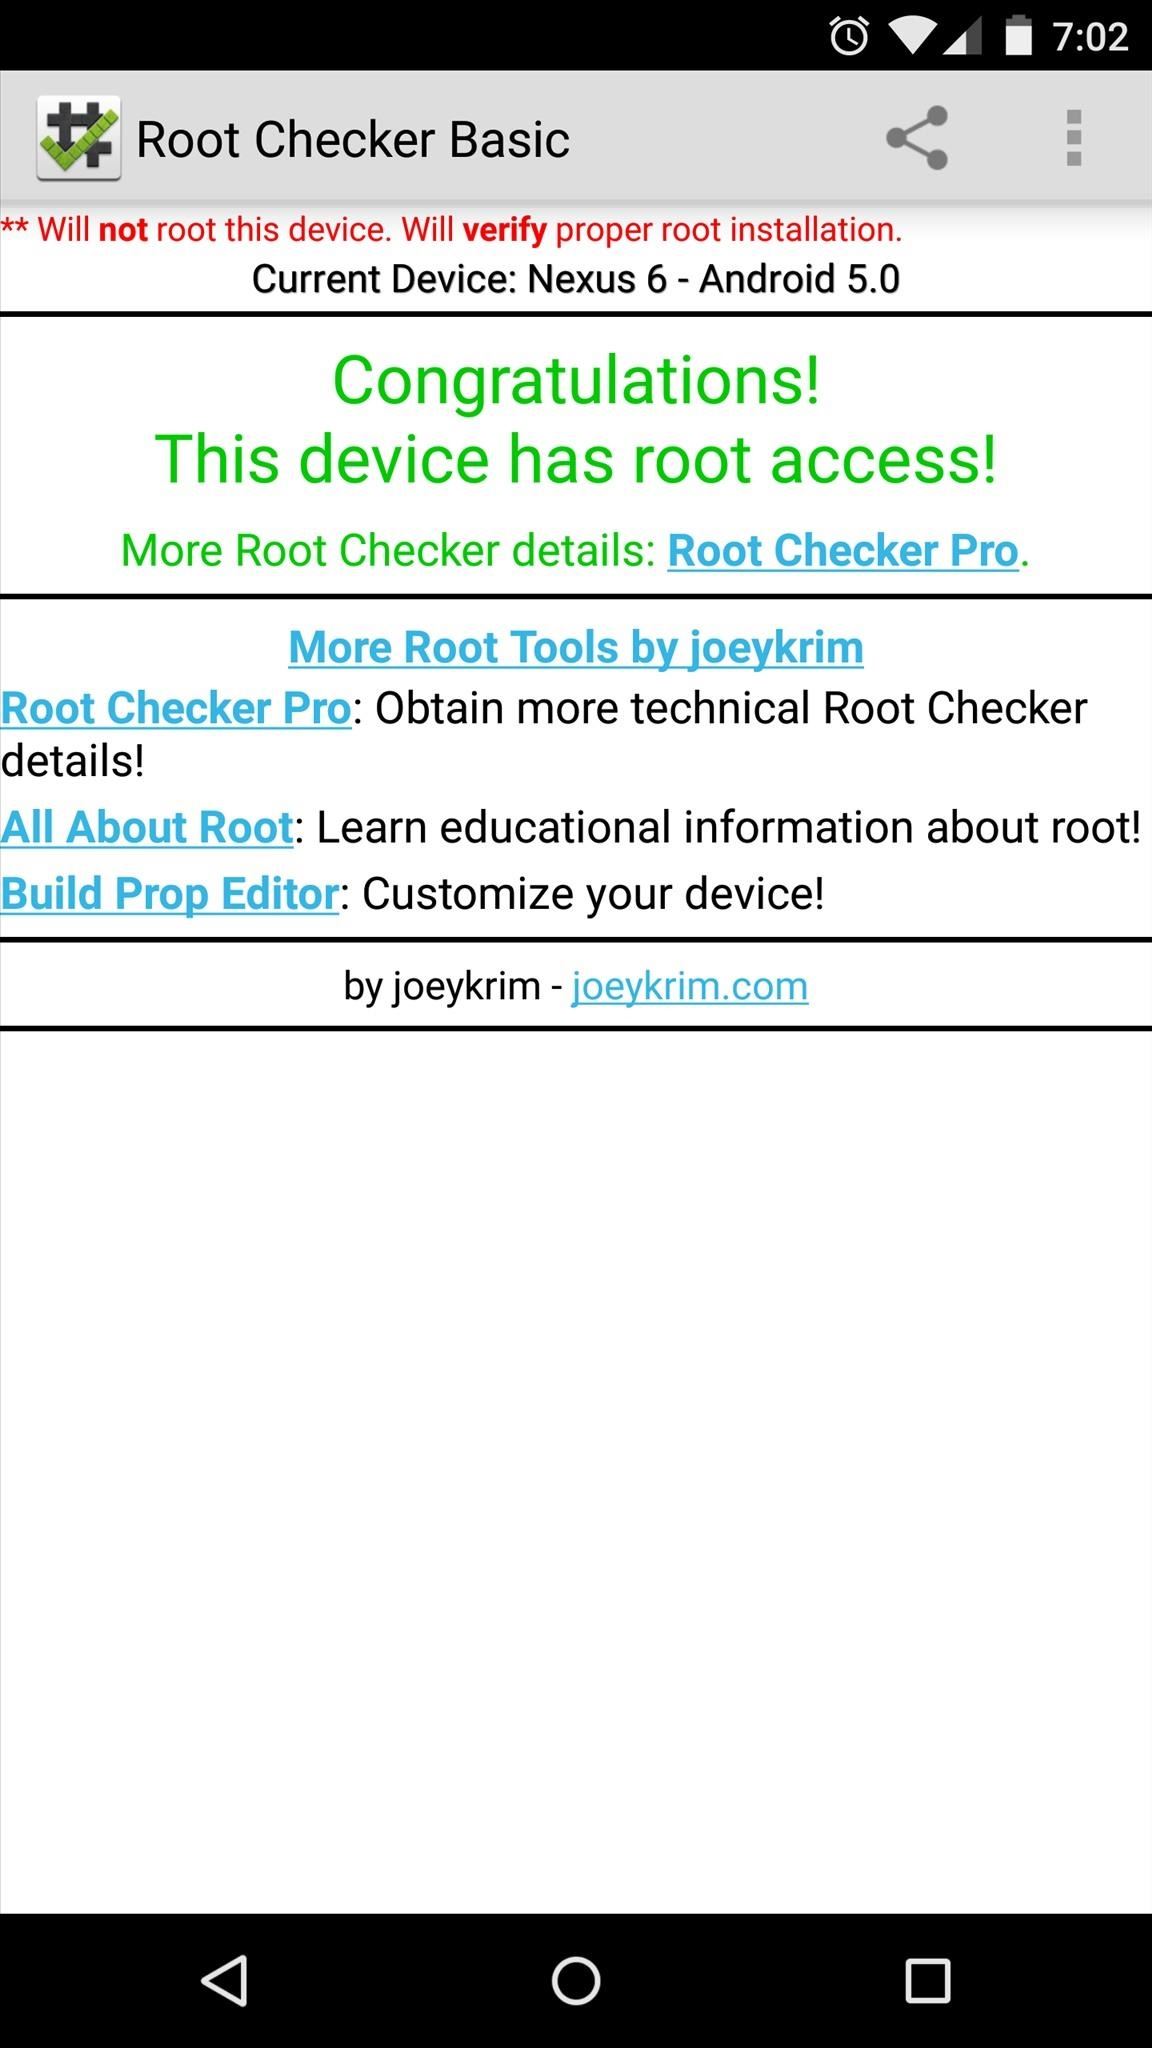
From there, simply run the app, then tap Grant on the Superuser request popup. If everything went off without a hitch, Root Checker will give you a message that says Congratulations! This device has root access!
Thanks to an incredible development community, the Nexus 6 is one of the easiest devices to root. What root apps did you install first? Let us know in the comment section below, or drop us a line on our Facebook or Twitter feeds.
Just updated your iPhone? You'll find new emoji, enhanced security, podcast transcripts, Apple Cash virtual numbers, and other useful features. There are even new additions hidden within Safari. Find out what's new and changed on your iPhone with the iOS 17.4 update.


6 Comments
I am new to Android and rooting phones as a whole...so this might be a dumb question to ask, but I'm going to ask it anyways...I have a Nexus 6 that is running stock Lollipop. I have seen that there is an update that should be coming out soon for the Nexus 6. The question that I have is this...if I unlock the boot loader and root the phone, do I have to relock and unroot the phone to update the phone to the newest ver. of Lollipop when it comes out? Or is there a way to leave the phone in its unlocked and rooted state and update the phone? Thanks in advance for answering this question.
The unlocked bootloader won't cause any issues with an update, so you wouldn't have to worry about re-locking. Root, on the other hand, might be an issue.
In the past, just the fact that you were rooted never had any impact on the update process. But if you used root access to make modifications to certain parts of the System partition on your device, the update would fail. So for instance, if you used Titanium Backup (an app that uses root access) to uninstall apps that came pre-loaded on your phone, the update would recognize that these apps were missing and it would abort the process.
It's been reported that this has changed with Android 5.0, and now the updater script checks to see if you're rooted as well. But we haven't seen this in action yet, so this is not 100% confirmed.
You can use SuperSU (the root management app that this method installs) to unroot your phone in preparation for the update, then run this tutorial again to get root back once you've updated. It wouldn't wipe your data the second time because your bootloader is already unlocked. But if you're just now starting out with Android and root, I'd suggest waiting until the update comes before rooting. At least that way, you'll have a decent amount of time to explore things and get used to the way they work before the next update comes in.
Dallas,
Thanks for the info....I think I am going to unlock my bootloader and get that part out of the way so I don't have to do that part again. An I am going to hold off on the rooting the phone until the update comes out. I do have another question for you tho...what is the best why that you have found to backup your user date on your device? I come from the Apple phone world where it is very easy to backup all your info to the PC or cloud. Thanks again.
PS: You should make (If you haven't already) a video for beginners like myself an call it "A Beginners Guide to Rooting". You could go over what a beginner would need to know about unlocking bootloaders, rooting customer recovery and backups etc...its just an idea...
Thanks for the idea! That would be a great starting point to have for the folks that are new to all of this.
Android does not really have a perfect backup solution that doesn't involve root or custom recovery. With root, Titanium Backup is the best out there—it lets you back up your apps and all of their data (gamesaves, settings, etc). With a custom recovery installed, you can create a system restore point of sorts—they call this a "NANDroid Backup". It's like a complete snapshot of all of your phone's software (the base ROM and all of the apps and data you've accumulated on it).
Without root, Android will at least restore the apps you have installed when you sign into a new or wiped device, or a new ROM (firmware like Cyanogenmod). The apps won't have their data intact, so you'll lose gamesaves and your settings, though. Another non-root option is Helium Backup. I just did a tutorial on that one here, but I haven't used it much since I'm rooted and Titanium Backup serves me well as-is.
If you're going to unlock your bootloader (which I think is a good idea to do up front if you intend on rooting and modding), you may as well use CF Auto Root to do it. Yes, the root thing might cause problems with the update, but it's really not that hard to undo. As long as you don't make any significant system modifications while you're rooted, all you'd have to do is open the SuperSU app after you finish this tutorial, then go to Settings and tap "Full Unroot". That will leave you with an unlocked bootloader and you wouldn't have any issues accepting the OTA update.
in need of serious help here....
I cannot get this phone to do anything I want. fail on every project.
this time, I am trying to OEM unlock to do root explorer script add ons. all the steps run perfectly BUT when I hit enter to run the script I get NO red droid, NO script scrolls on my phone and the script on my computer only says if "I don't get a red droid there may be a problem"
well no kidding....
any tips or where to go from here???!!!
This may be a result of a recent change. If you can boot into Android, try heading to Settings, then About Phone, then tapping "Build Number" 7 times. After that, back out one level and head into the "Developer Options" menu that you'll now find. From here, there should be an option that says "Allow OEM Unlock" or something to that extent. Enable this option and try running the root script again.
Share Your Thoughts