

Update, November 12, 2014: Android 5.0 Lollipop is officially out now. If you haven't gotten the OTA yet, check out our new guide on installing the official Lollipop builds on any Nexus for download links and instructions, for Mac or Windows.
Update, October 17, 2014:
In advance of the official release of Android 5.0 "Lollipop", Google released a brand new set of preview images for the Nexus 5 and Nexus 7 (2013) this morning. These images are as close as we're gonna get to the final build of Lollipop, and can be easily installed using a Windows PC.
The method below will be the same for installing the new preview build, and we've updated the links to reflect any changes. We've also recorded a new video tutorial to make things as easy as possible:
We've also updated the Getting to Know Android 5.0 section towards the end of this article. Enjoy!
Original Instructions:
Yesterday's I/O event showcased the upcoming version of Android, whose official release is set for some time this fall. But for curious Nexus 5 and Nexus 7 (2013 Wi-Fi only) owners, a preview version of this new Android build has been made available today.
Before you decide if you'd like to install this preview version, consider that all of your data will be lost, and if you're rooted, that will be gone as well. But it's not like you can't just return to stock and then re-root in under a minute, so if you've got all of your data and apps backed up, you should really try this one out. It's got tons of cool new features and a new design that you're sure to love.
Note that, if you don't have a Windows computer handy, there's an equally easy way to install this build using fastboot and your command prompt. Check out Neil's guide for everything you need.
What You'll Need
- A Windows PC
- Good Quality USB Cable with no visible damage
Step 1: Enable USB Debugging
Since this method will utilize Android Debug Bridge, you'll have to enable USB Debugging on your phone, which is in the Developer Options menu. If you don't see that menu in your Settings, let's go ahead and unlock it.
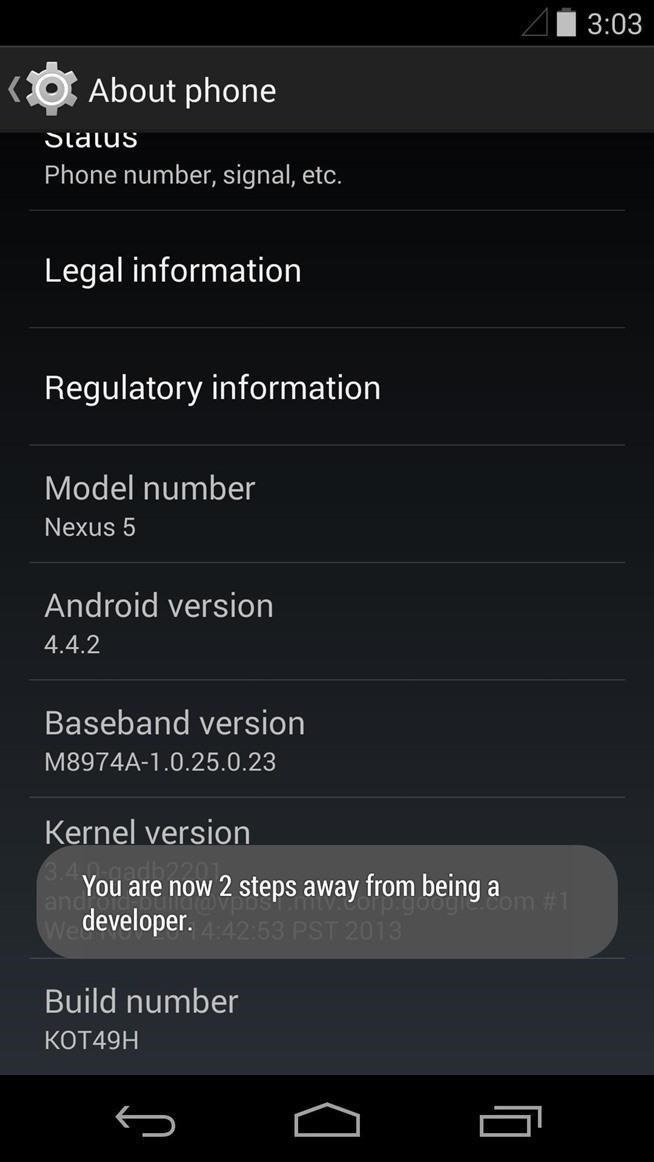
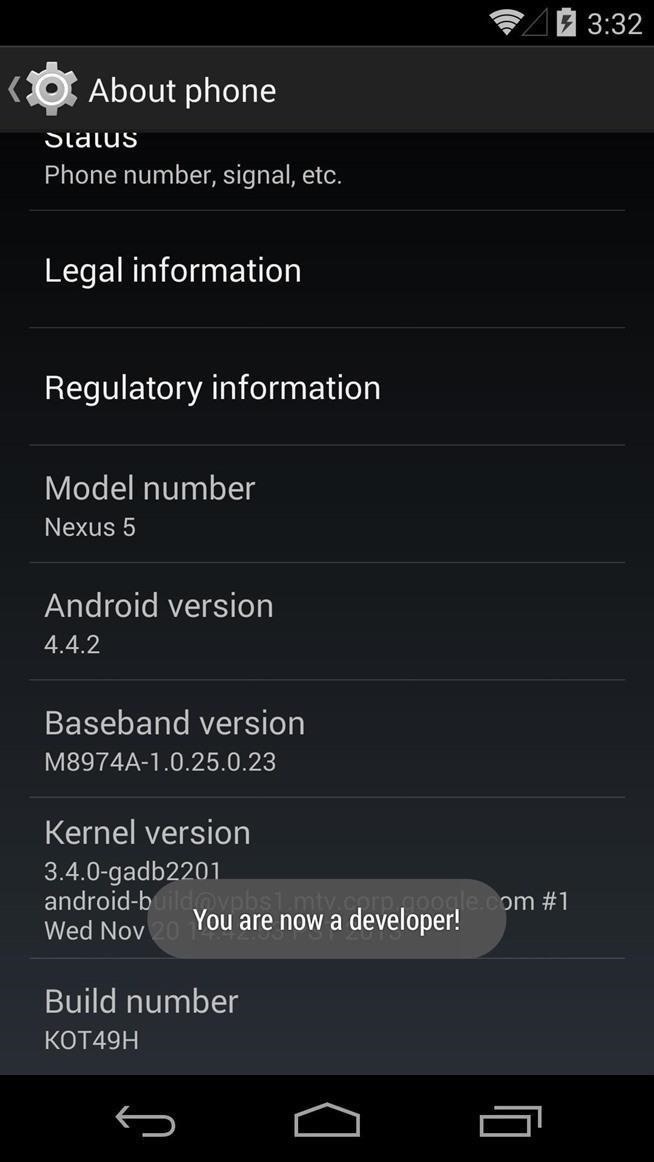
Start by going to Settings, then scroll all the way down to the bottom and hit About Phone. From here, scroll down to the bottom again and tap Build Number seven times in a row.
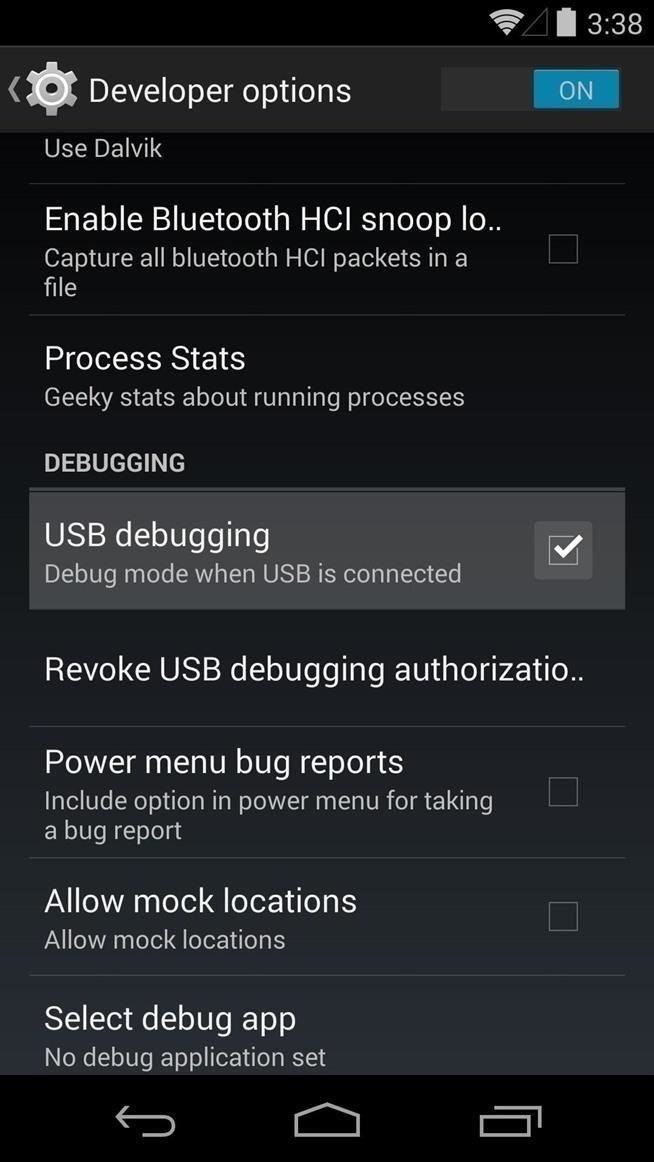
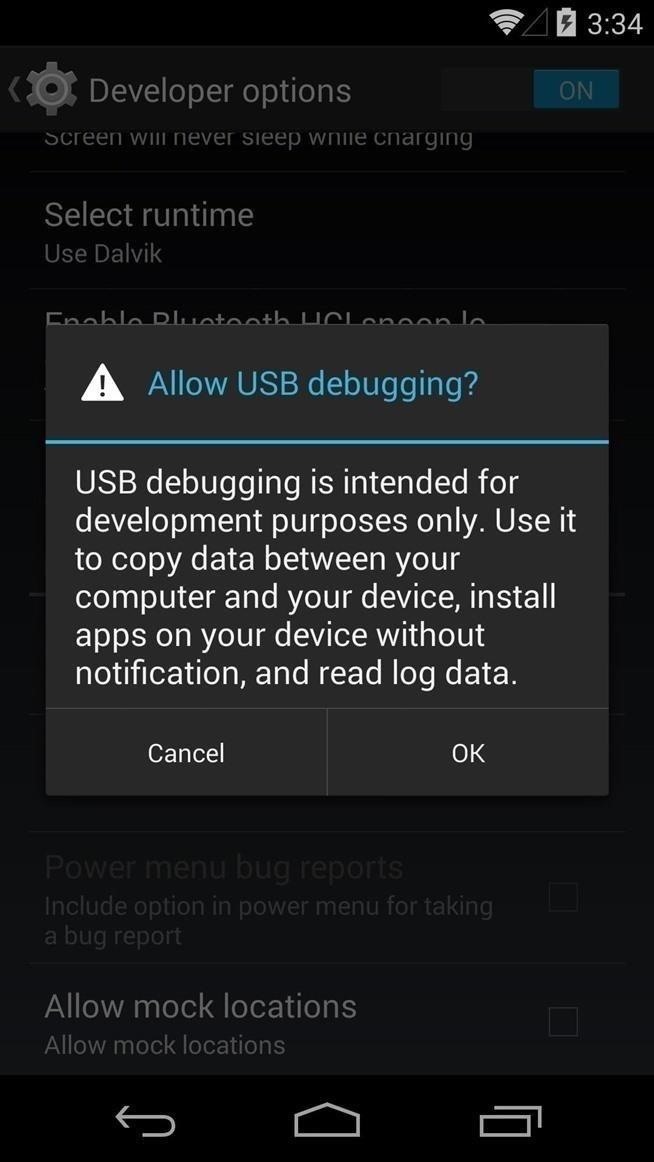
Now, just back out one level and you'll see a new Settings menu for Developer Options. Tap this menu, then tick the box next to Enable USB Debugging and press OK on the following pop-up.
Step 2: Connect Your Phone to Your PC
This is a simple, yet important step. Make sure the USB cable that you're using to connect your phone to your PC is in good condition. Check the connection at both ends to ensure a firm fit, and look for any kinks or other damage to the cable itself.
Step 3: Download the Preview Images from Google
Google has made the new Android 5.0 "Lollipop" preview images available on a special developers website, but that doesn't mean the general public can't download them too.
From your Windows PC, click this link to head to the download page. From here, scroll down a bit and click the download link next to the Nexus 5 (GSM/LTE) "hammerhead" entry (or Nexus 7 (WiFi) "razor" if you are doing this for your Nexus 7).
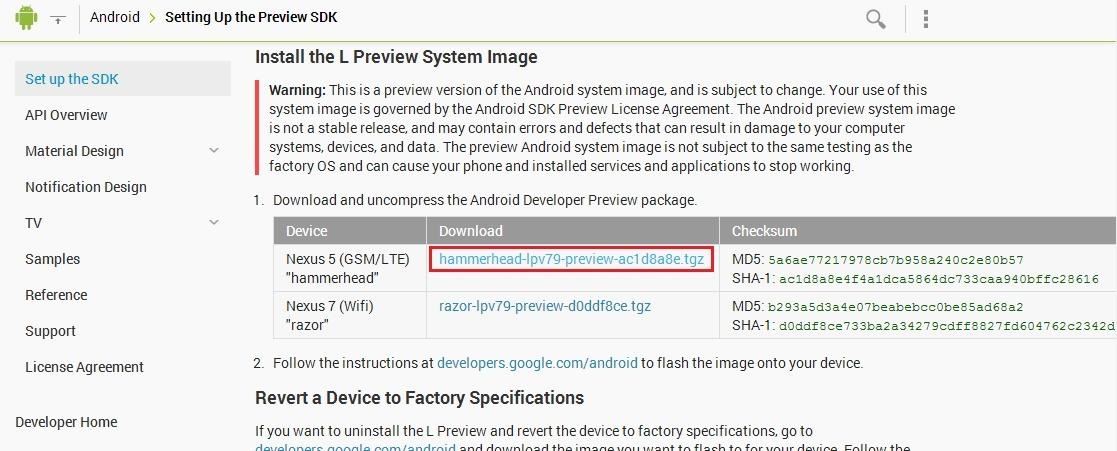
If you're having trouble with the download link, try middle-clicking it or opening the link in a new tab.
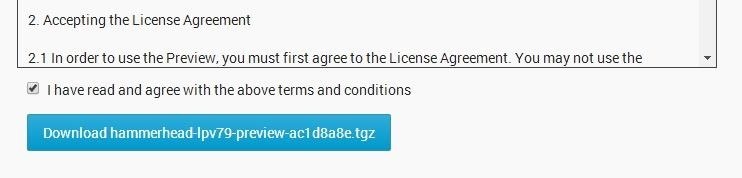
This will take you to a Terms of Service page, so scroll down a bit and tick the box next to I have read and agree with the above terms and conditions, then click the download link right below it to get your preview images.
Step 4: Install Nexus Root Toolkit
Nexus Root Toolkit is a very handy tool that I've used many times in the past. It guides you through some of the harder setup aspects of getting ADB and its drivers installed, then lets you flash factory images at the click of a button.
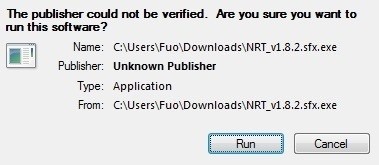
To download WugFresh's Nexus Root Toolkit, click this link from your Windows PC. The download should start automatically, and when it's done, click the file to open it and hit Run.
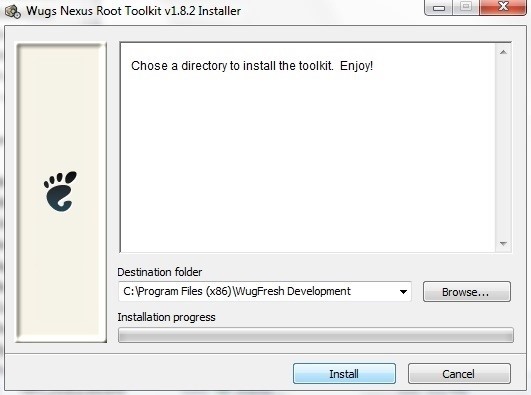
From the next window, just click Install.
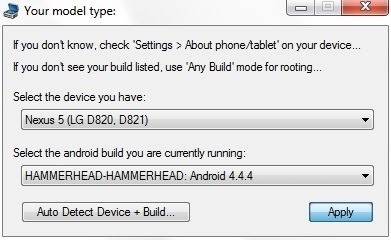
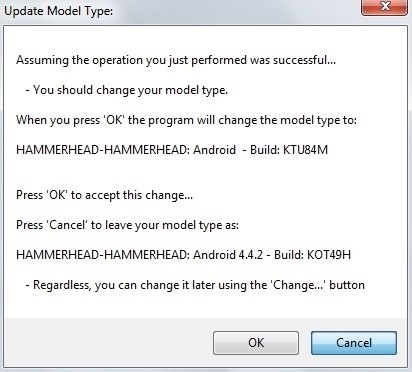
When the installer is finished, NRT will ask you to enter your device name and Android build number. For Device Name, select Nexus 5, and in the Android Build Number field choose any Android 4.4.4 build (this will be different for Nexus 7 owners—just click the Auto Detect Device + Build... button).
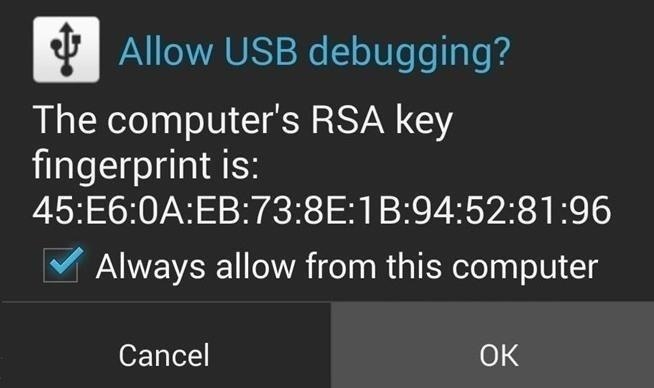
At this point, you'll see a dialog box instructing you to enable USB Debugging on your device. You've already covered that part in Step 1, but you'll also need to allow your computer to connect to your device at this point.
Unlock your device and you should see a dialog box asking you to Allow USB Debugging. Tick the box next to Always Allow From This Computer and tap OK.
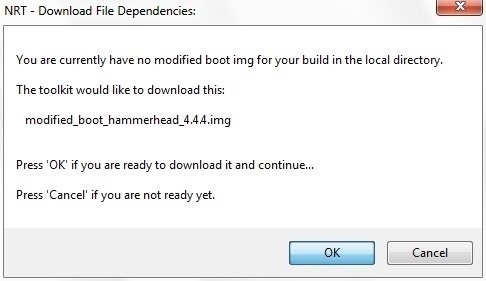
Now, NRT will prompt you to download some files. Just click OK on the next two dialog boxes to allow it to download everything it needs.
Step 5: Configure Nexus Root Toolkit
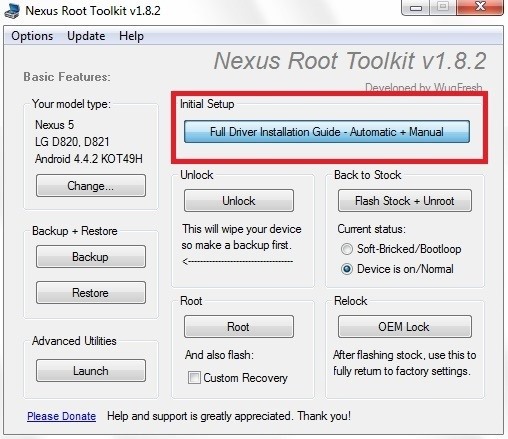
By now, you should have arrived at the Nexus Root Toolkit's main screen. But before you get to flashing the images, you'll need to make sure your device drivers are in order. Right up top, click the button that says Full Driver Installation Guide to begin.
From the next screen, just skip directly to Step 3. In here, take a look at the Recommended Driver Solution and click the corresponding option below it.
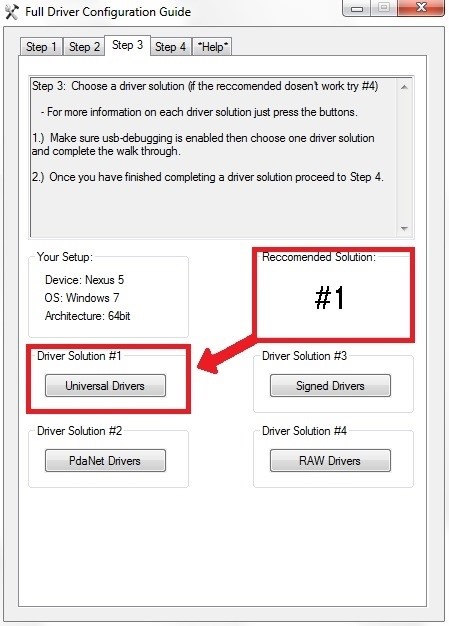
This will install all of the appropriate ADB and device drivers, so you know that your device will interact with Windows properly when it comes time to flash the update.
Step 6: Flash the Preview Images
At this point, the only thing left to do is install the Android L preview images. From the NRT main screen, click Flash Stock + Unroot to begin.
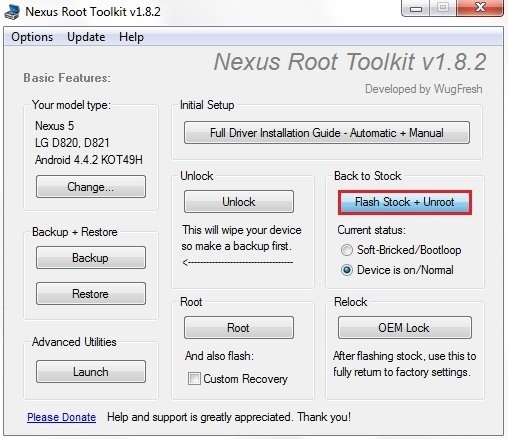
On the following screen, tick the box next to Other/Browse up top, and make sure that I downloaded a factory image myself that I would like to use instead is selected as the second option.

A file browser window will pop up at this point. Just navigate to your Downloads folder and select the hammerhead...tgz file that you downloaded earlier (or the razor...tgz file for the Nexus 7).

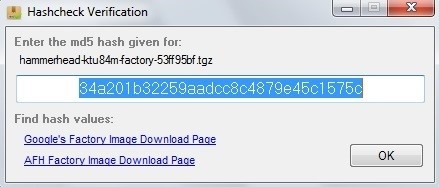
Shortly after that, you'll be asked to enter an MD5 number to verify the file's integrity. Copy the following text, then paste it into the field in that window and click OK:
- 8d92596aa038203fc6c8ff40a0e8b560 (this will be different for the Nexus 7)
At this point, the file will be verified and extracted, so give it a minute or two. When it's done, a window will appear that summarizes the install options you've selected. Click OK here to begin flashing the update, making sure that your phone doesn't get disconnected from your PC during this process.
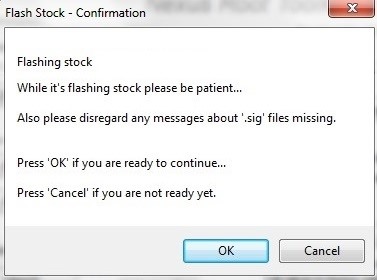
The process takes at least 5 minutes to complete, so don't freak out if it seems to get hung up on one aspect of the install. When it's finished, you'll get a confirmation dialog that instructs you to Press any key to exit, so do that. Close out any further dialog boxes, as you're done with the Nexus Root Toolkit.
At this point, it's safe to disconnect your USB cable, and give your phone at least 5 minutes to finish booting.
Getting to Know Android 5.0
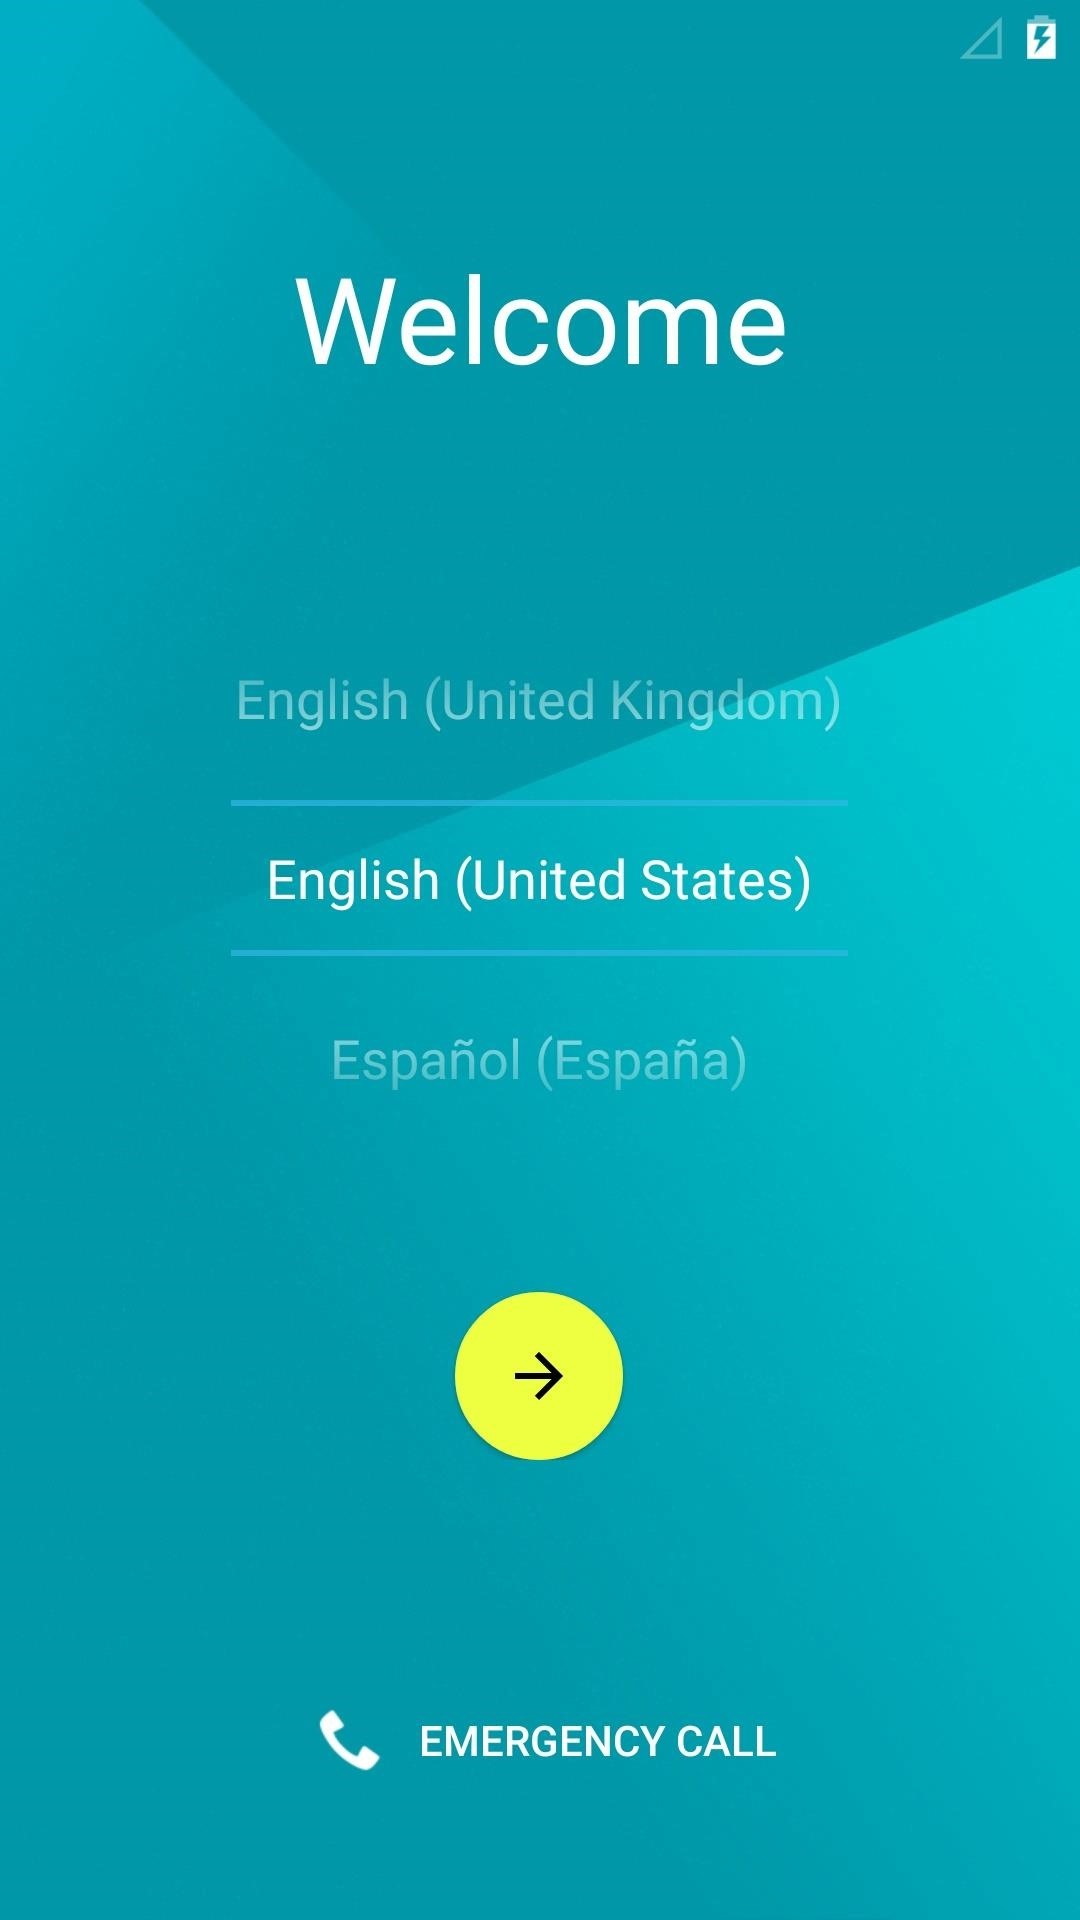
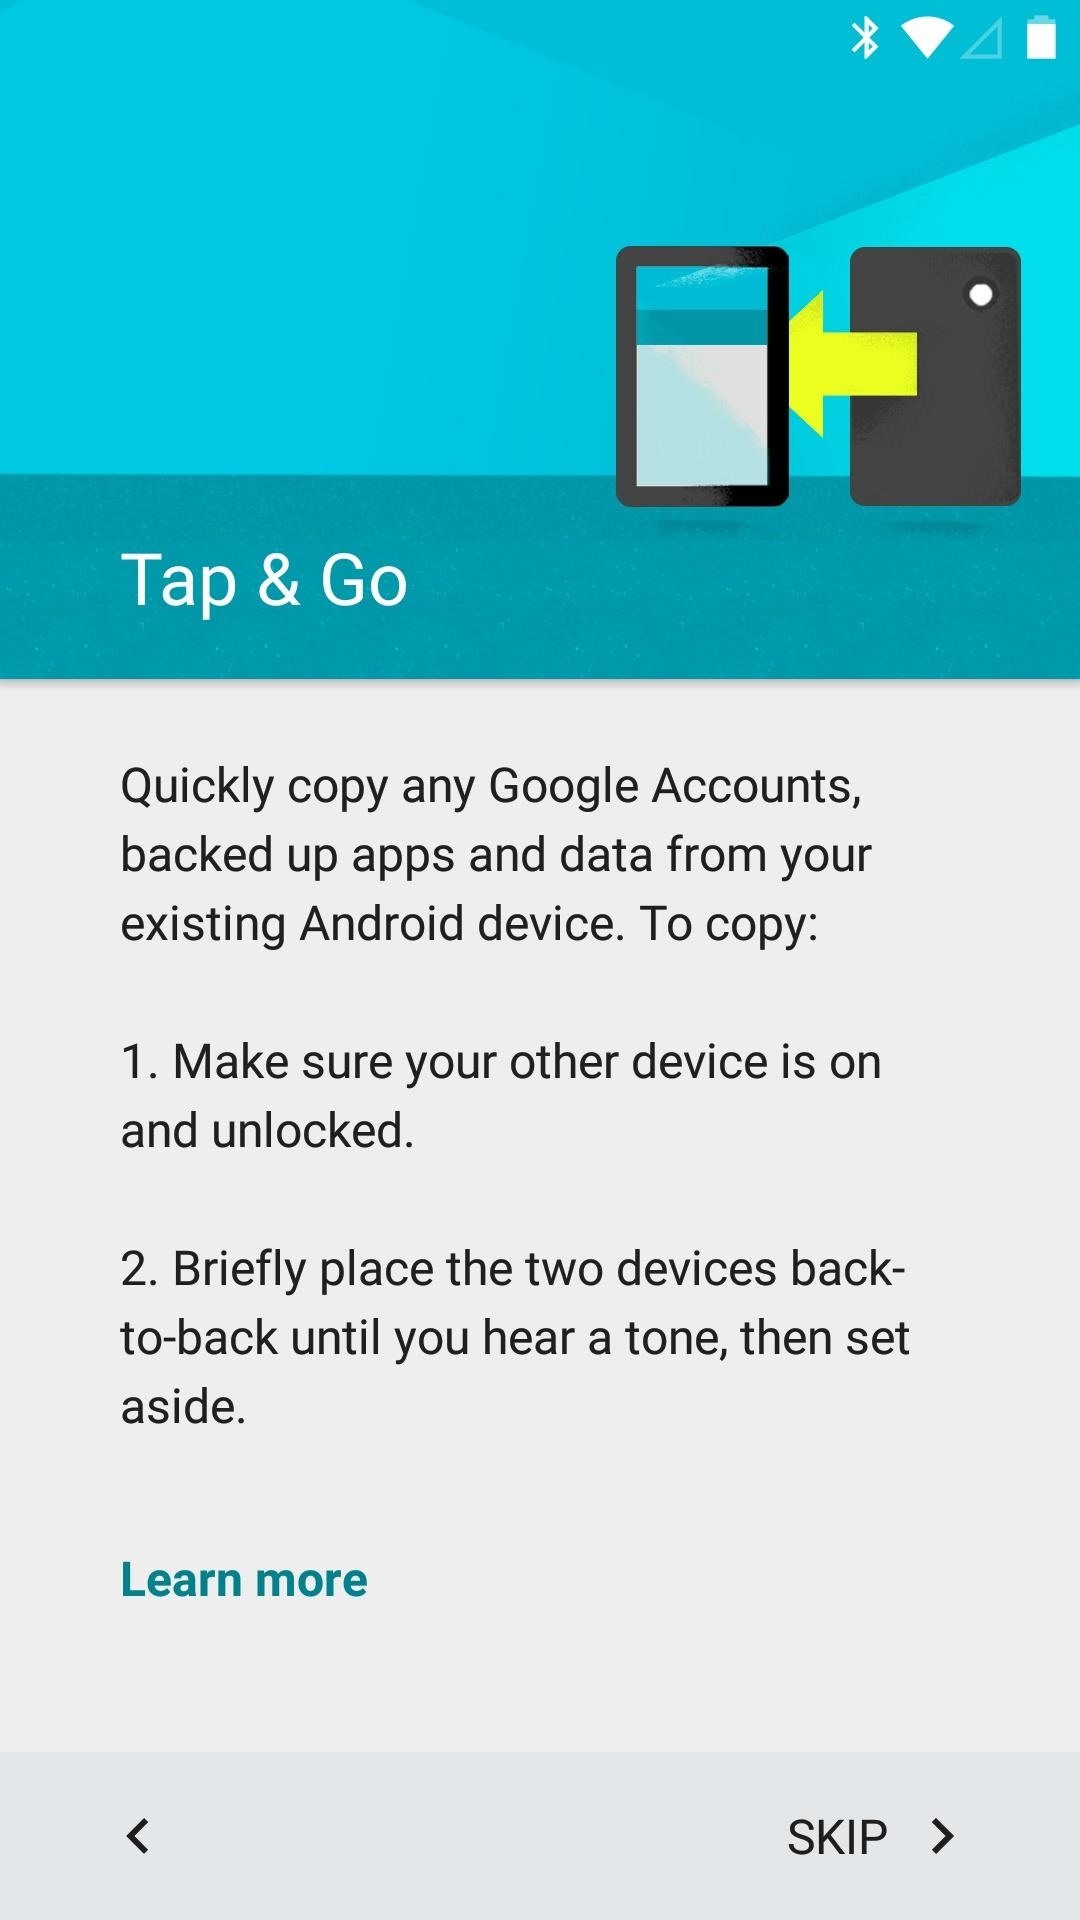
This new preview build has been greatly refined since Google's first Android 5.0 release in June. The updates are noticeable right off the jump—the initial setup guide has been polished, and there's even a new Tap and go feature that uses NFC to transfer settings and data from your old device.
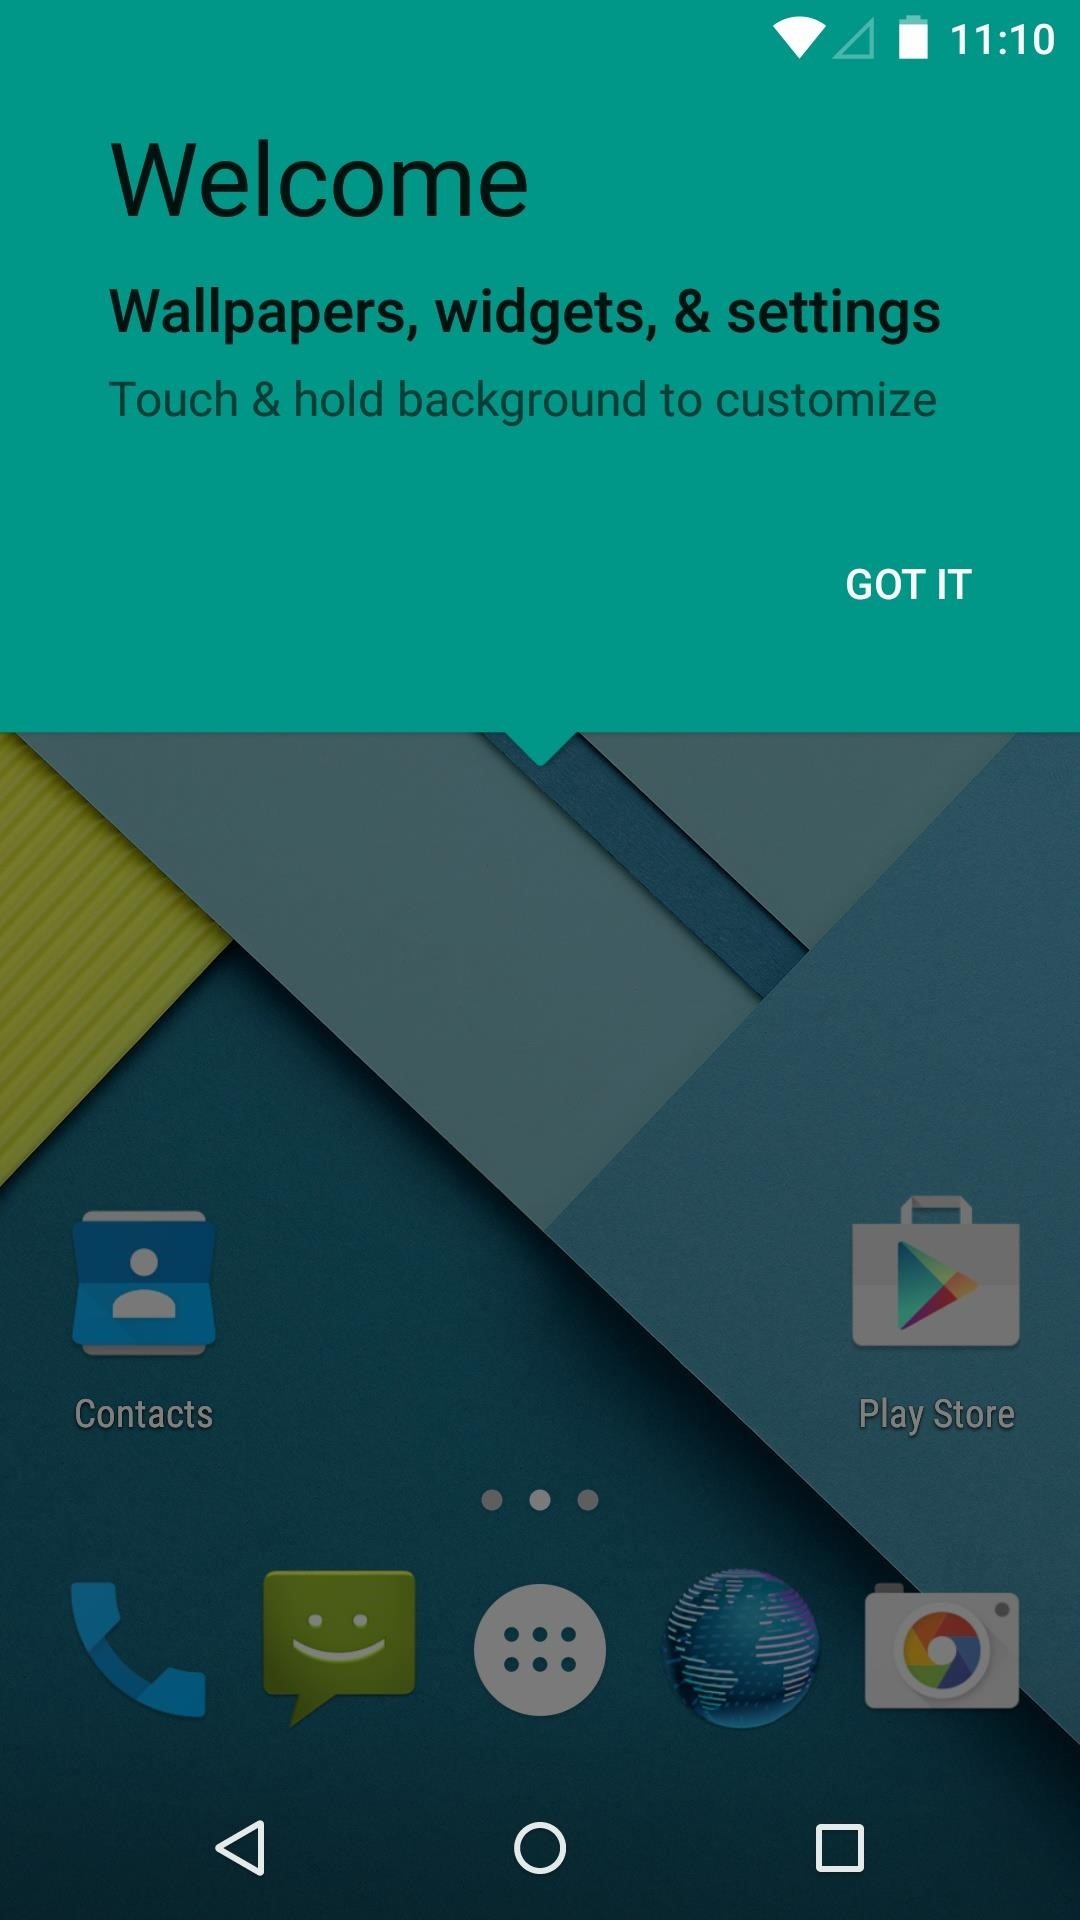
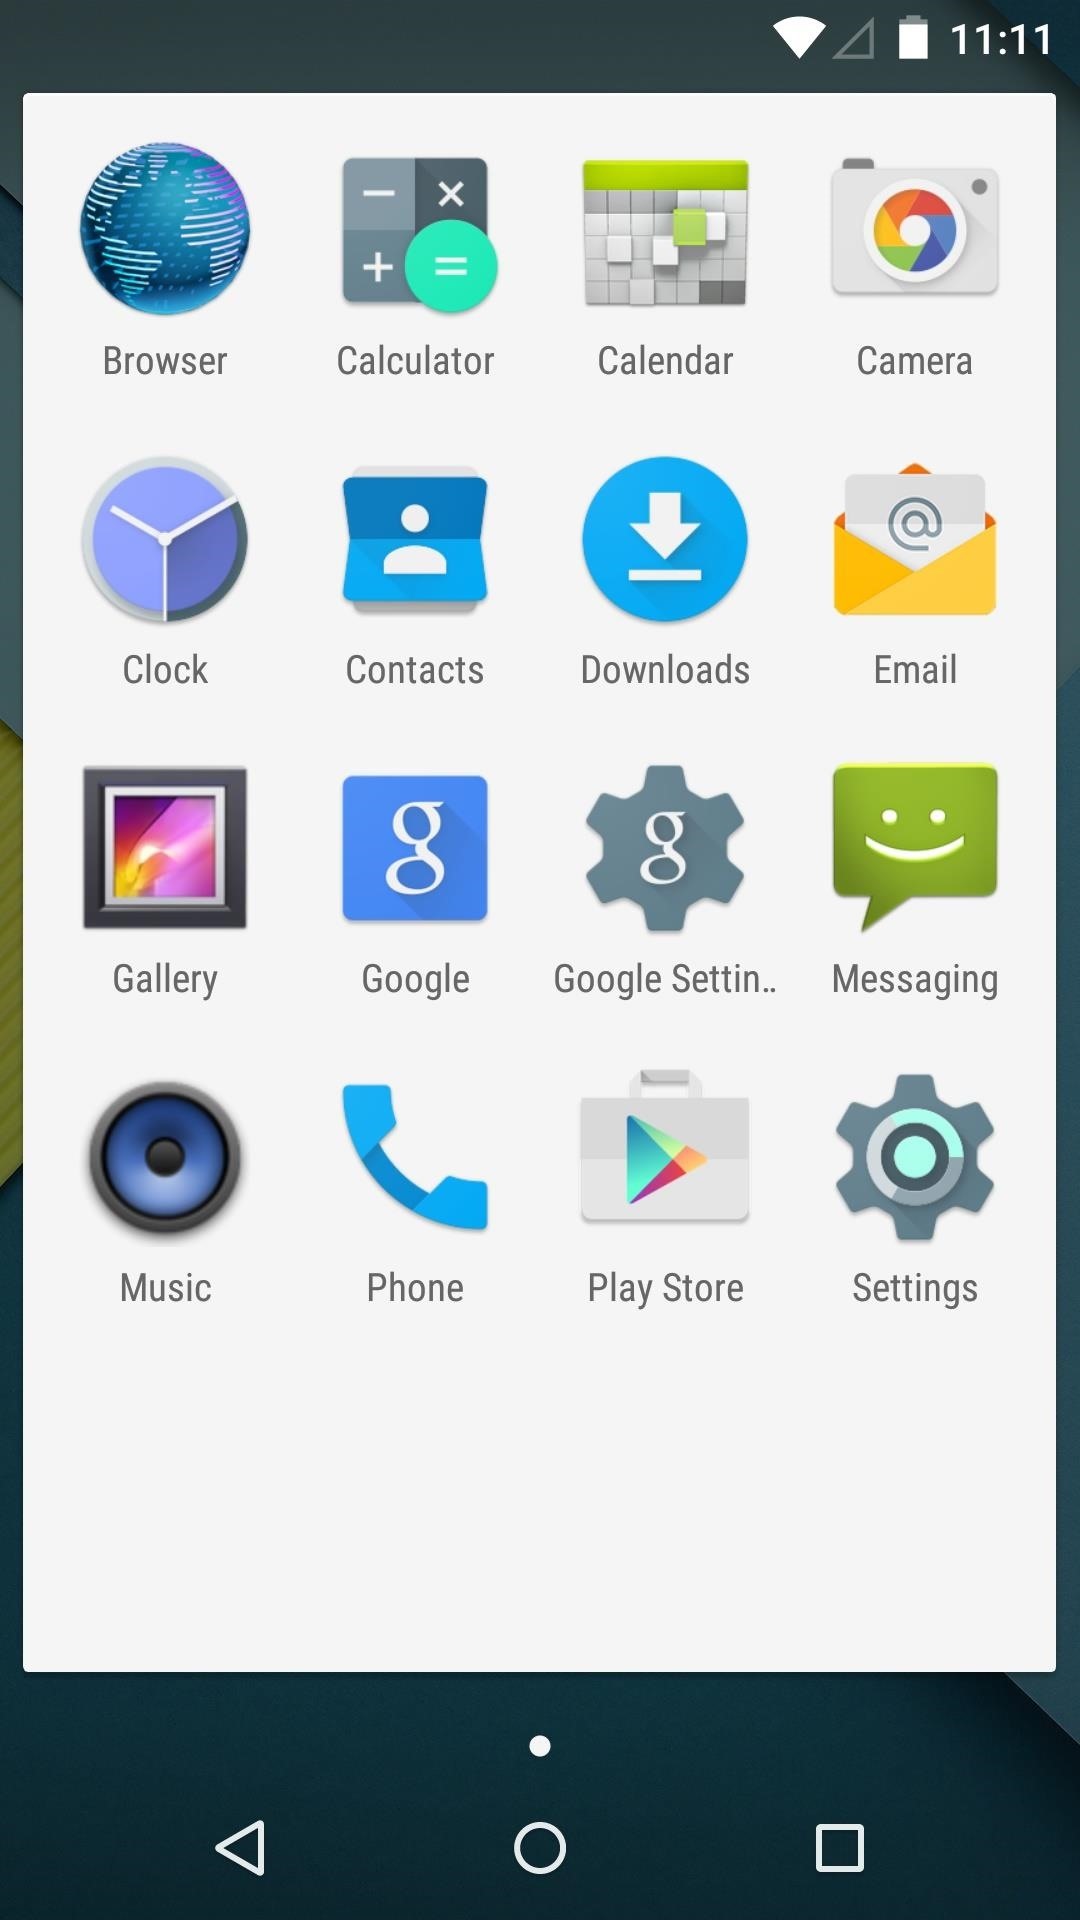
The home screen has a new overview menu, and the app drawer now has a white background that animates out when you press the app drawer button.
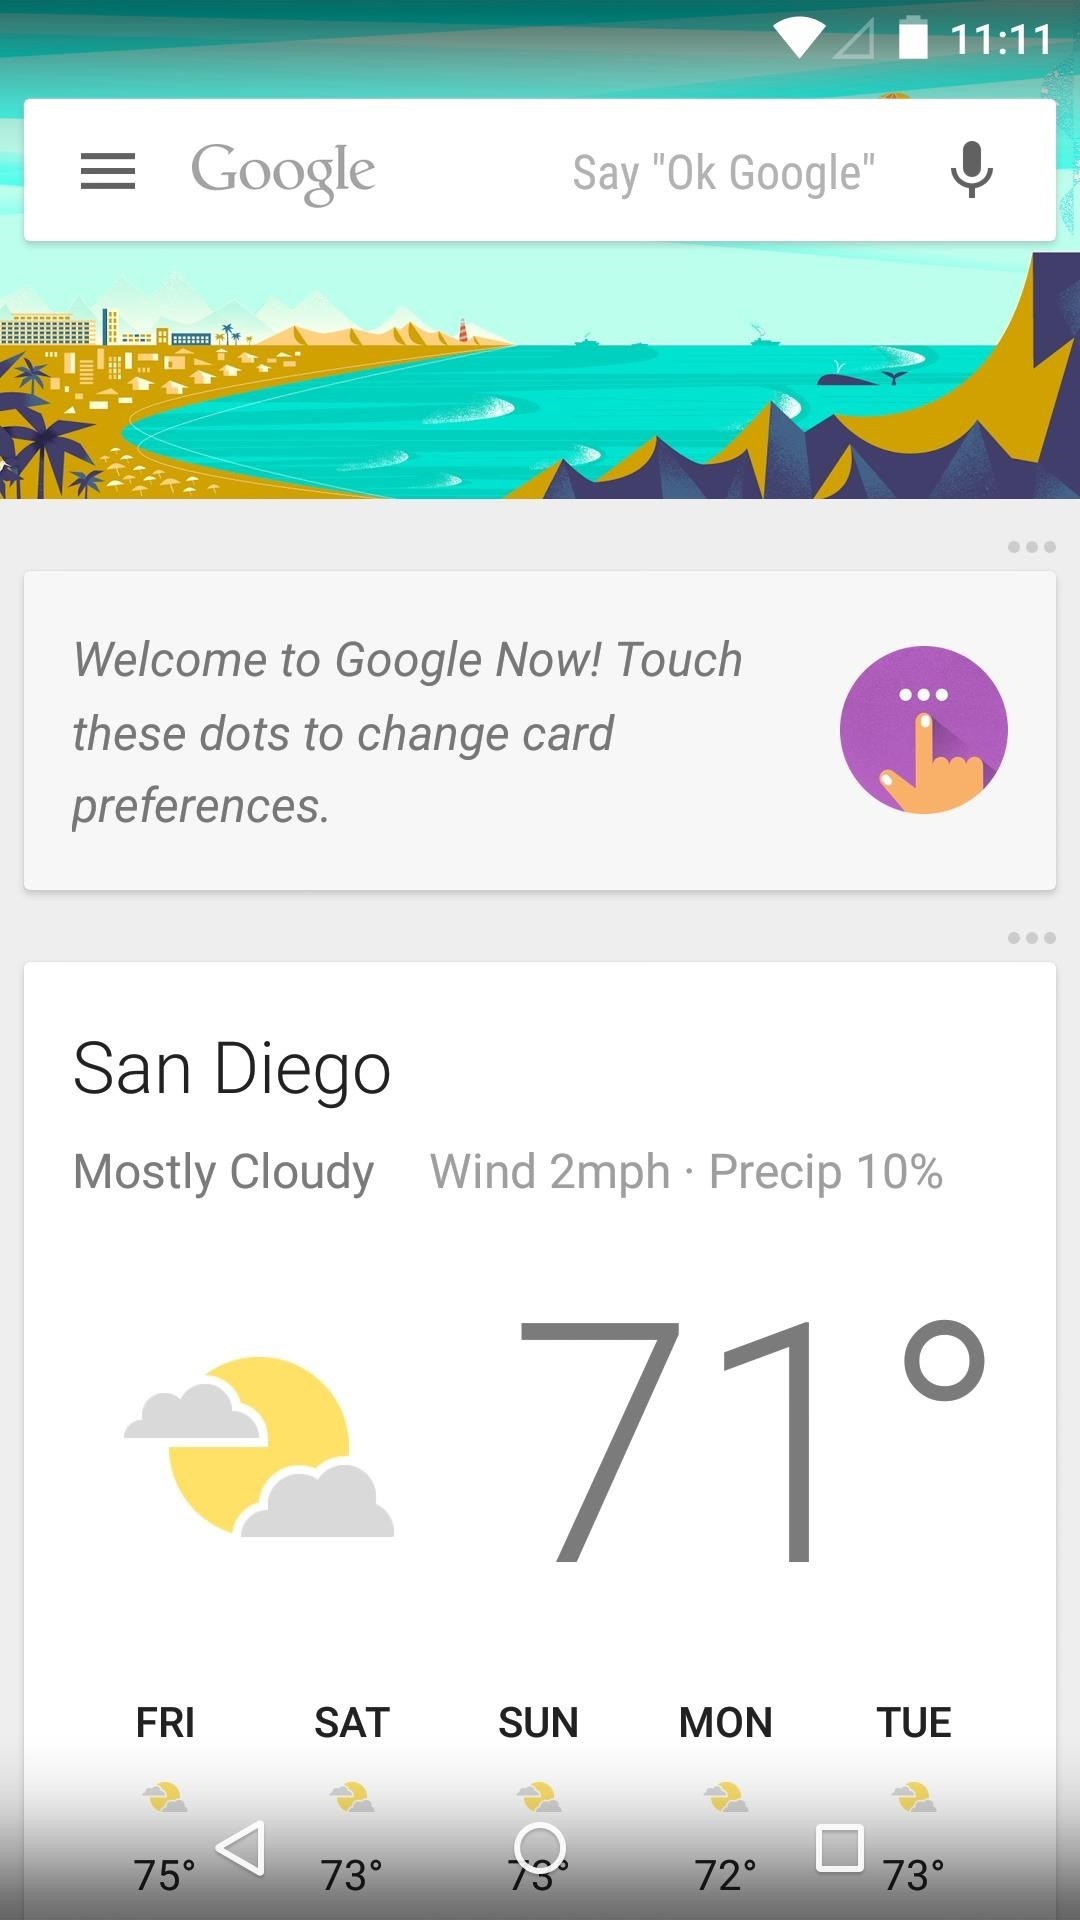
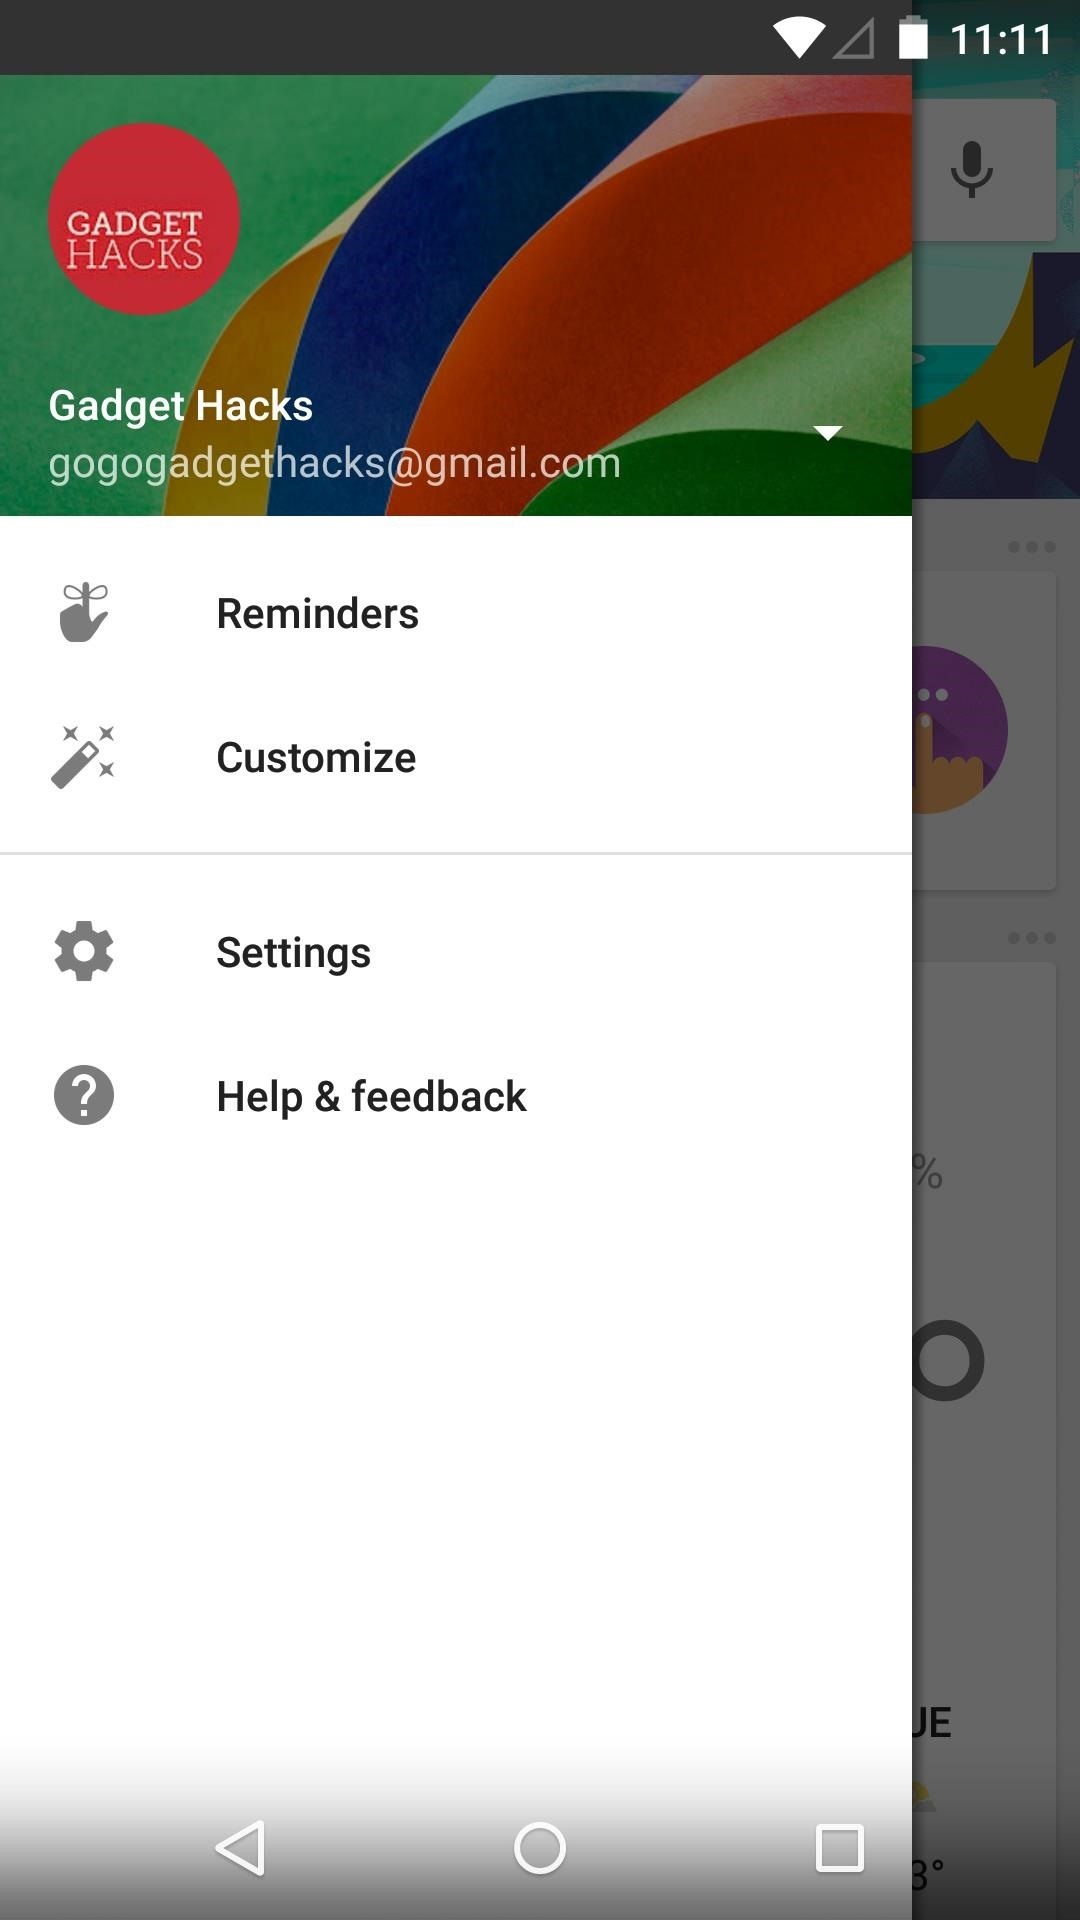
The integrated Google Now home screen page now has a slide-out navigation drawer. This gives quick access to settings and other customization options.
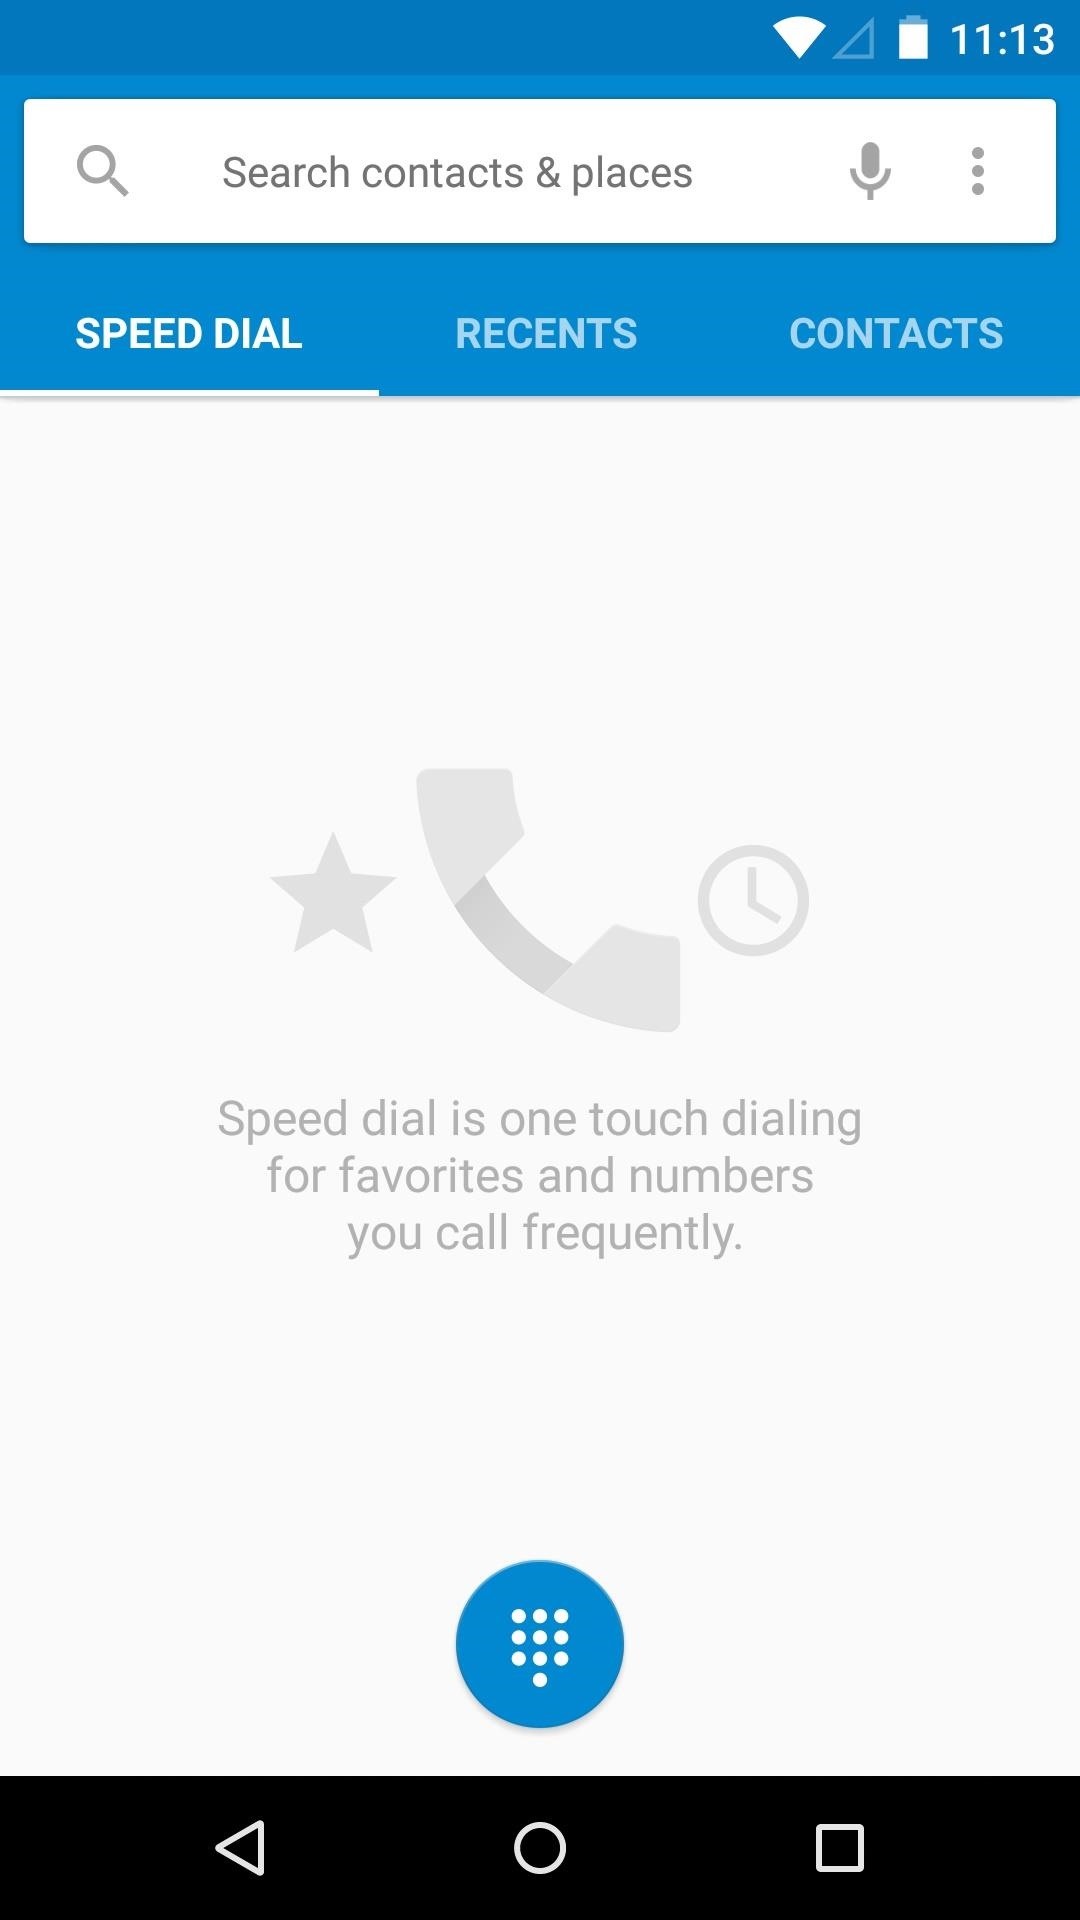
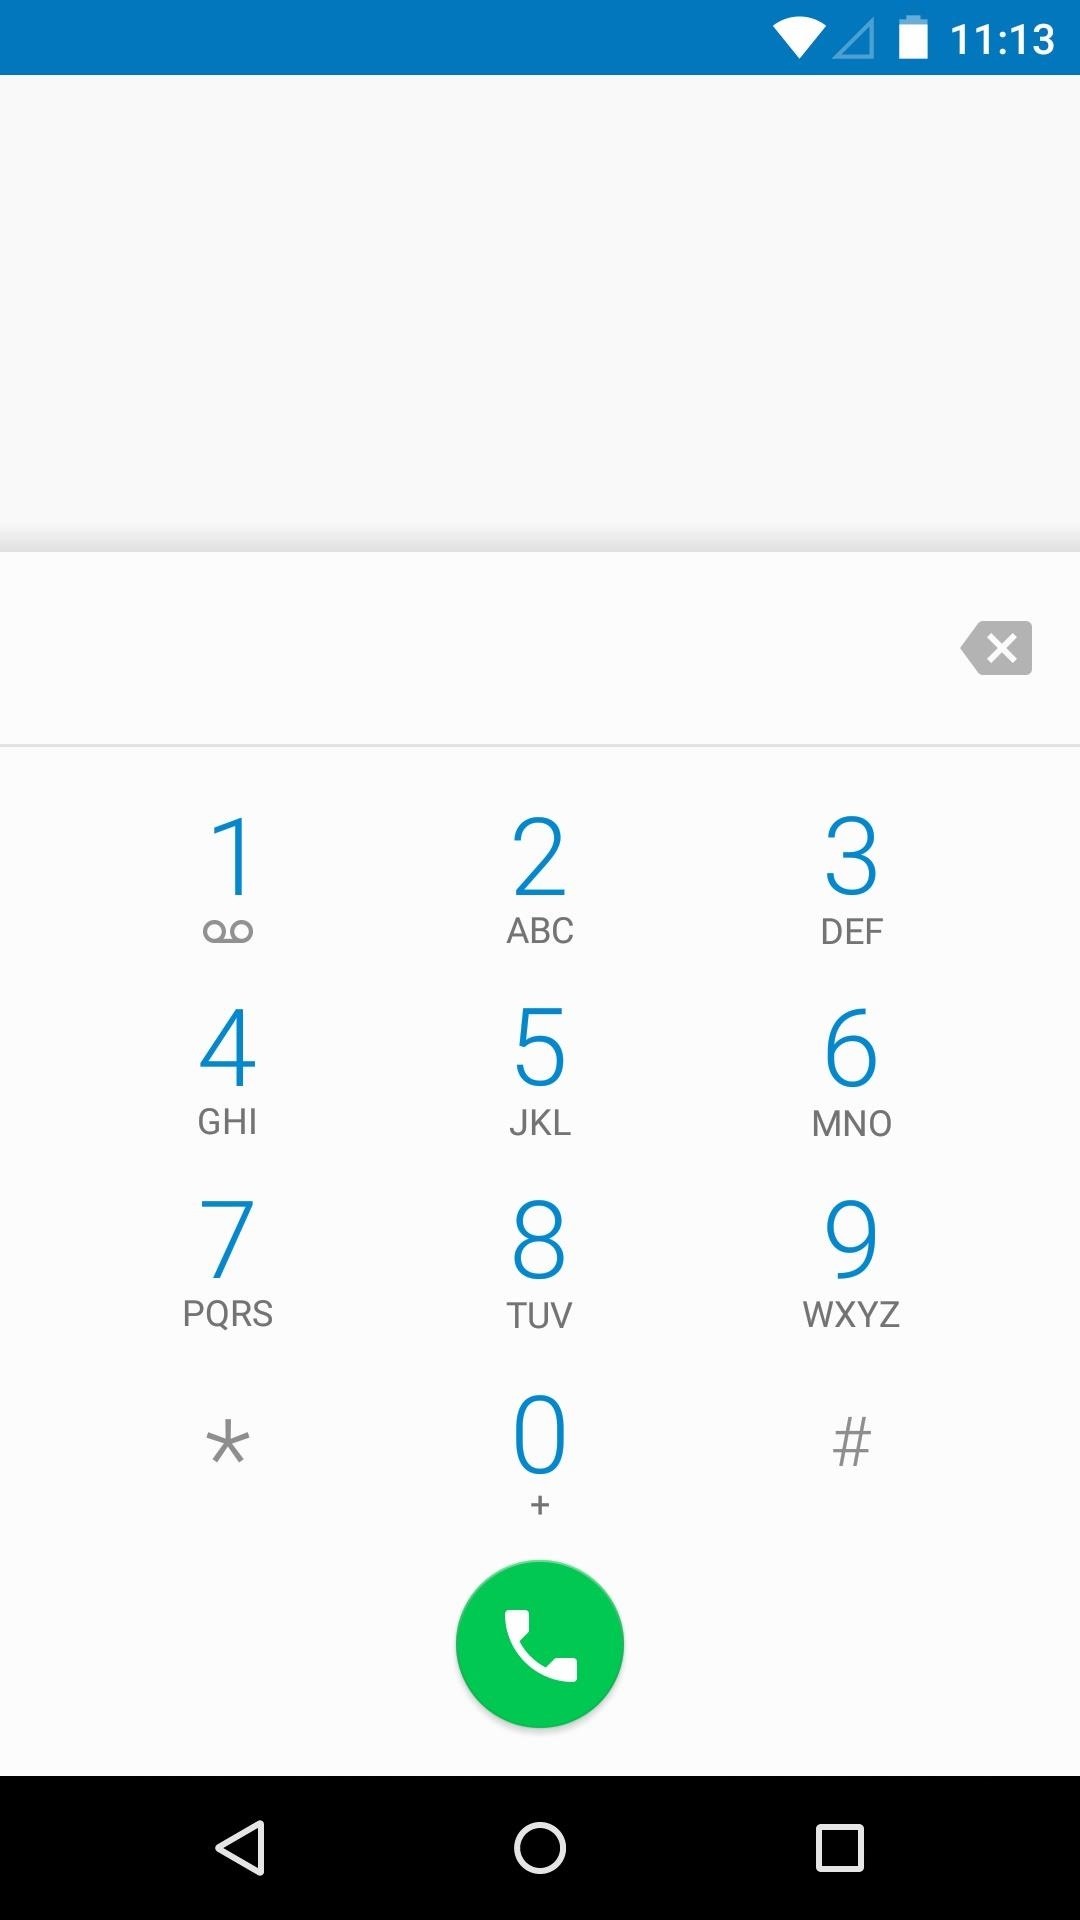
The phone app was updated in the original "L" preview, but has received a minor facelift this go-around as well. With a new color scheme and an updated Floating Action Button, it's looking just about ready for prime time.
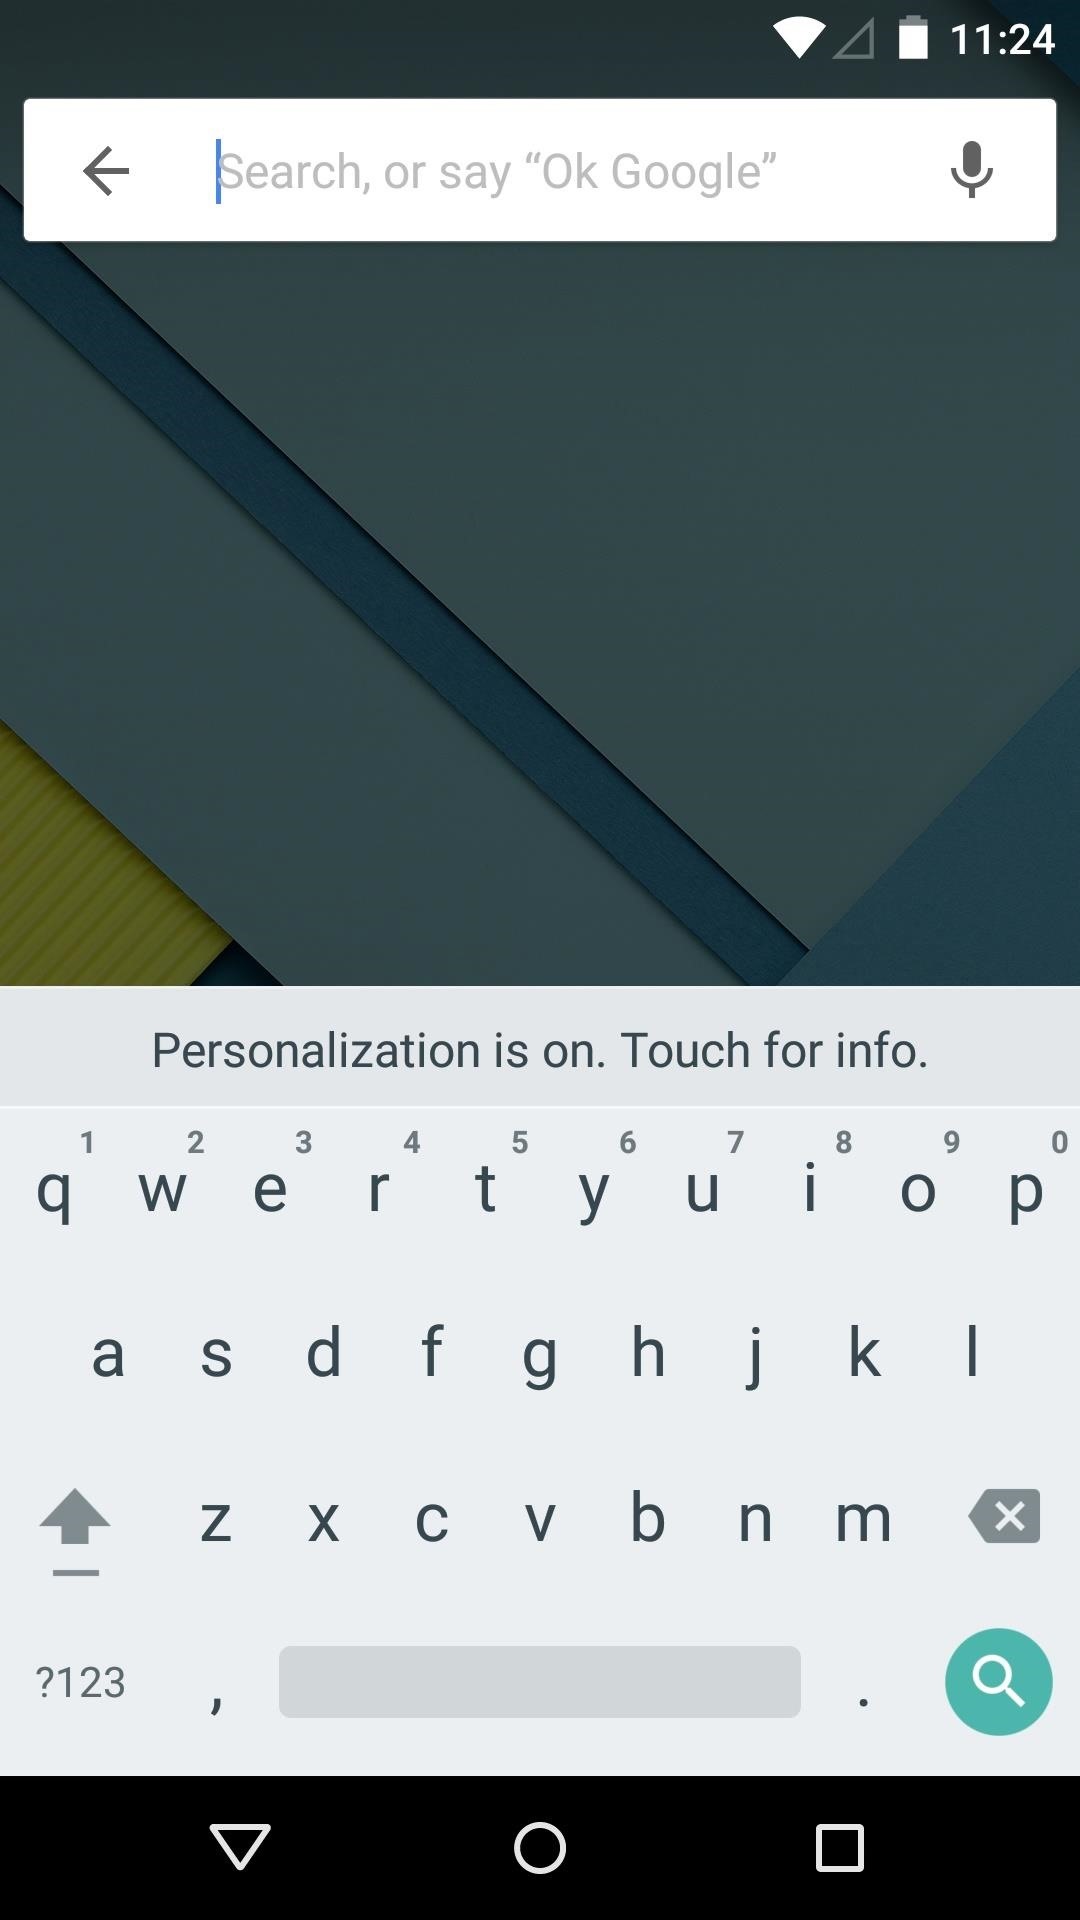
The default keyboard, which received a Material Design makeover in June's release, now has a white theme, which is enabled by default.

It's a big release for Android, and I'm absolutely loving it. What are your thoughts on the new UI elements? Let us know in the comments section below.
Just updated your iPhone? You'll find new emoji, enhanced security, podcast transcripts, Apple Cash virtual numbers, and other useful features. There are even new additions hidden within Safari. Find out what's new and changed on your iPhone with the iOS 17.4 update.


103 Comments
Very nice article. I'm on Android 4.4.4 kitKat on my Nexus 5 and wanted to install Android L. Now if I do this, will loose all my apps and data? Is there any method to upgrade to Android L developer preview without loosing any apps and data?
You are correct, the process depicted here will wipe all of your data. But yes, there are methods to install this without losing data. The only problem is you might experience some bugs. Your apps and their data were installed and generated on KitKat, and that may cause compatibility issues with L. I've tried it myself and nothing seems to be broken, but it's not recommended.
If you want to try it anyway, you can use this same method. But before you click Flash Stock+Unroot in Step 6, go to Options in Nexus Root Toolkit and head to the Flash Stock tab. Here, tick the box next to Enable No Wipe Mode and hit Apply. Afterwards, proceed to Step 6.
Will this unlock the phone to I never rooted my N5
It will, but you can easily re-lock it using the same toolkit. After Android L is up and running, but before you set up your accounts, use the toolkit again to select the OEM Lock option.
Thanks for the info
Great article.
I'm have to installed the new "Android L" and yeah, it's pretty nice, well, I had some troubles in the beginning, the control to navigate (back, home) don't see it, the phone shut down at the 30 seconds, so I had to do a Factory Data Reset and that solved my problem.
But in the end I back to the Android 4.4.4 kitKat, actually I don't really like the developer (beta) version, maybe if it could be rooted but meanwhile I'm wait for the official version.
Wow, the interface is top notch; cool recent app viewer... However, I have encountered 2 or 3 major problems.
Firstly, am unable to re-root using either the NRT or the CF auto root. I follow all root instructions, it finishes rooting quiet alright, boots back but SuperSU and BusyBox detect NO ROOT.
Secondly, my hammerhead is 32gs by default or stock, but now? Now it's showing that the total storage capacity is only 12.5gs.
Lastly, I couldn't locate the Autorotation button in Settings>>Display.
Please help.
Chainfire will be updating his SuperSU root tool for Android L. Once that happens, we should be able to root this build.
The storage issue is strange. We'll investigate and figure out what's happening.
Rotation is now located in Settings -> Accessibility, as well as on the notification pulldown.
For the wrong storage capacity, just do a factory reset. That'll fix it.
All is well except that the the device doesnt get rooted. It gives the error as attached in the picture.
SuperSU will be updated soon, and we'll let you know when.
hi broo... i ws having the same problem ... but it is solved now... all u have to do is that... after installing firmware u need to install custom recovery.... to install custom recovery...open nexus root toolkit... thn go to ""OPTIONS"" ... nd thn clik on custom recovery tab...nd select ""Utilize open recovery by Team Win Recovery""... and thn press "Apply"" BUTTON...
After that in "Root" option ... check the box ""Custom Recovery"" ... and press root button,,,
it will install TEAM WIN RECOVERY MODE..on ur phone nd will root ur phone... thn u can b albe to do access with SUPER SU :)
boldremember that root have issues usinf ART that now its default
so if i want to get back to 4.4.4 i just have to do the same but flashing the 4.4.4 file????
yeah i didnt understand how to bold my text
bold hola bold
nop can anyone please teach me :(
You can bold text in comments by placing it in-between a set of asterisks. For example, *to bold this text use asterisks*, and it'll look like this: to bold this text use asterisks. (PS: two asterisks side-by-side equals a real asterisk).
When I click the no wipe mode it gives a notice will the flashing of L work property
It's recommended that you turn that off. You can definitely try with the "no wipe" setting, but you'll probably get a good amount of force closes.
But, again, fine to try. If it becomes too problematic, you can keep "no wipe" mode on and go back to 4.4.4, or turn it off and install "L" again.
thanks a lot but if a want to roll back to 4.4.4??
which be the steps????
just hit airplane mode to fix it
did all the step mentioned and got same dial boxes from the tutorial. At the end when at step
'For some reason, Android L doesn't seem to want to boot up if you're still connected to your PC. So disconnect your USB cable at this point, and give your phone at least 5 minutes to finish booting.'
i disconnected my phone, but the phone was stuck on bootloader
and I could change the option via volume +- to RECOVERY MODE, POWER OFF, START and RESTART BOOTLOADER....
it was on START after disconnecting So entered that option via power key, it switch off and started again with 4.4.4....
I have not rooted the phone or unlocked it, it the same box pack. Is some thing Im missing ???
Try repeating these steps but hit the Unlock button in Nexus Root Toolkit before you do Step 6. This will wipe all of your data, though, if it's not gone already.
Is this possible with Nexus 4?
Not yet, but when a stable port is available, we'll have it here.
OK I flashed L now to go back to stock do I need to put in the new build # and if so where do I find that. And It just be using flashstock +unroot correct when I test it is downloading KTU84P image. . Just making sure that is correct. . Thank you
To roll back to Android 4.4.4, check out Dallas' guide here.
Basically, it's the same steps, but with a different image file.
finally someone answer me, thanks Faisal
Update got it!
Will I be able to flash the .tgz on my rooted Nexus 5 @Version 4.4.2 without unrooting? Thanks
Yes, but you will have to re-root afterwards. Dallas has a guide up on that right here.
Just bear in mind that things like Titanium Backup and Xposed currently aren't working on L.
my phone is getting restarted after every 30 sec or so, i cant even change any setting or do any changes too less time before it restarts again... what should i do...
Why don't you boot into recovery mode and do a clean wipe. Maybe that would help.
Yaa I did the same.. I guess there are some app which are not getting compatible with android L... Right now kept only basic apps its work fine now.
How To Install On Your Nexus isn't really accurate. There are more Nexi than razor and hammerhead.
After this my Nexus 5 doesn't start more :/
hey i have installed the preview but i want to go back to 4.4.4, what build number should i select in the Nexus Root Toolkit,because it only shows upto 4.4.4?
I have installed the android L preview, but i want to go back to 4.4.4 , what build number should i select in the nexus root toolkit ,because it only show upto 4.4.4?
You need to download the factory image for your device and flash it the same way as you flashed the android L preview.
Yeah I did it..Thanks for the reply though..
Hi....i've already rooted my Nexus 5....can i still use this method to upgrade to Android L or i need to re-root it and then upgrade ??
You can use this method, but you will lose root. But, you can get it back using this method.
After I installed Android L, everything is done setup, and if you can see it on the left side of the screen, there are some blue stripes on it. I wonder why.
need help bro
i do the same thing but there''s nothing changed on my nexus 5.
the phone stay on 4.4.4
plizz fix it for me.
and my nexus 5 is not rooted.
Are you sure you downloaded the correct image file?
yes bro i downloaded correct image file?
form the link given in your method.
what should i do now?
should i root my nexus first and than try it again?
thanks a million!!! do i need to do fastboot oem lock when done?
The bootloader should have automatically relocked itself after installing L.
Thanks so much. I am glad this is here.
Here you go: b293a5d3a4e07beabebcc0be85ad68a2
after i done everything it's the same 4.4 i downloaded the file 3 times and i will try to reset my phone
Would I able to get Google OTA updates after doing this....Would I get final and full android L when Google will launch it..???
Plz help me..!!!!
Yes and yes.
Not sure about the OTA. But you can download the factory image the day its is launched and flash it the same way you flashed this one. There's no difference.
some 'AutoIt' is coming when I try to flash the phone
please help.....mail me jainabhi39@gmail.com
I donno its relevant to ask this question here,but I need help after struggled a lot by updating my nexus 5 to 4.4.3 I done factory reset but still Google play store showing error only and recently received 4.4.4 update and while I am trying to install this update I am receiving error while booting.
And my ultimate aim is to remove my Google play store error and I want android L
Tell me what to do and my device not rooted.
So, the toolkit is not working for you?
After convert to L, Xposed will not be available anymore right? at least for this period, since L is run on ART.
That is correct!
when can i do this this on my nexus 7 2012 model because this guide gives factory images of nexus 7 2013 model
I previously used this kit for rooting my phone but after that i installed it so do i need to go through driver installation process after installin this kit again??
Google has just released the source code for the 2012 Nexus 7. It's not an official build, so we'll need to wait for a developer to put a ROM together.
When that happens, we'll have a guide up.
thanks and what about drivers installation??
You can install proper drivers if you need to using this toolkit.
I get down to the final step and it ALWAYS says ADB devices not found. Any suggestions?
I've had problems on that part in the past as well. What worked for me was playing around with the USB connection settings on the phone. Basically, just tap the Connected as a media device notification and tick/untick the various boxes in there.
I've found it works best with Camera (PTP) selected and Media device (MTP) deselected, but unticking both options might work as well.
Wow, that's what it was, I wish I would've have asked over an hour ago lol.. soon as I did that, I was up and running ten minutes later. Thanks!! :)
After I tried to greenify something, my N5 crashed, and lead me to the loading page with 4 dots, for about 1 hour already. Any idea on what is going on?
If you have a custom recovery installed, try wiping data/performing a factory reset. Otherwise, you may have to reinstall Android L. That's simple though—just follow this guide again, except when you go to flash the preview images in Step 6, make sure to tick the box next to Softbricked/Bootloop under Current Status in the toolbox. Then just follow the prompts and they'll tell you how to put your phone into bootloader mode so that Android L can be reinstalled.
Me too it happened, but it's stuck in the google page. I will do that in the morning. Thank you for helping me. :)
MY NEXUS 7 IS ROOTED DO I HAVE TO UNROOT FOR INSTALLING ANDRIOD L
You don't have to unroot before installing Android L, because the process of installing it will unroot for you.
MY NEXUS IS RUNNING AT 4.2.1 CAN I DIRECTLY UPGRADE TO ANDRIOD
L
Yes, using this method you can switch directly from whatever version you're currently running to Android L. But if you're running 4.2.1, you must have a 2012 version of the Nexus 7. If that is the case, then there is no official build of Android L available for your Nexus (only the Nexus 5 and 2013 Nexus 7 have official images available).
How to roll back to android 4.4.4. from android L?
Please help to new user.
You can refer to this guide for everything you need. It's essentially the same method as shown here, but with a different factory image file.
now its the 3rd day after i install Android L, yesterday @ 5.30pm i charged battery 100% over USB and now exactly 24 hrs over and showing 44% left and 18 hrs left!! so significant battery improvement/utilization is there right?
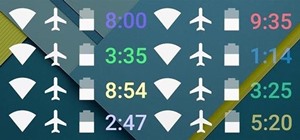
You are correct, a lot of battery optimization options have already been baked into Android L. This is part of a new initiative from the Android team called Project Volta.
I have unlocked the phone before installing Android L through NRT, so now did I have to unlock it back? or no need because its not necessary, or if I have to unlock it back how I will do that & will this affect the present working condition of phone?
I would just leave it unlocked. "Unlocked" just means the bootloader is able to boot/load up a non-stock recovery; the rest of the phone's software is not affected by that.
Thanks Dallas.
When i get to the part where it's supposed to flash android L to my device, nothing happens. I've had the prompt come up with the RSA fingerprint and i clicked always allow. It states that it could not communicate with my device. Any suggestions? I have tried rebooting my pc and clicking the 'revoke usb debugging permission' button under the developer options.
Try playing around with the USB connection settings in Android once you get to the step where it keeps hanging up. If you tap the "Connected as a media device" notification that shows up,, it will take you to a screen where you can choose between MTP and PTP modes. Try switching between these two options, or turning them both off.
If none of that works, there may be something wrong with the connection between your phone and your PC. Possibly the usb cable or port, for instance.
Is there any way to install Android L in other devices like dell venue 7 tab which have android 4.4.2 kitkat?
No...or at least not yet. There's a working port of Android L for the Nexus 4, but other than that, only the Nexus 5 & 7 (2013) have working builds right now.
i had installed android L via this method couple of weeks back. Its working fine and great. I need to root my phone, there are some app which needs it.
need help about it.
I fixed my problem. For those with the same one as me all i did was turn off my phone and booted it into the bootloader (volume down+power button). I then just ran the script as normal. For whatever reason the script just would not boot my phone into the bootloader. Cheers!
Good to hear! And thank you for the tip.
hi people. I have installed android l on my nexus 5 and the gallery is missing. i can find only "photos". and i have another prob with music. When i set any equalizer the volume output is very low on earphones and i have to increase my volume upto 80% for a proper music output. please help me over this prob. some times im facing problems with my front camera aswell . please some one help me over this.
You have to remember that this is a preview (beta) build, so no everything will work as you're used to.
In any new Nexus builds, the "Photos" app is the default gallery.
As far as volume, that should not have been affected. Did you have any volume mods on your previous build?
What is the problem with the front camera?
i am unable to use security applications like app lock or lockdown pro
so i tried this method and it didn't work :/...after choosing the .tgz file for Android L and entering the MD5 number during the HashCheck, i get a message that says: This script will not continue. Try downloading it again, or use a built in downloader.
please help!
nevermind! i i sorted it out!
Great guide, but having some issues. I get as far as it starting the upgrade process, but then I get the following error:
Device version-baseband is 'M8974A-2.0.50.1.16'.
Update requires 'M8974A-2.0.50.2.08'.
I'm trying the update using the "Enable No Wipe Mode". I've checked and I have the correct device selected, but figure I'm doing something dense...?
Ignore me - sorted it :-)
I know its a little late but I tried this a while back and I got in a bootloop and can not fix it at all. I had android l for like 1 week when it happened to me. at night, it started flashing and I just turned it over cause i was tired. Anyway, I woke up and I tried to boot it up and got in a bootloop. Any help?
It would be really hard to nail down what happened overnight there without going through a long list of troubleshooting steps. But, my first suggestion would be to wipe your phone's cache and dalvik. Hold down the power button to force a reboot, then quickly press and hold the Volume Down button as soon as the screen goes black. When the bootloader menu comes up, use the volume buttons to highlight Recovery Mode, then press the power button to select it. If you have a custom recovery installed, it should come up at this point. Go to Wipe —> Advanced Wipe, and ticking Cache & Dalvik.
If you don't have a custom recovery installed, you can try factory resetting the phone with the stock recovery. You'll lose all of your data with this second method, but there's a good chance it'll cure your woes.
If all else fails, run through this tutorial again, but when you get to Step 6, make one minor change. Before clicking Flash Stock + Unroot in NRT, select the Soft-Bricked/Bootloop option just beneath it. It should attempt to automatically boot your phone into bootloader mode, then the rest of the process will be the same.
Android 5 lollipop sdk file will be available tomorrow for developers. Do we have to follow same method to install lollipop? Or you making a new tutorial for it??
I went ahead and updated this article to include a new video tutorial and download links for the preview build that came out this morning. Hope that helps!
when there is a root avaible should we use the same method on the rooting post for the L DEv preview?
hi, after i flash to L preview, and once it finish all the updating.
The phone (nexus 5) screen is all blank. i can only see the notification area. and at the bottom, only back button is there (the button is unusable). basically i cant do anything with the phone.
How to recover? BTW, i cant even go to recovery mode now. when i try to go recovery mode, it show the android icon with exclamation mark.!!
please help.
btw: i fixed it while waiting. If anyone encounter what i encounter. Just reset your phone to factory default. I did it using the android device manager, so make sure your phone is enable for it. Good luck guys.
BTW, nice L.
Please help!!!
The dialog with RSA fingerprint doesnt show up what can i do ?
Im using an nexus 5
I have downloads android l preview hammerhead from the given link butwhile flashing it gives an error
"Update package does not contain system.IMG" ... What should I do now?
Dear please tell me how to install android L in qmobile i12?
may i install this OS on Qmobile Z8 would it be compatible with this or not.
Share Your Thoughts