

We Nexus users are fairly spoiled. There's a ton of third-party development for our phones, which translates to a virtually endless stream of custom ROMs being made available to us.
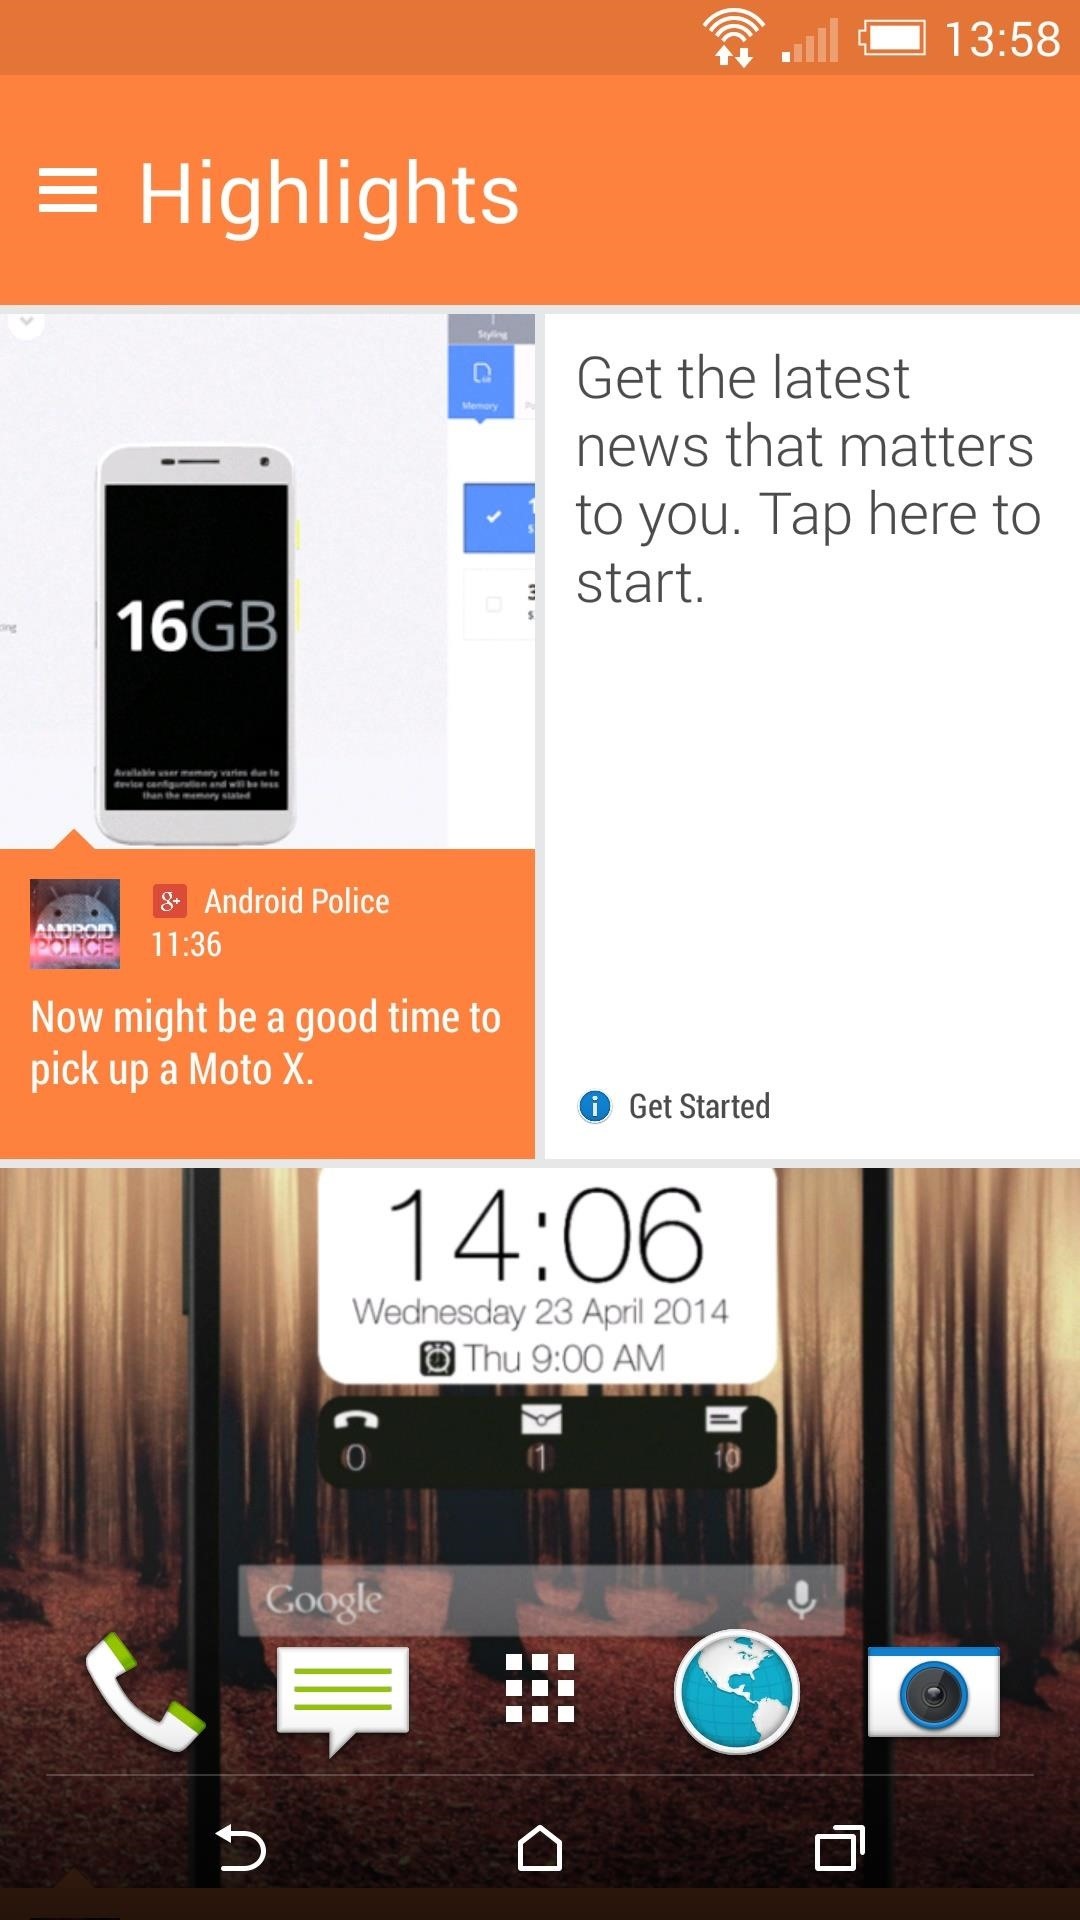
When HTC updated its flagship phone earlier this year to the HTC One M8, they also improved their proprietary Sense skin. Adding tons of cool new features, this software had me a tad bit jealous, to say the least.
Thanks to developer GalaxyUser, we can now have this software on our Nexus 5. This ROM is in its alpha stage, so sounds and the camera do not work at this time, but the development community at XDA is rapidly working out these last few quirks.
For the early adopters out there, this softMod tutorial will take you through the process of trying out HTC's new Sense 6 software.
What You'll Need to Get Sense 6
Step 1: Download the ROM & Patch Files
With this install, there's a base ROM and a set of patches that you'll need to flash. Directly from your Nexus 5, tap this link to get the ROM, and this link to get the patches. Alternatively, you can download the files to your PC and transfer them over to your device's Download folder.
Note that there are no OTAs for this ROM, so whenever new bugs get fixed, you'll have to flash the updated ROM and patch files, which can be found in the thread on XDA (check out the changelog for new updates).
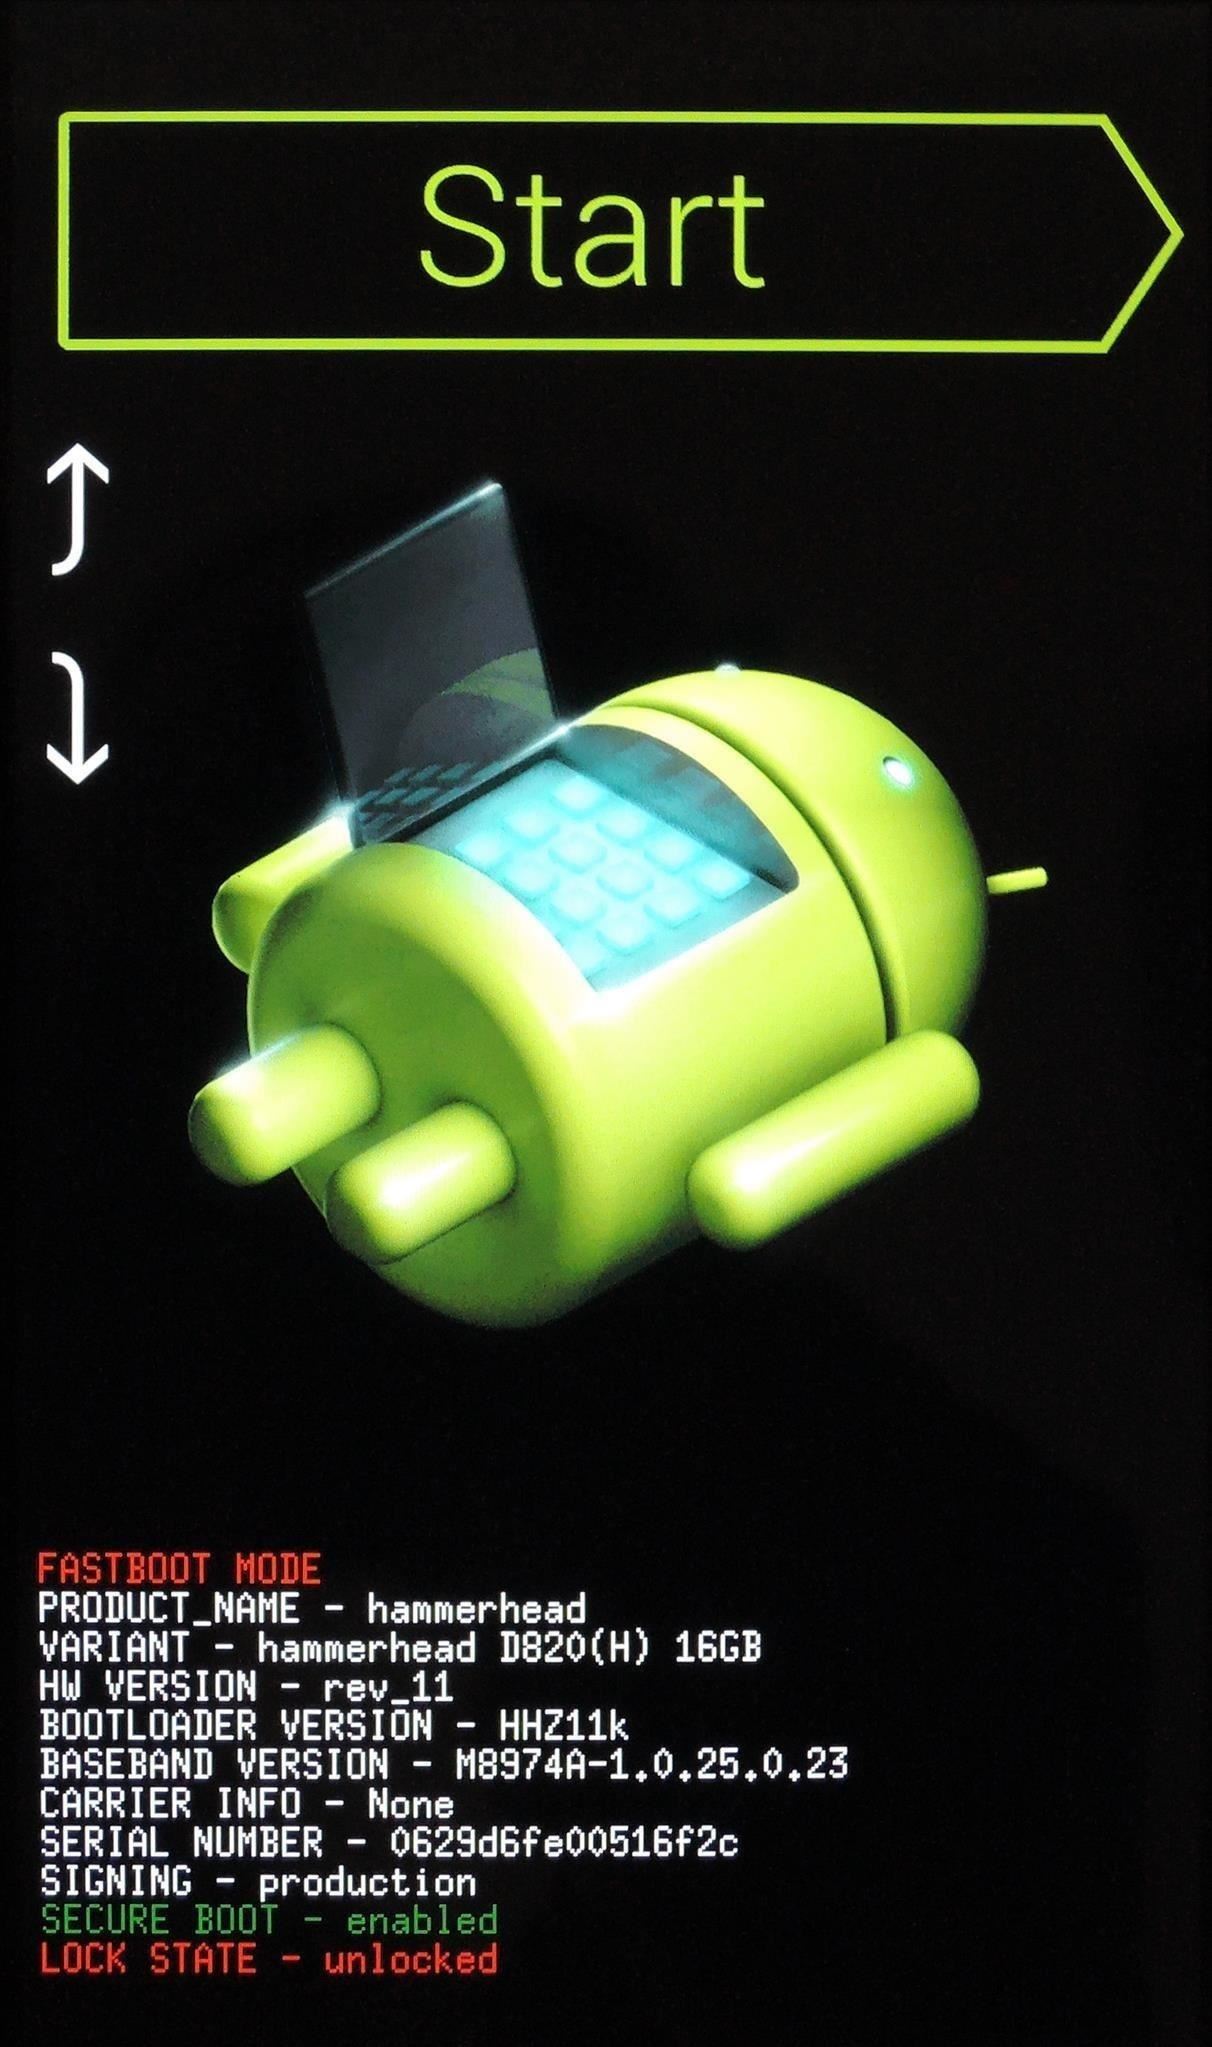
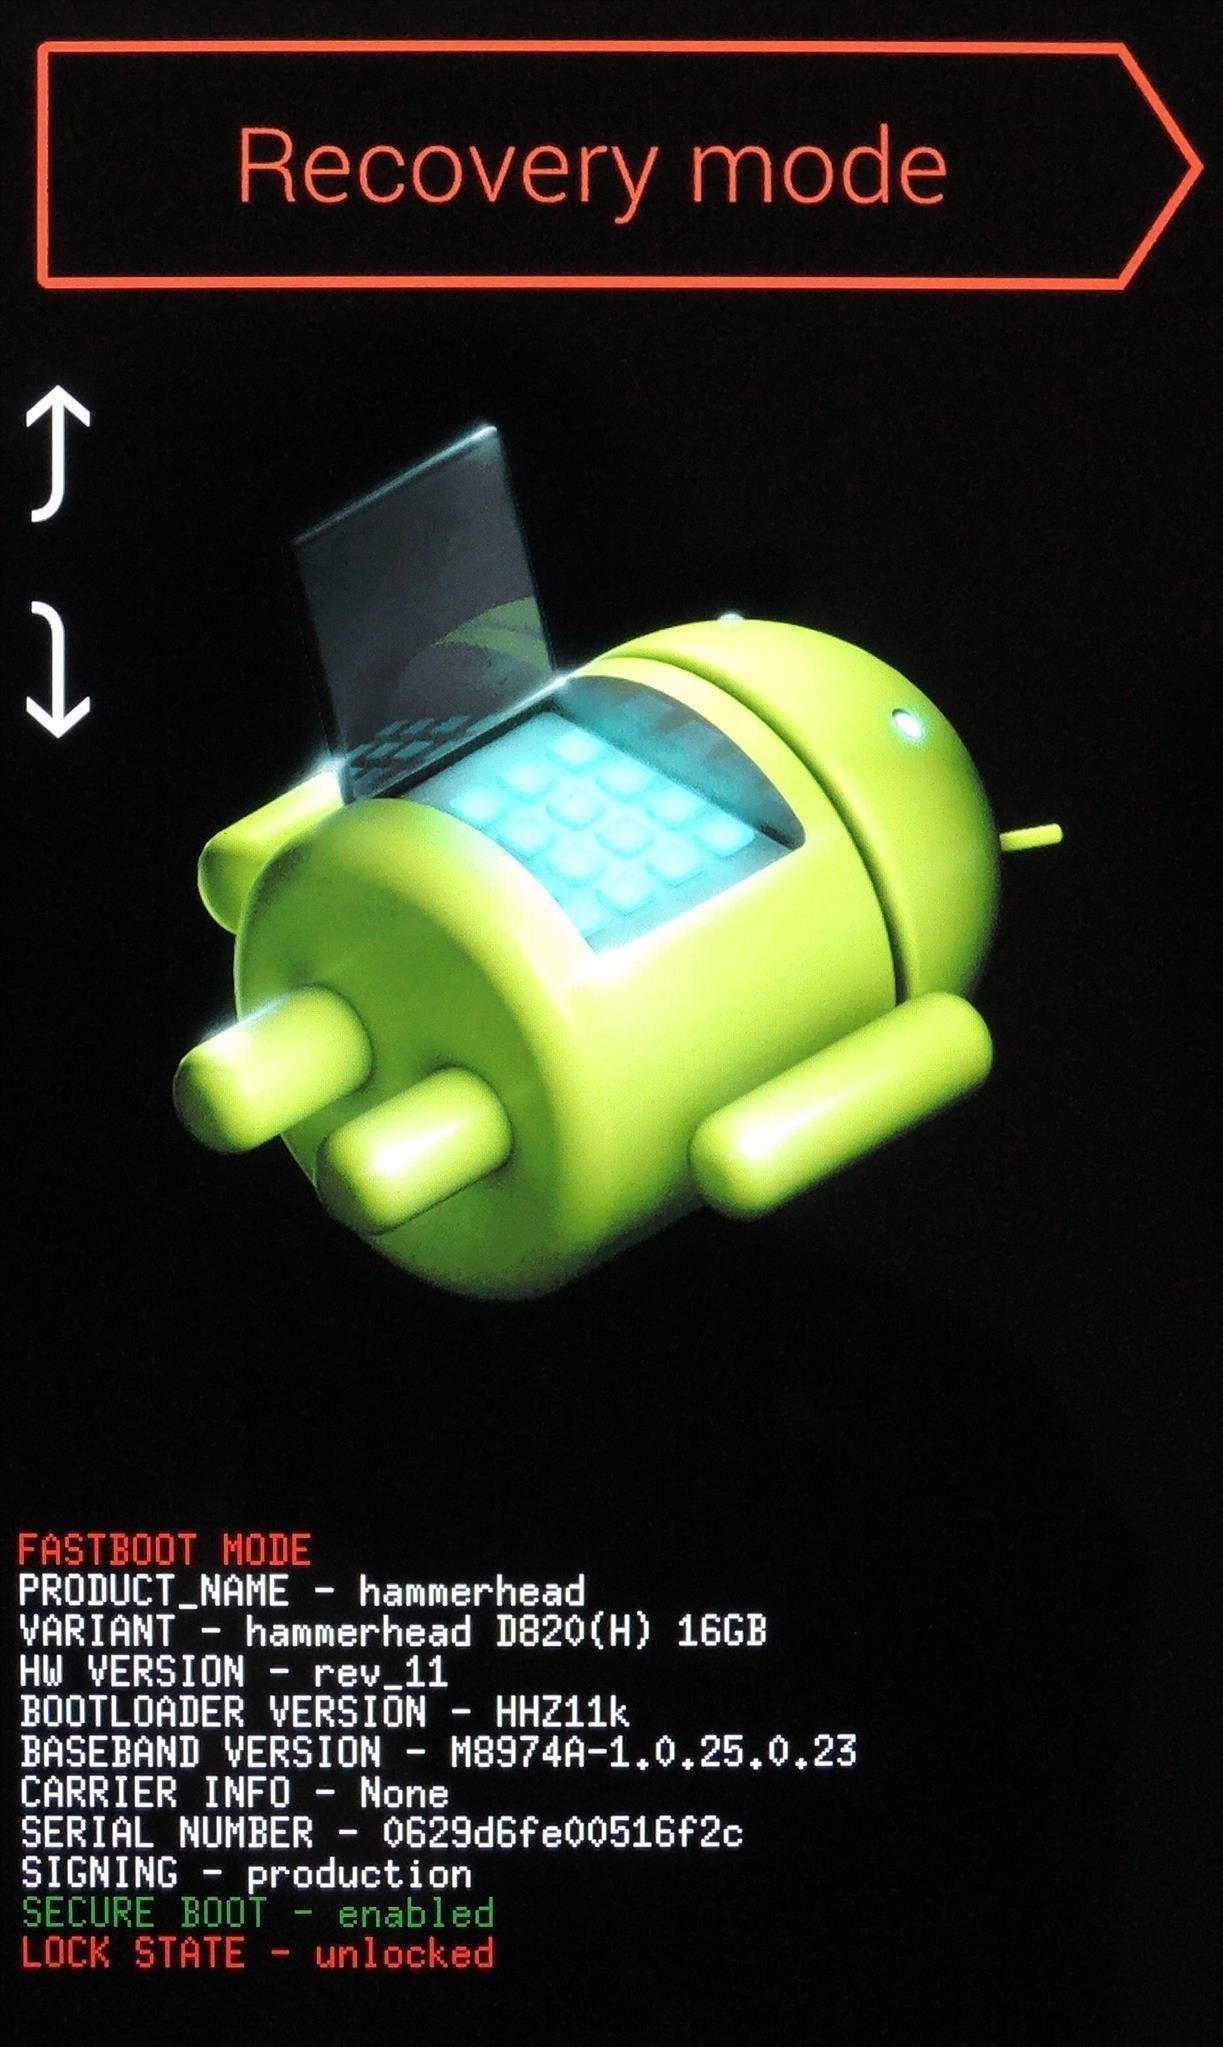
Step 2: Reboot into Recovery
When the files have finished downloading, power your Nexus 5 completely off. Next, hold the Volume Down button with one finger, then press the Power button with another. On the screen that comes up, tap the Volume Down button twice to highlight Recovery Mode, then hit the Power button.
Step 3: Make a Backup
Before going any further, you should make sure to have a backup of your existing setup since we'll be performing a full data wipe in the next step. We say this a lot, but it's especially critical here.
Because the camera and sounds currently don't work with this build, you may not want to use this ROM as your daily driver. With a nandroid backup, you can run this ROM and seamlessly go back to your original setup, complete with all the apps, files, messages, etc. that you previously had.
Tip: Make Nandroids for Both ROMs
Make a nandroid of your current build, follow the steps below to install the Sense 6 ROM, then make a nandroid of that setup. Having a backup of both your current build and the Sense 6 ROM will allow you to switch back and forth between the two ROMs with ease.
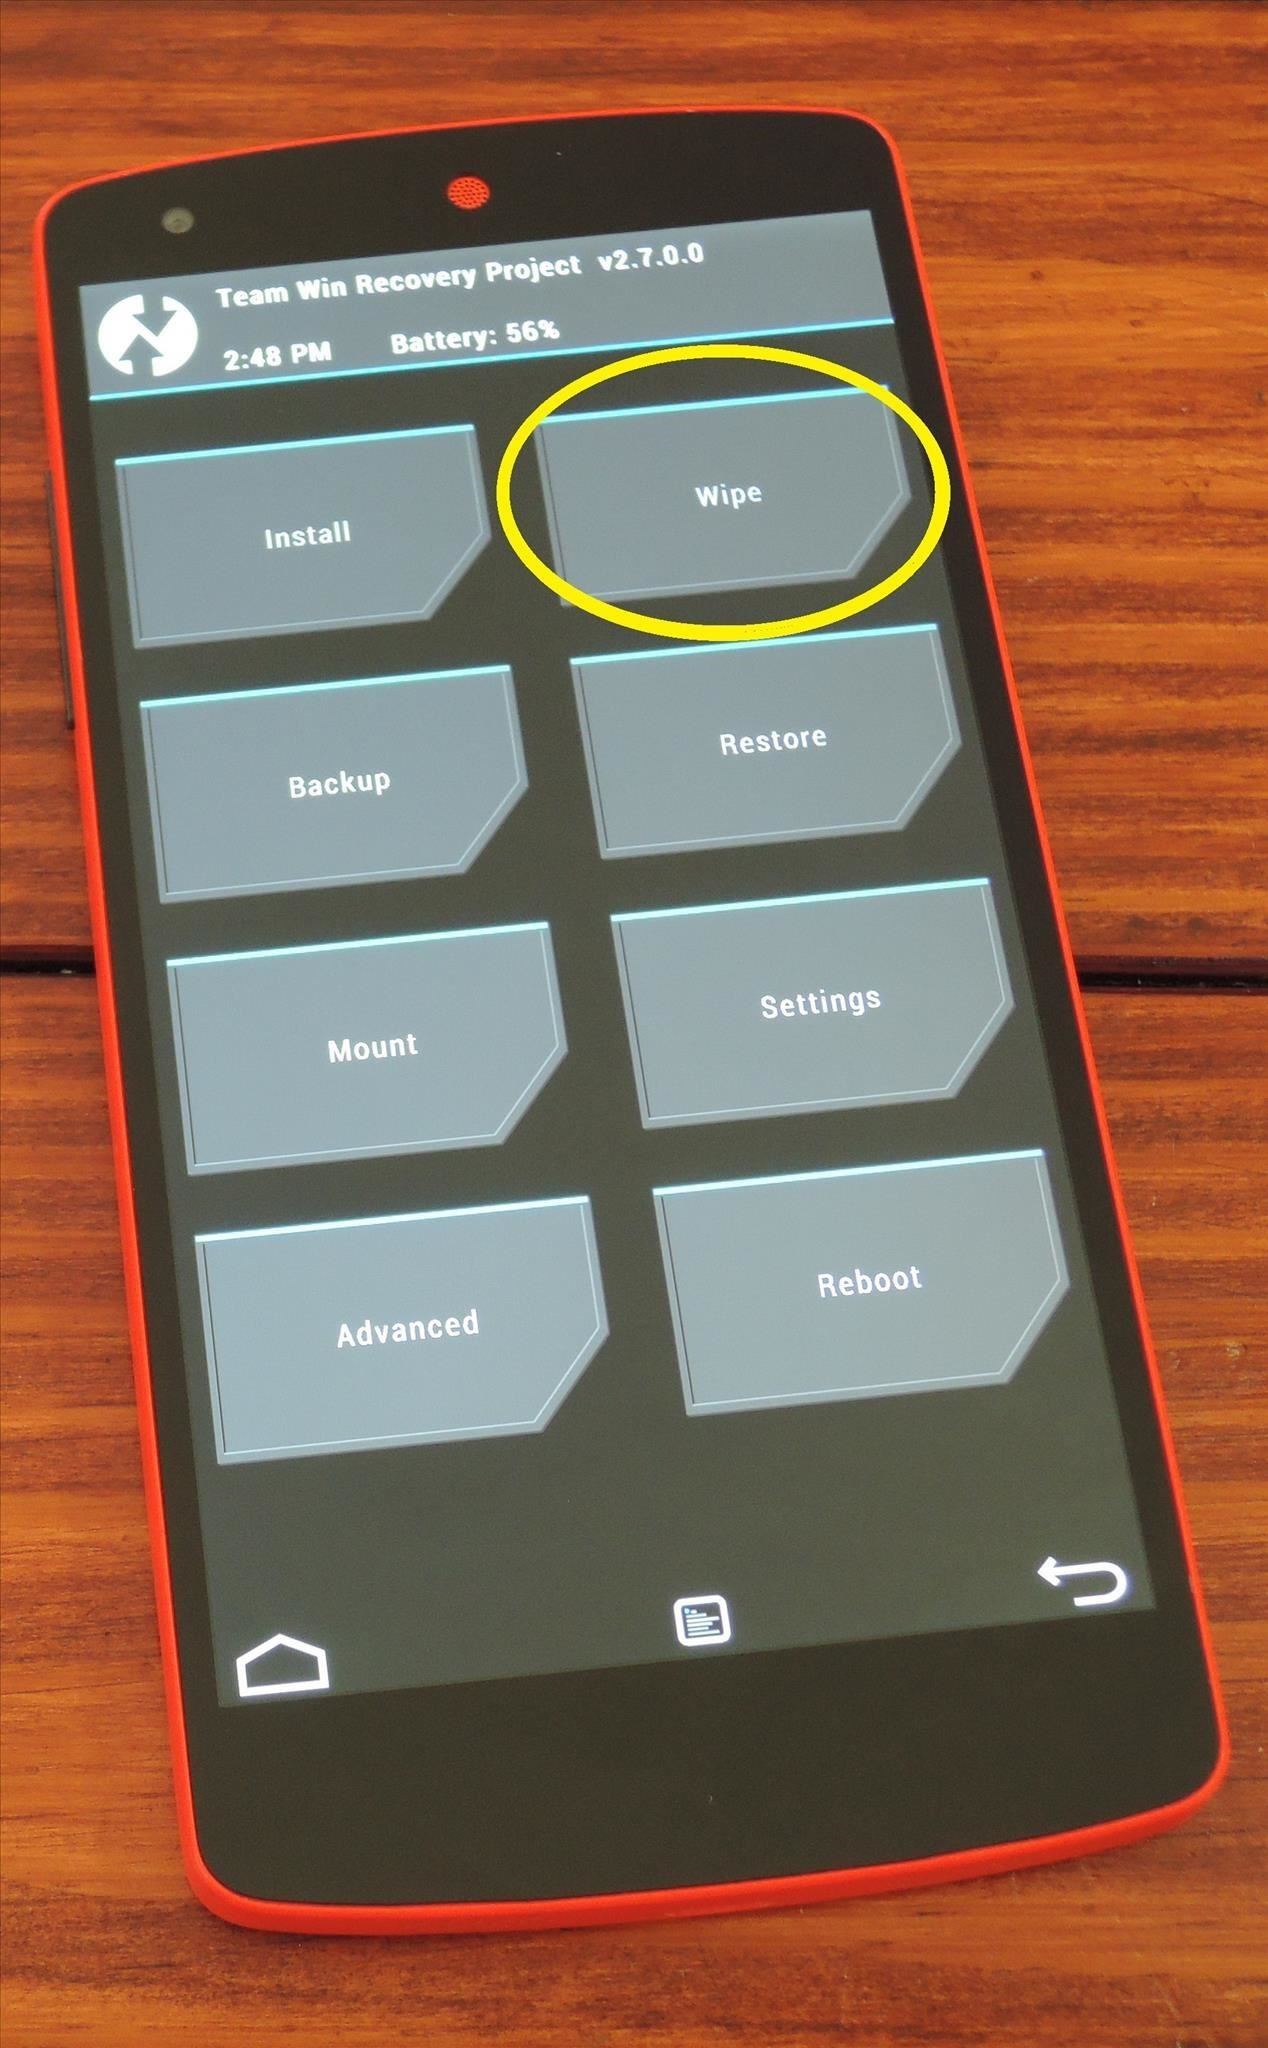
Step 4: Perform a Full Wipe
In TWRP Recovery, tap Wipe, then hit Advanced Wipe.
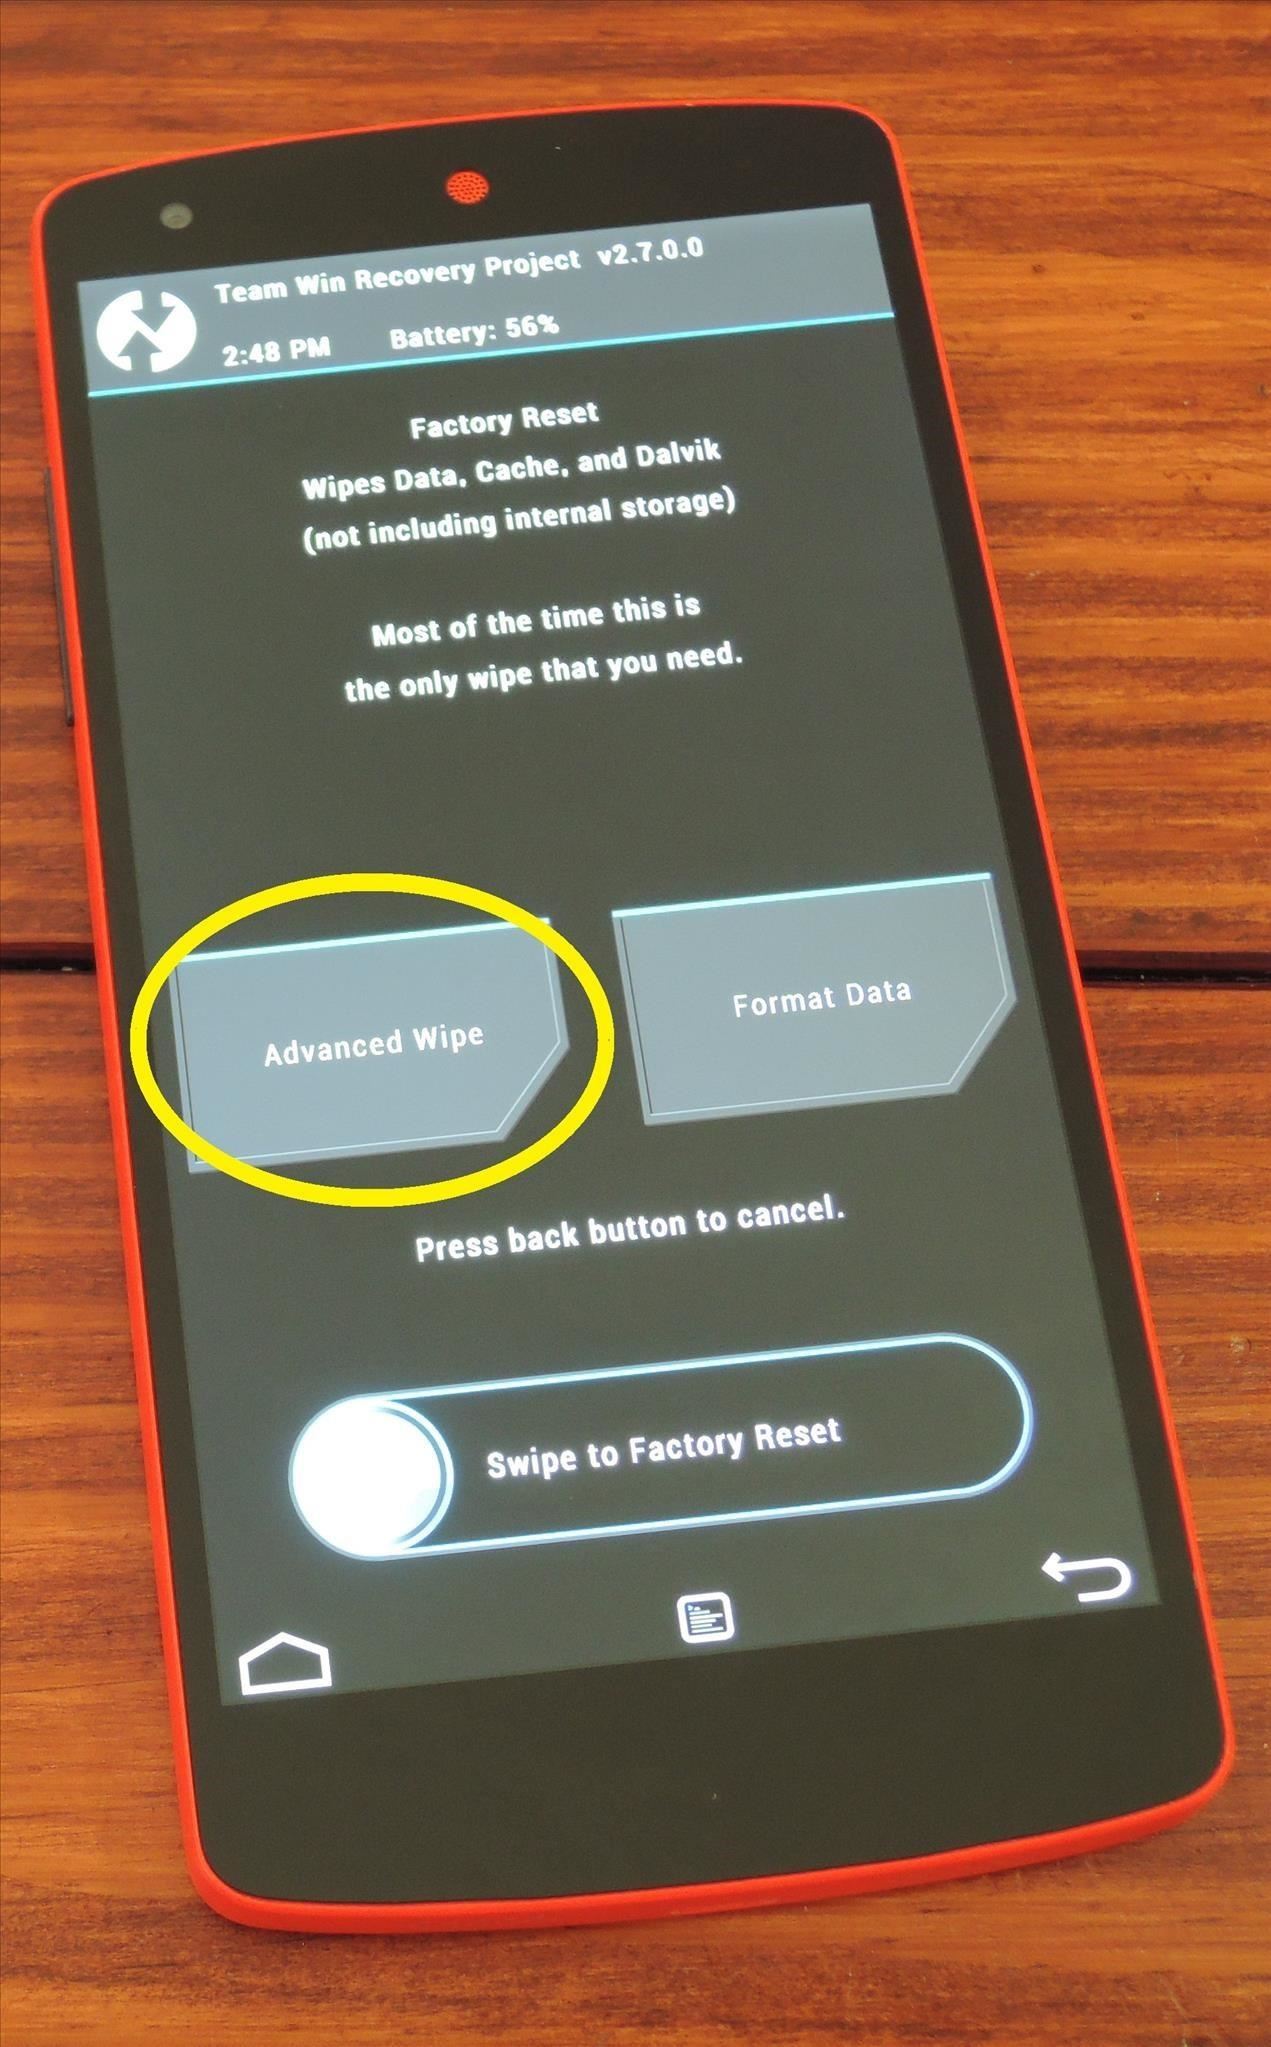
Next, tick the boxes next to Dalvik Cache, System, Data, and Cache. Swipe the slider at the bottom to initiate the wipe.

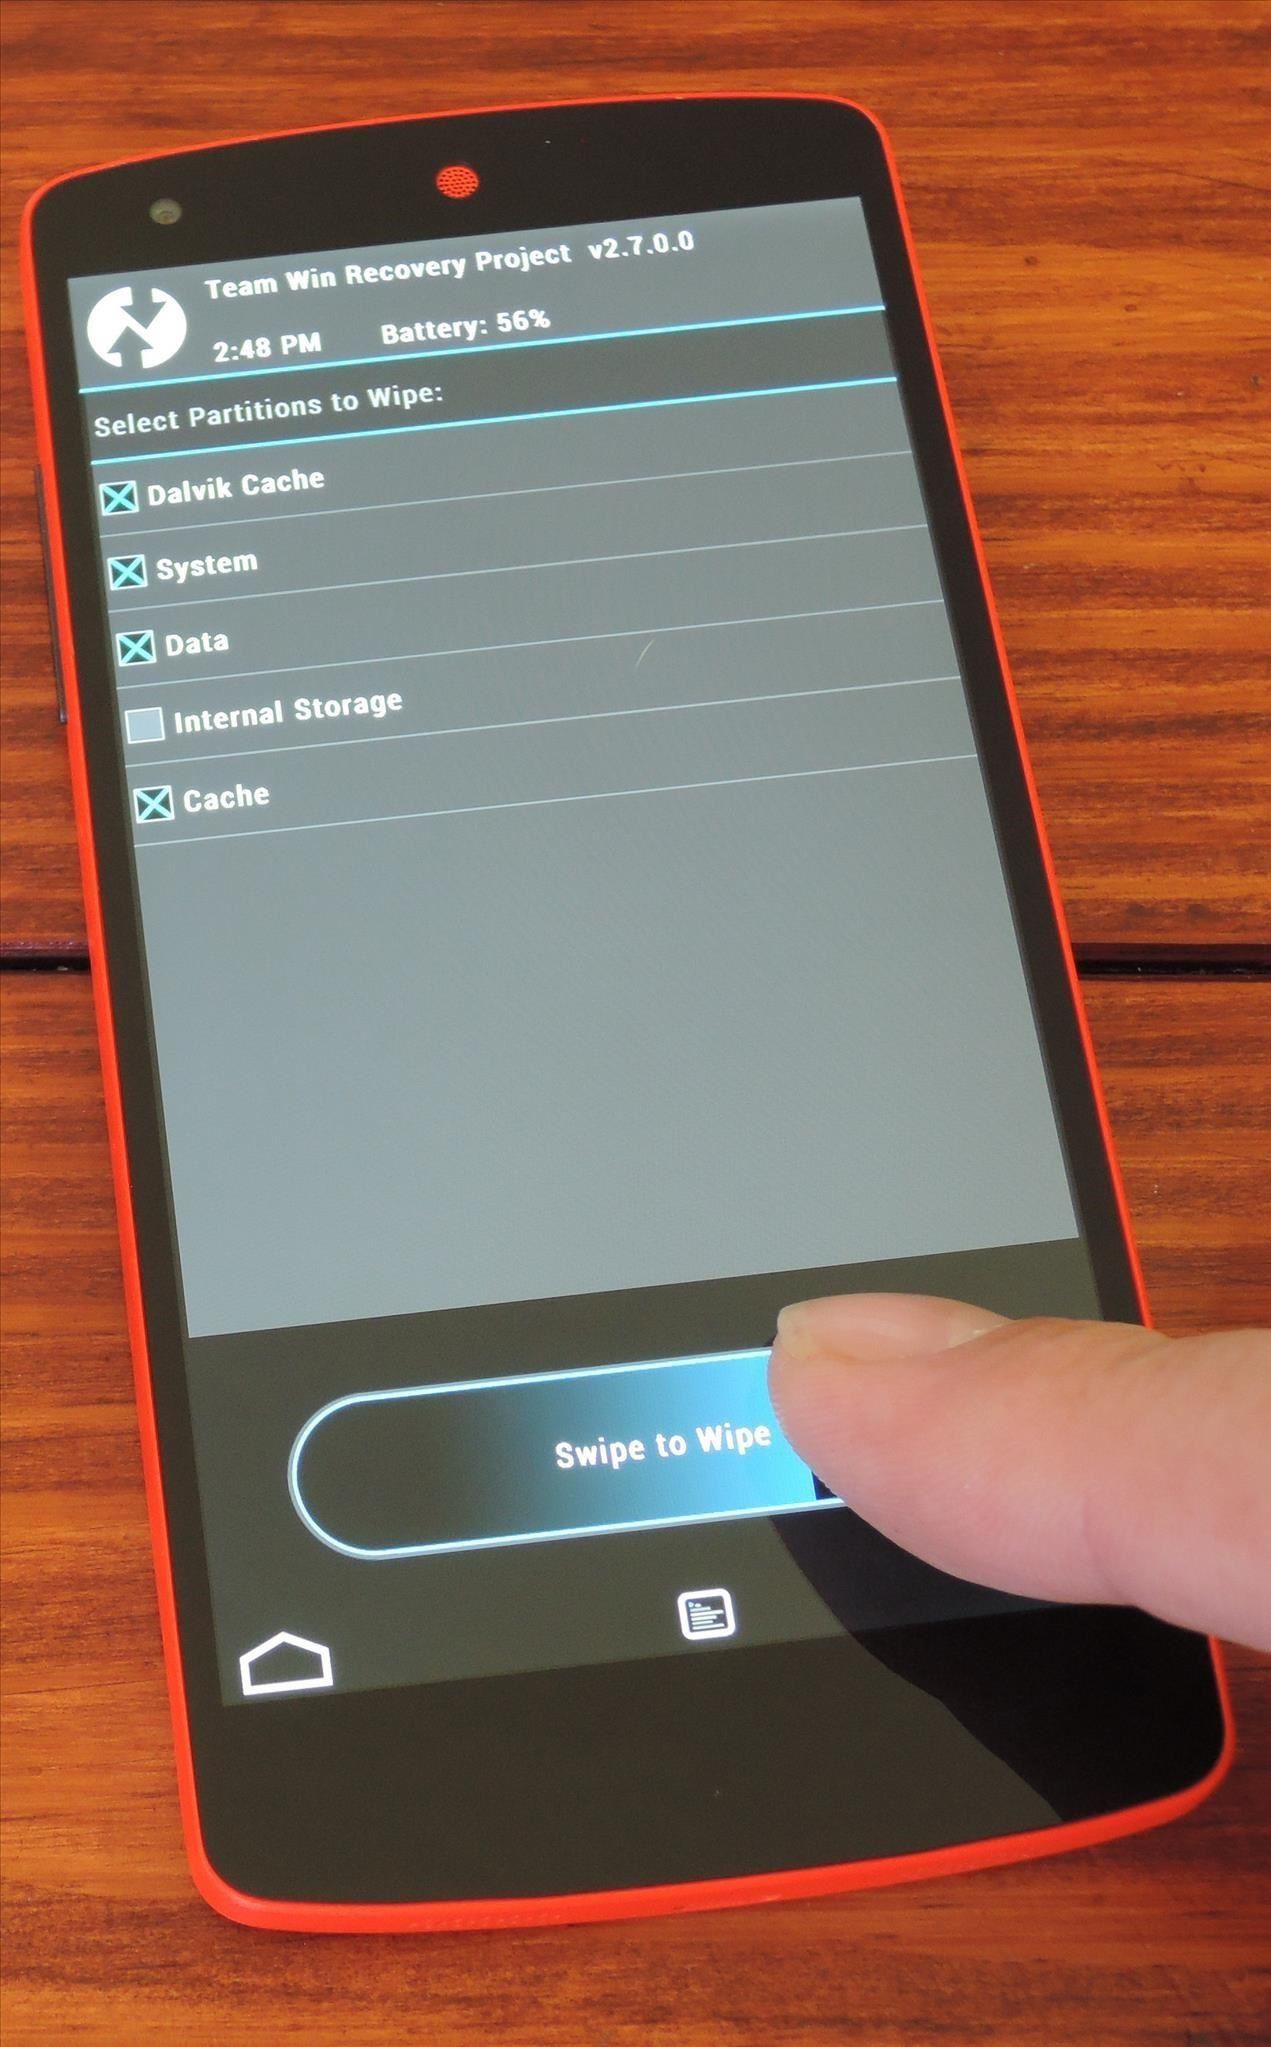
When the process is finished, tap the Back button in the lower right-hand corner three times to head back to the main screen.
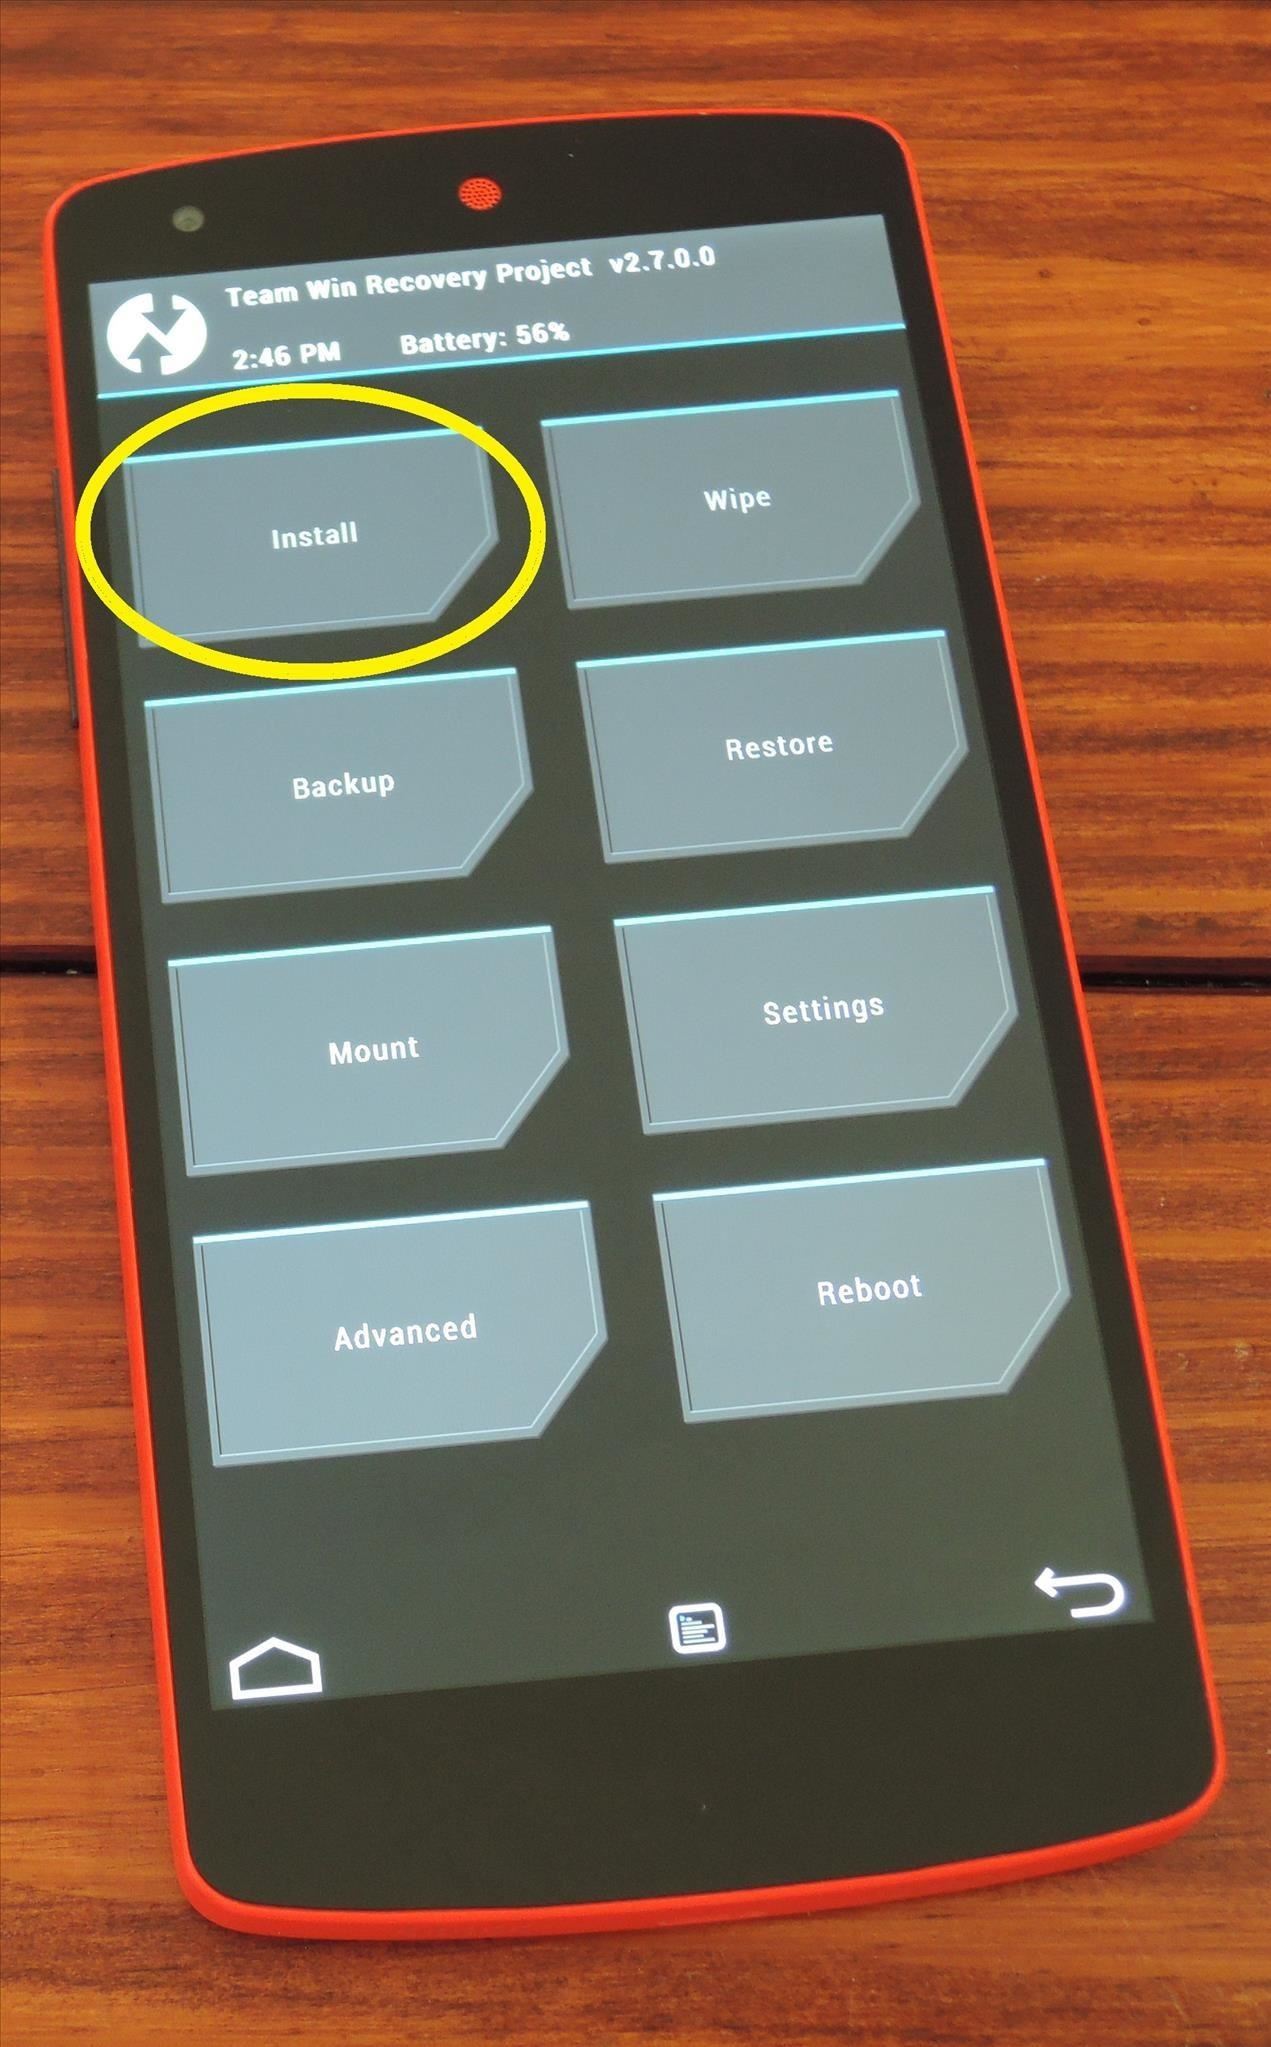
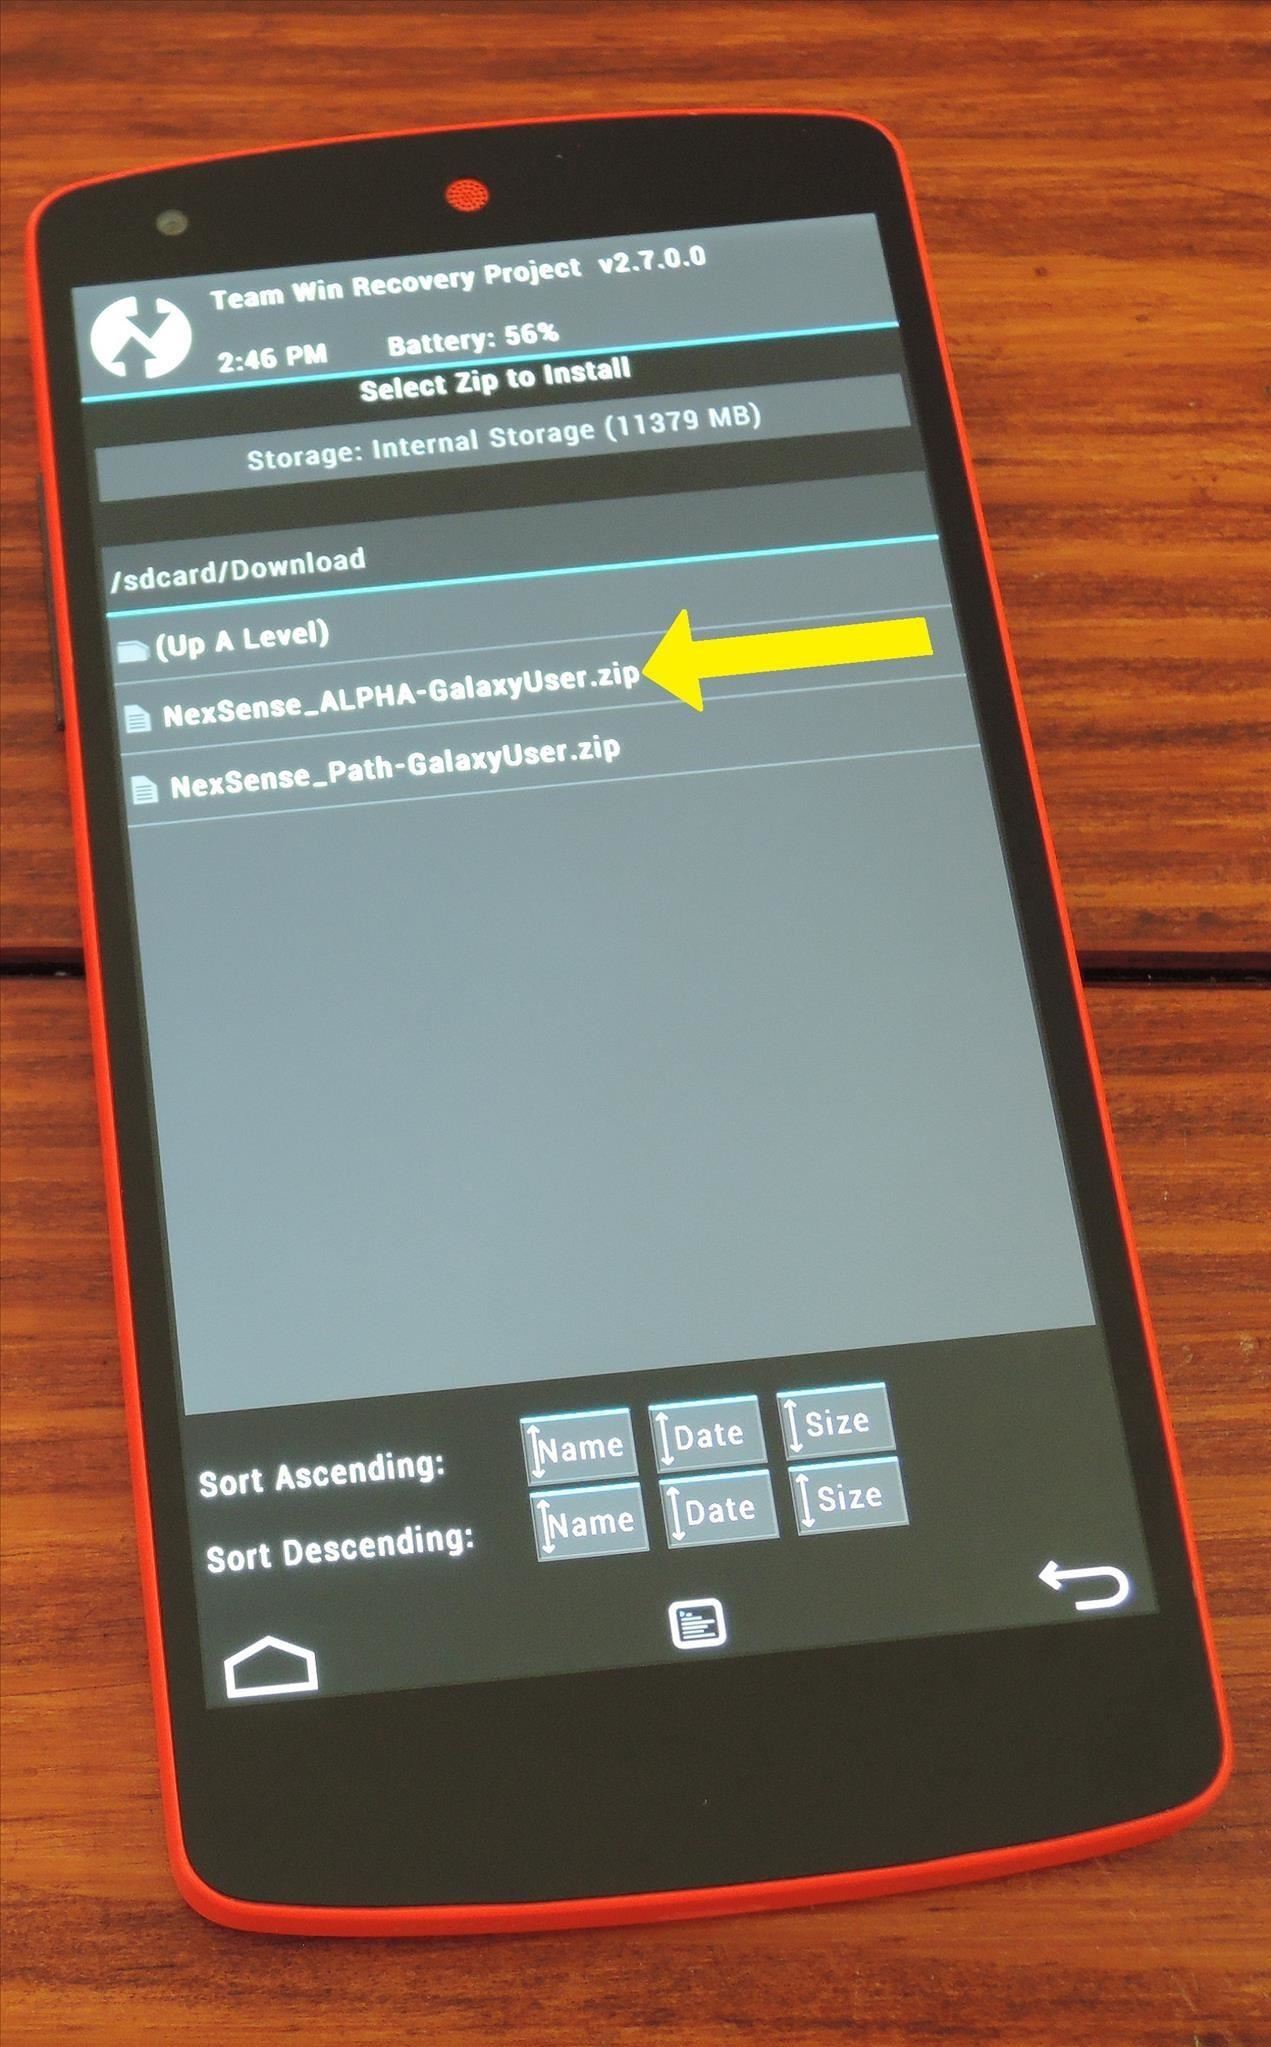
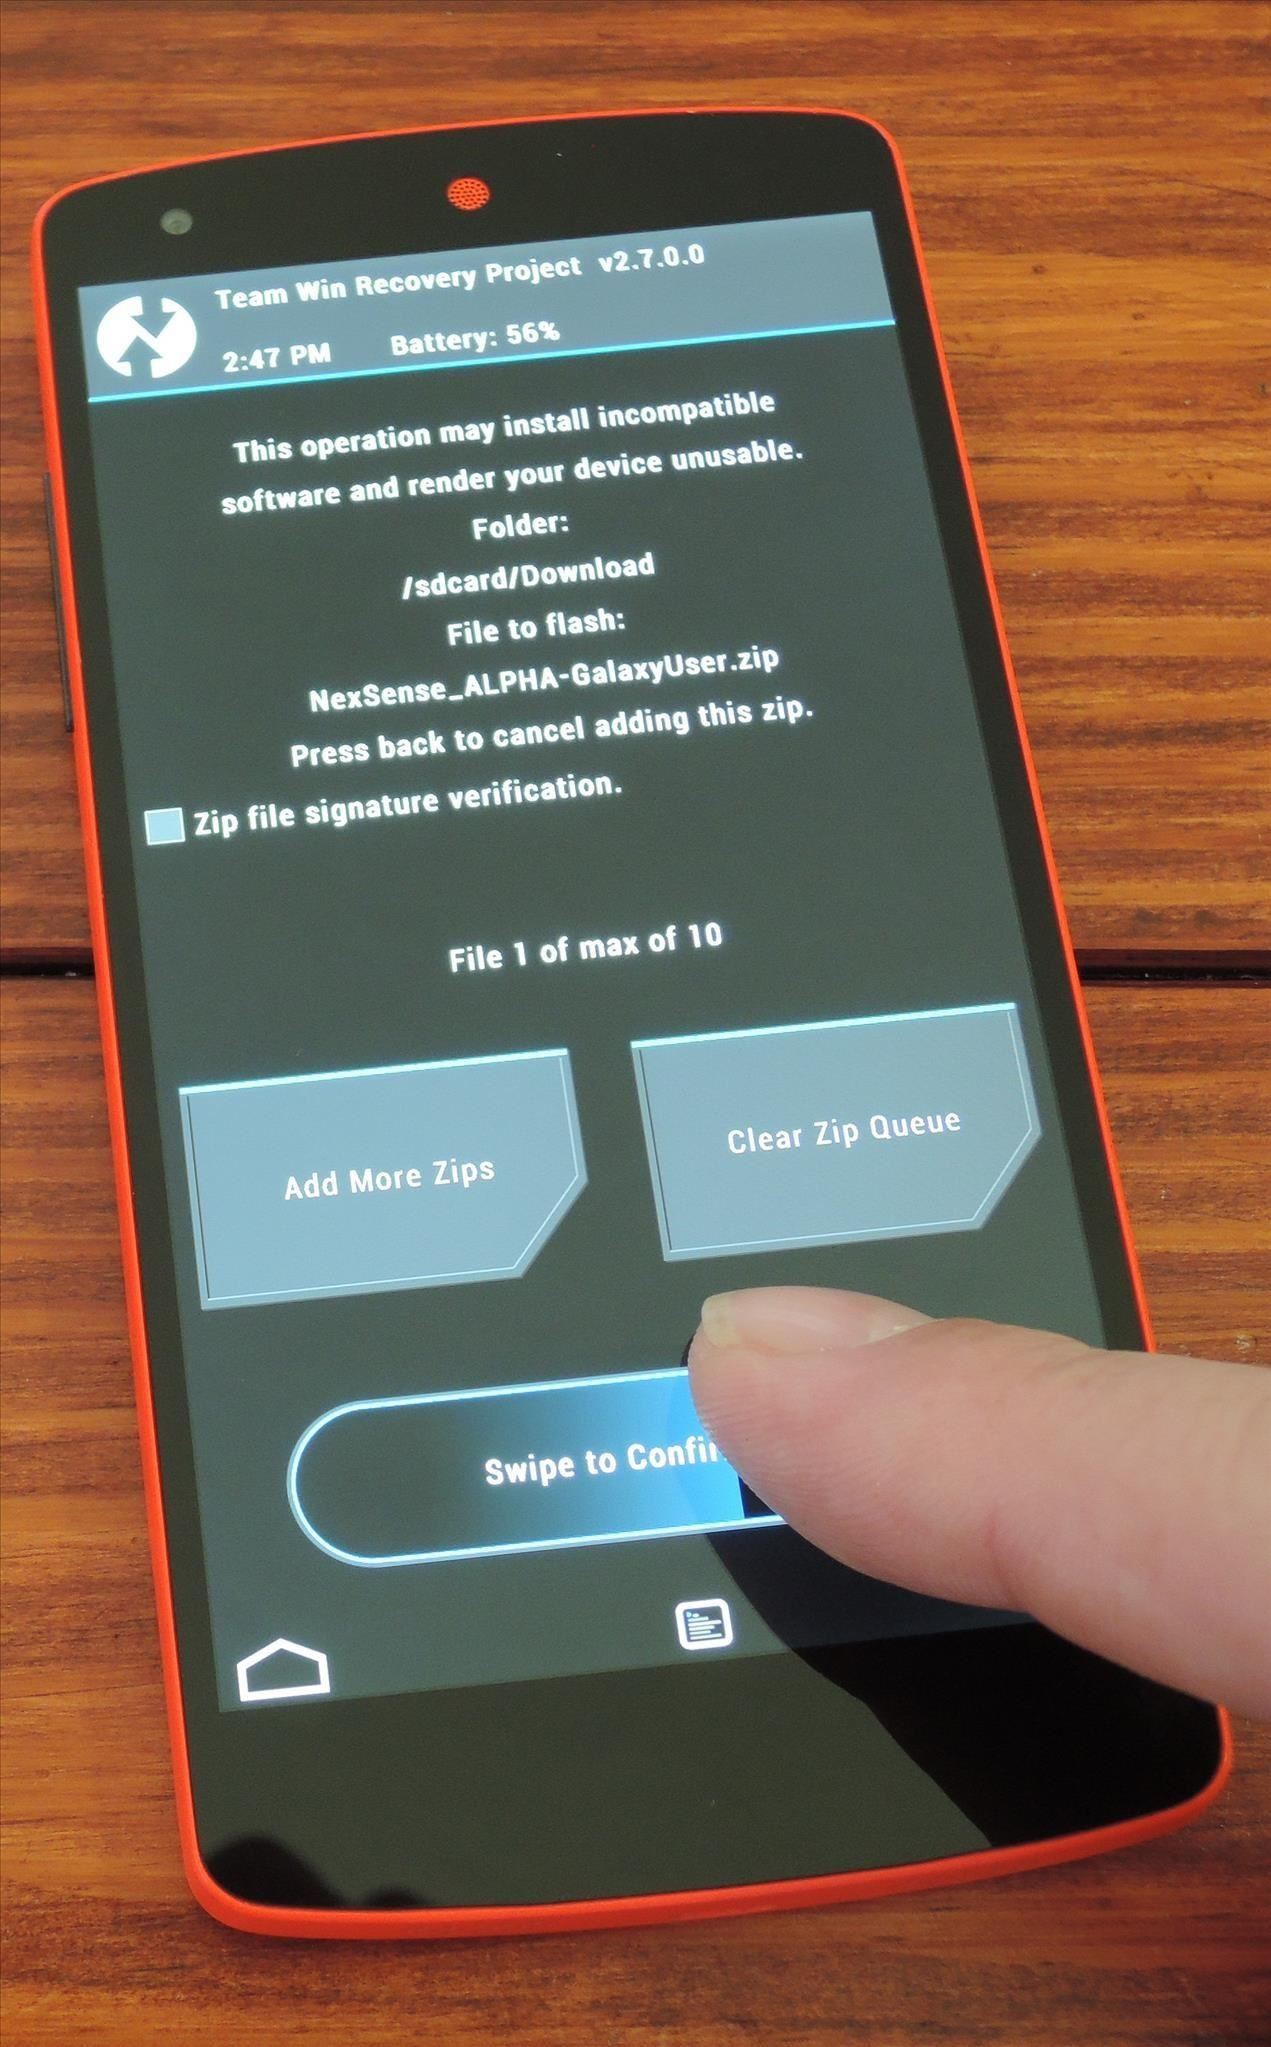
Step 5: Install the Sense ROM
From here, hit Install, then navigate to the files you downloaded earlier (they will be in your "Download" folder by default). The ROM file needs to be installed before the patch, so locate the ZIP named NexSense ALPHA-GalaxyUser. Tap that, then swipe the slider to start the install.
This ROM utilizes the Aroma Installer, a graphical interface that will walk you through installation.
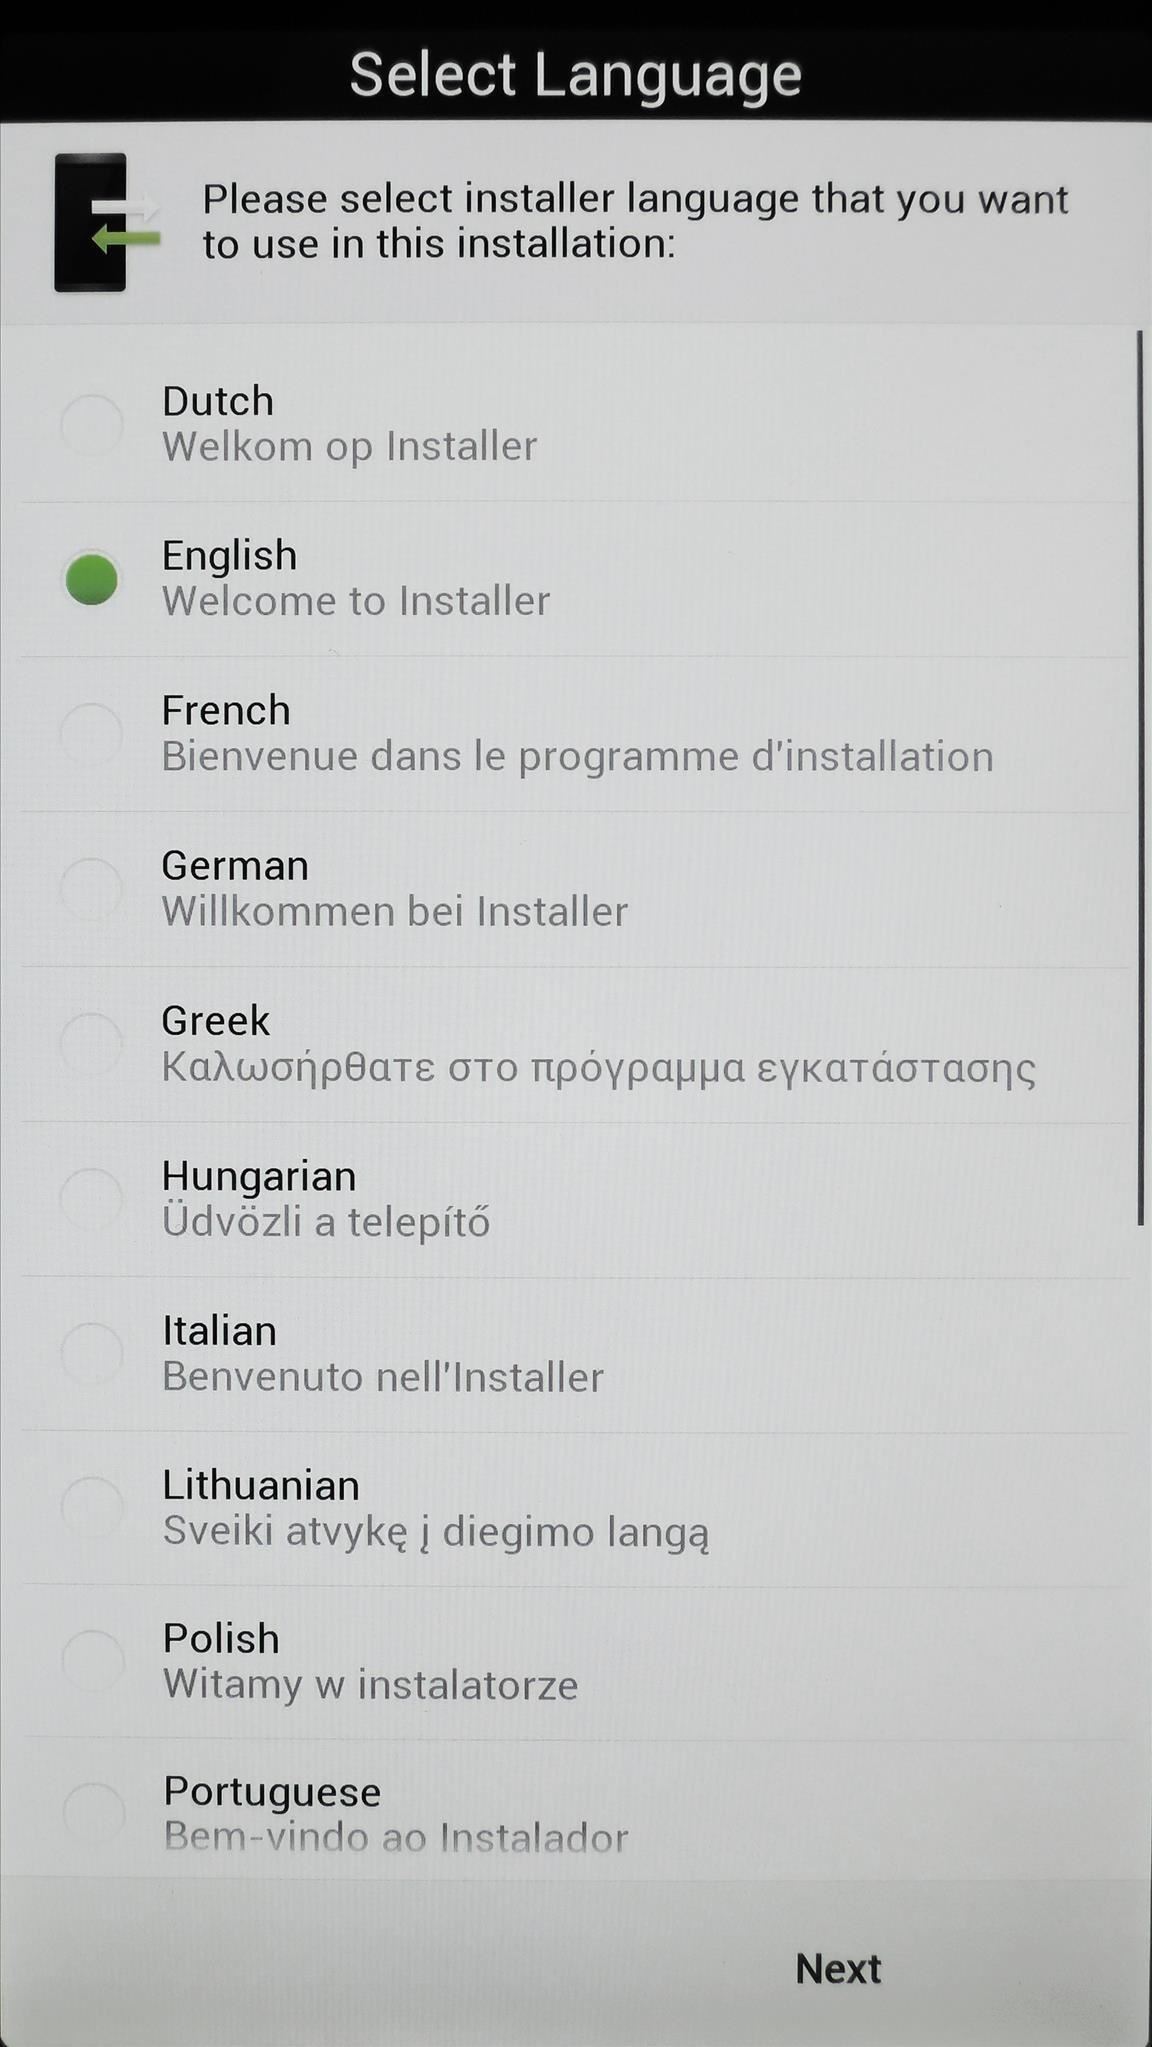
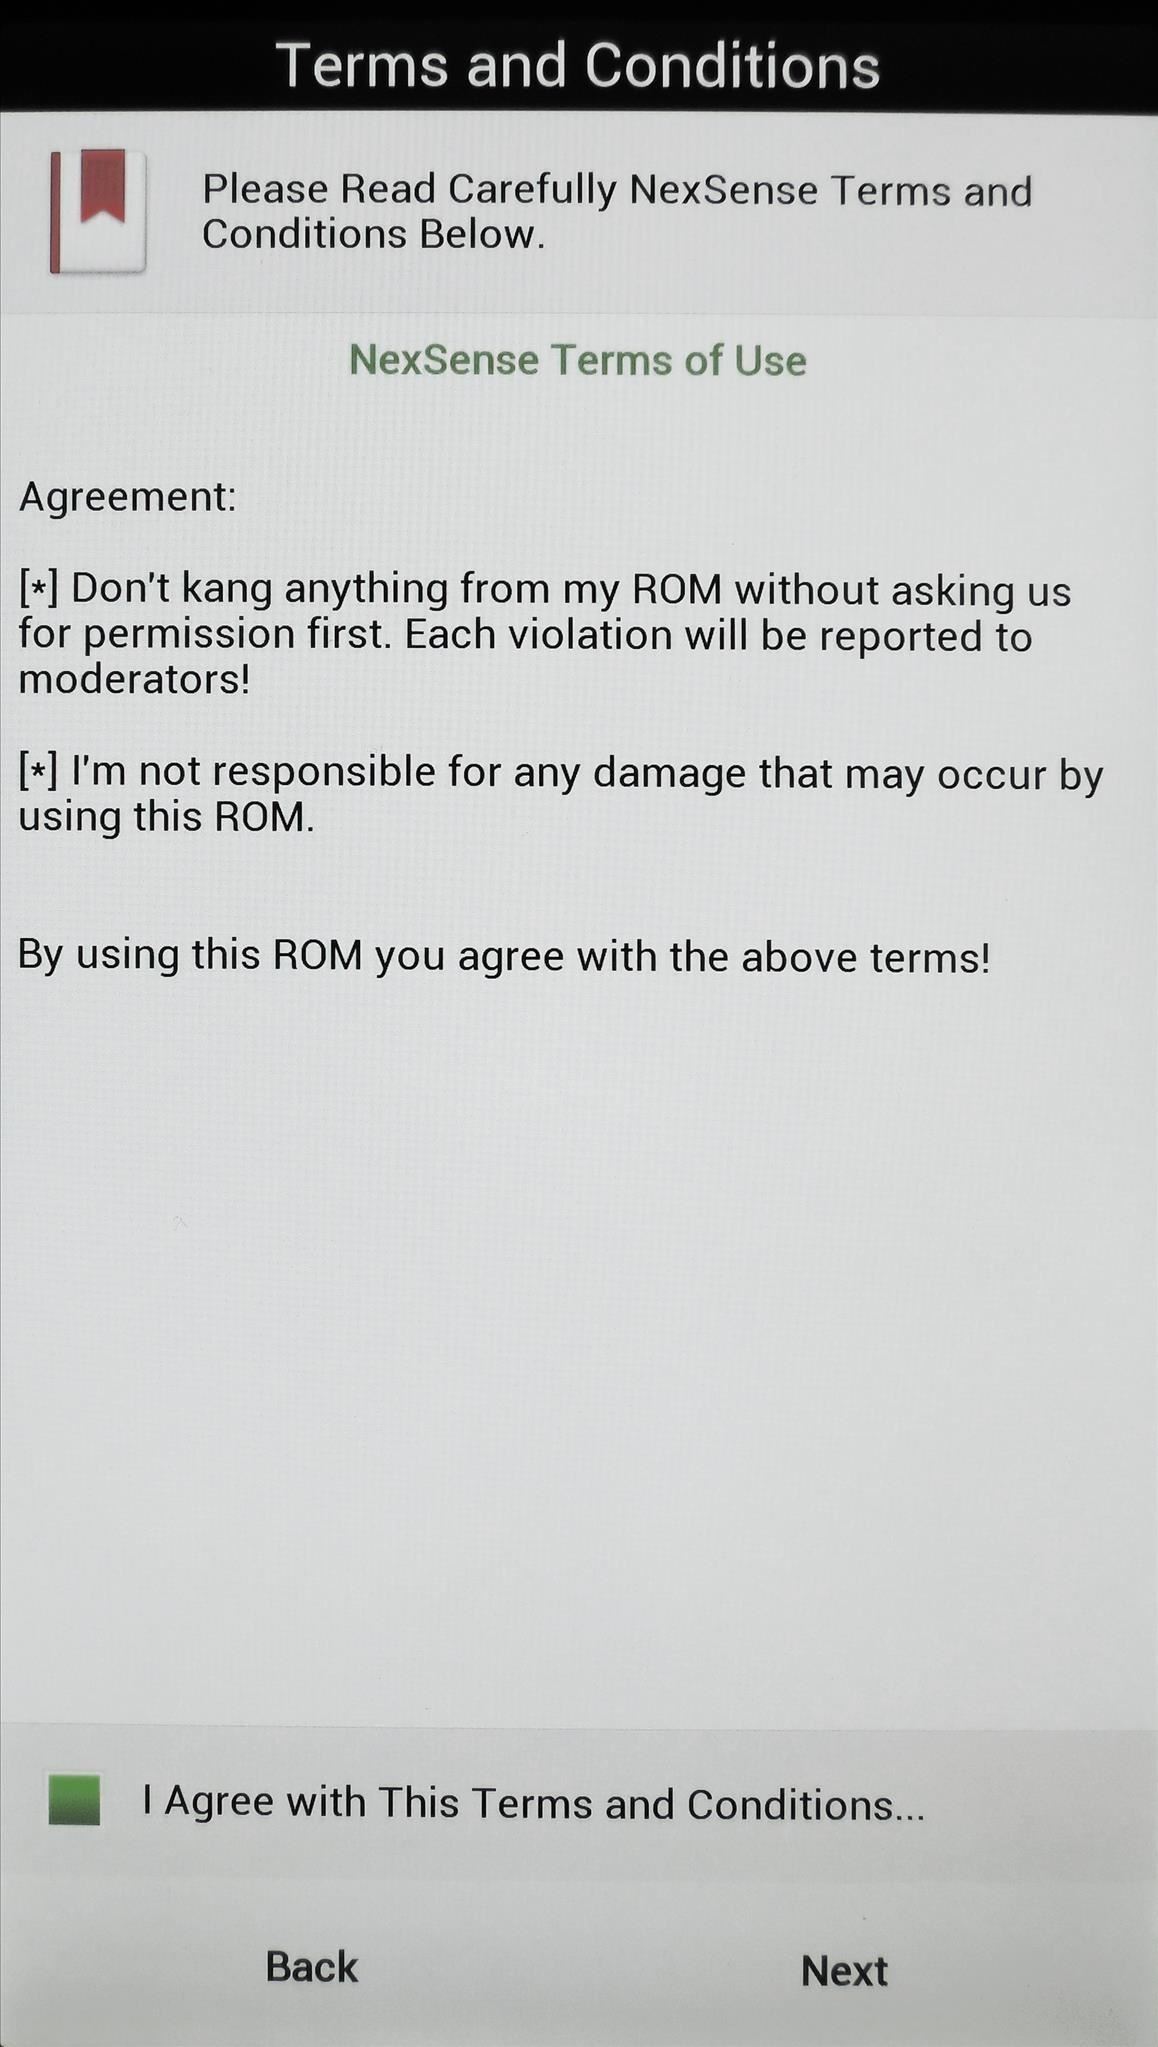
From the first screen, select your language, then tap Nexttwo times. Tick the box that says I Agree with This Terms and Conditions [sic] and hit Next four more times.
After the ROM has installed, be sure to hit Next only once. At this point, you should arrive at a screen titled Installation Completed.

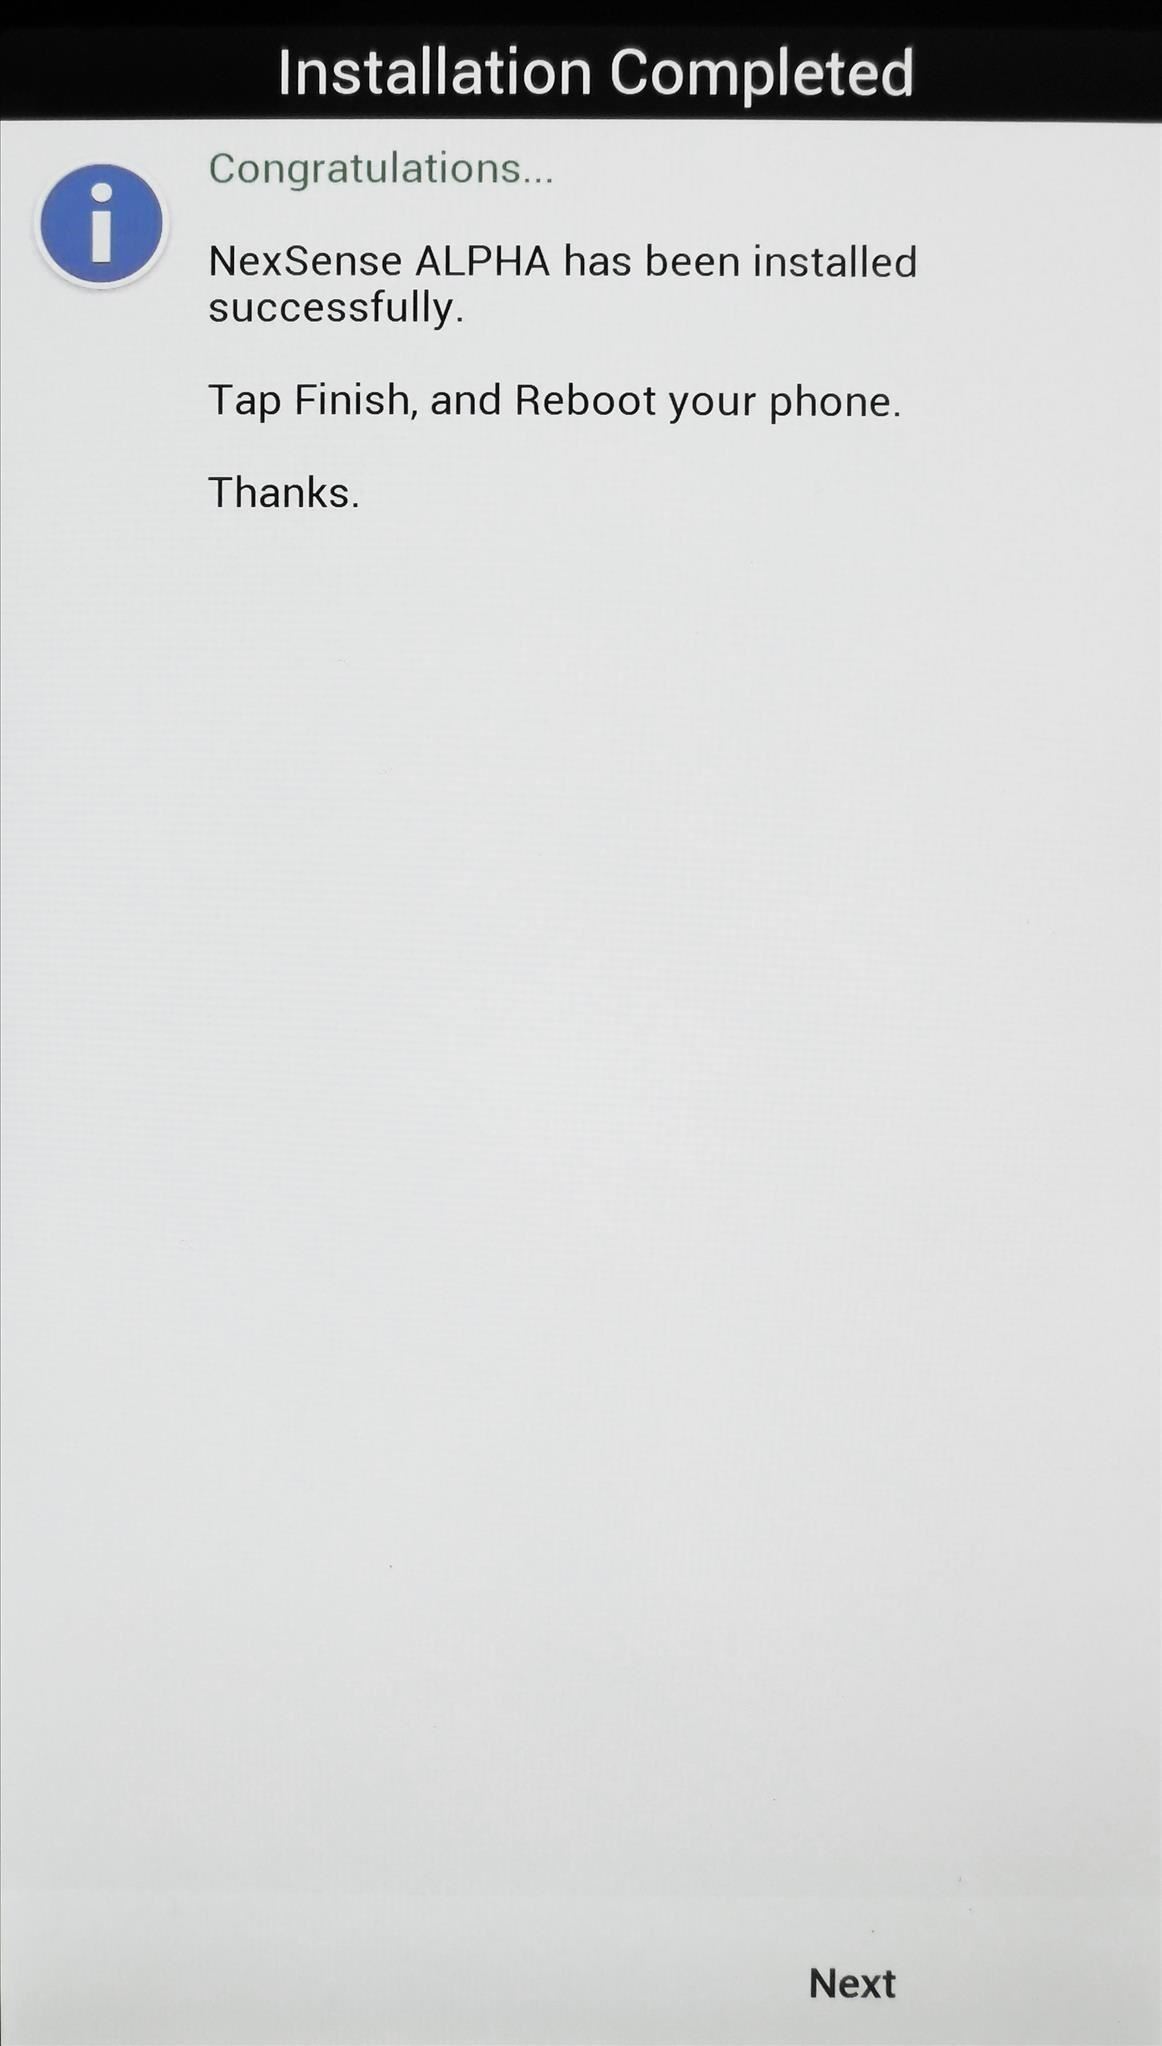
Since you still have to flash the patches, you don't want Aroma Installer to auto-reboot for us. To avoid that, hit your phone's Powerbutton, then select Quit Installation from the menu that pops up.
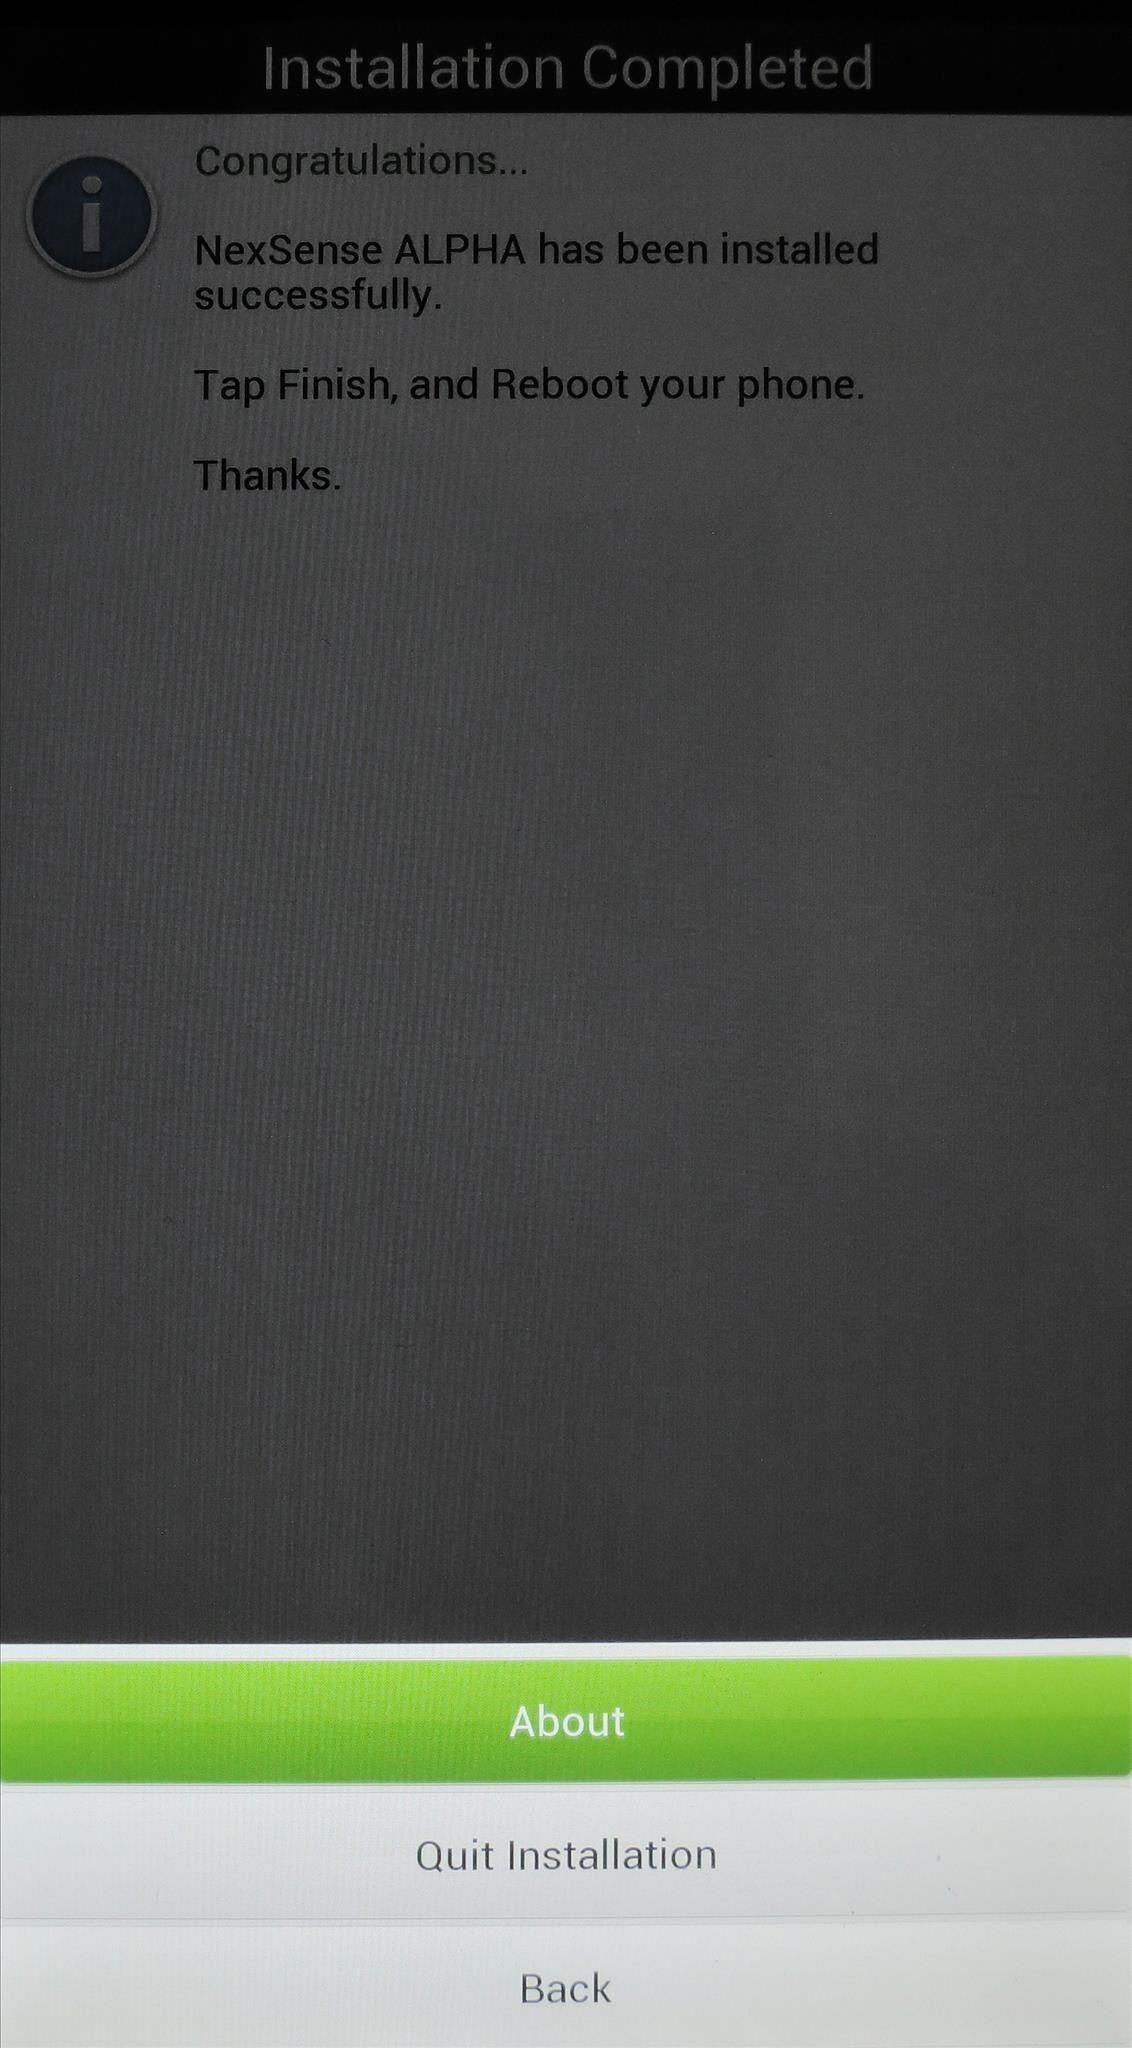
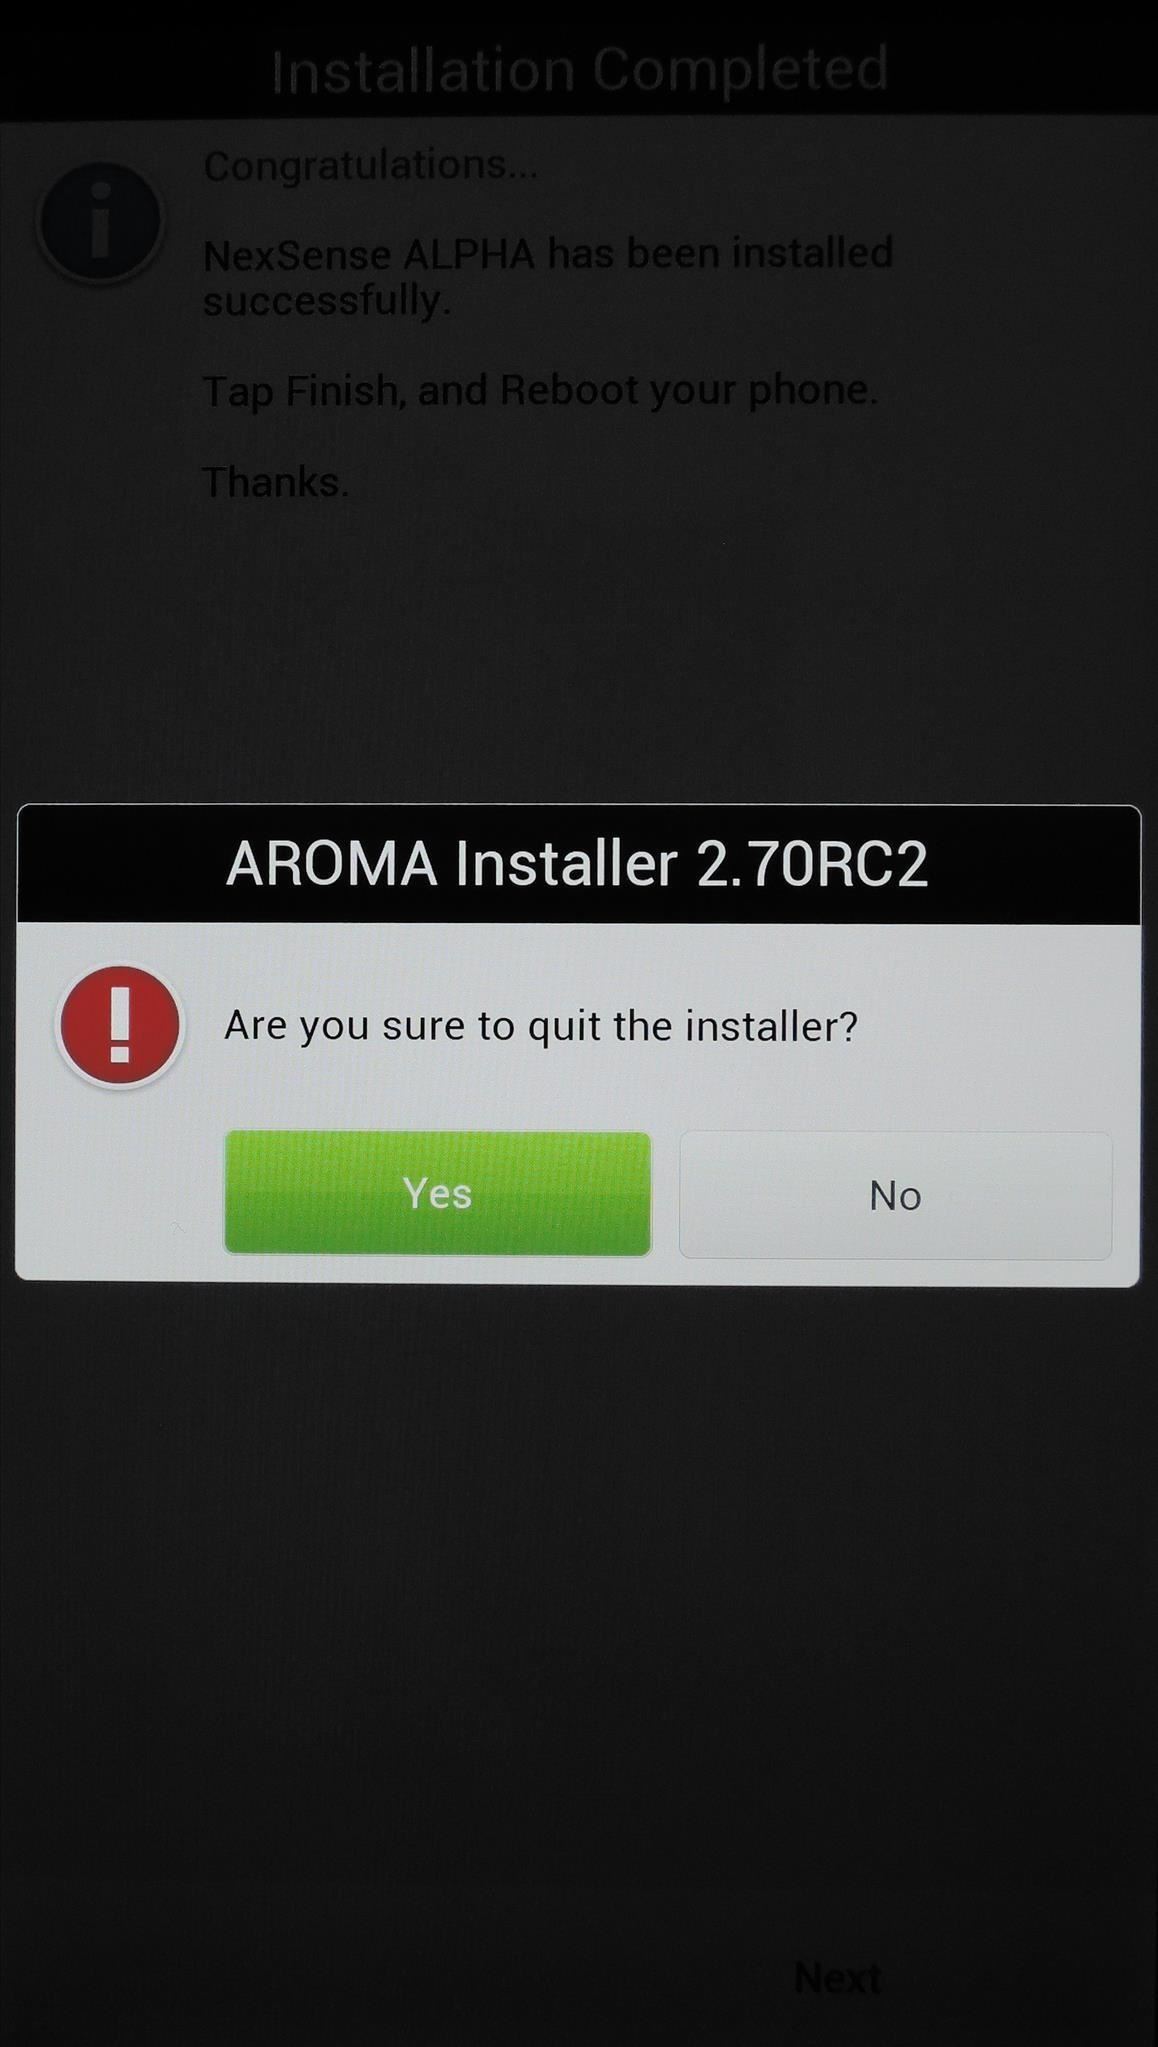
Tap Yes to confirm this, then hit the back button twice to head back out to the main screen.
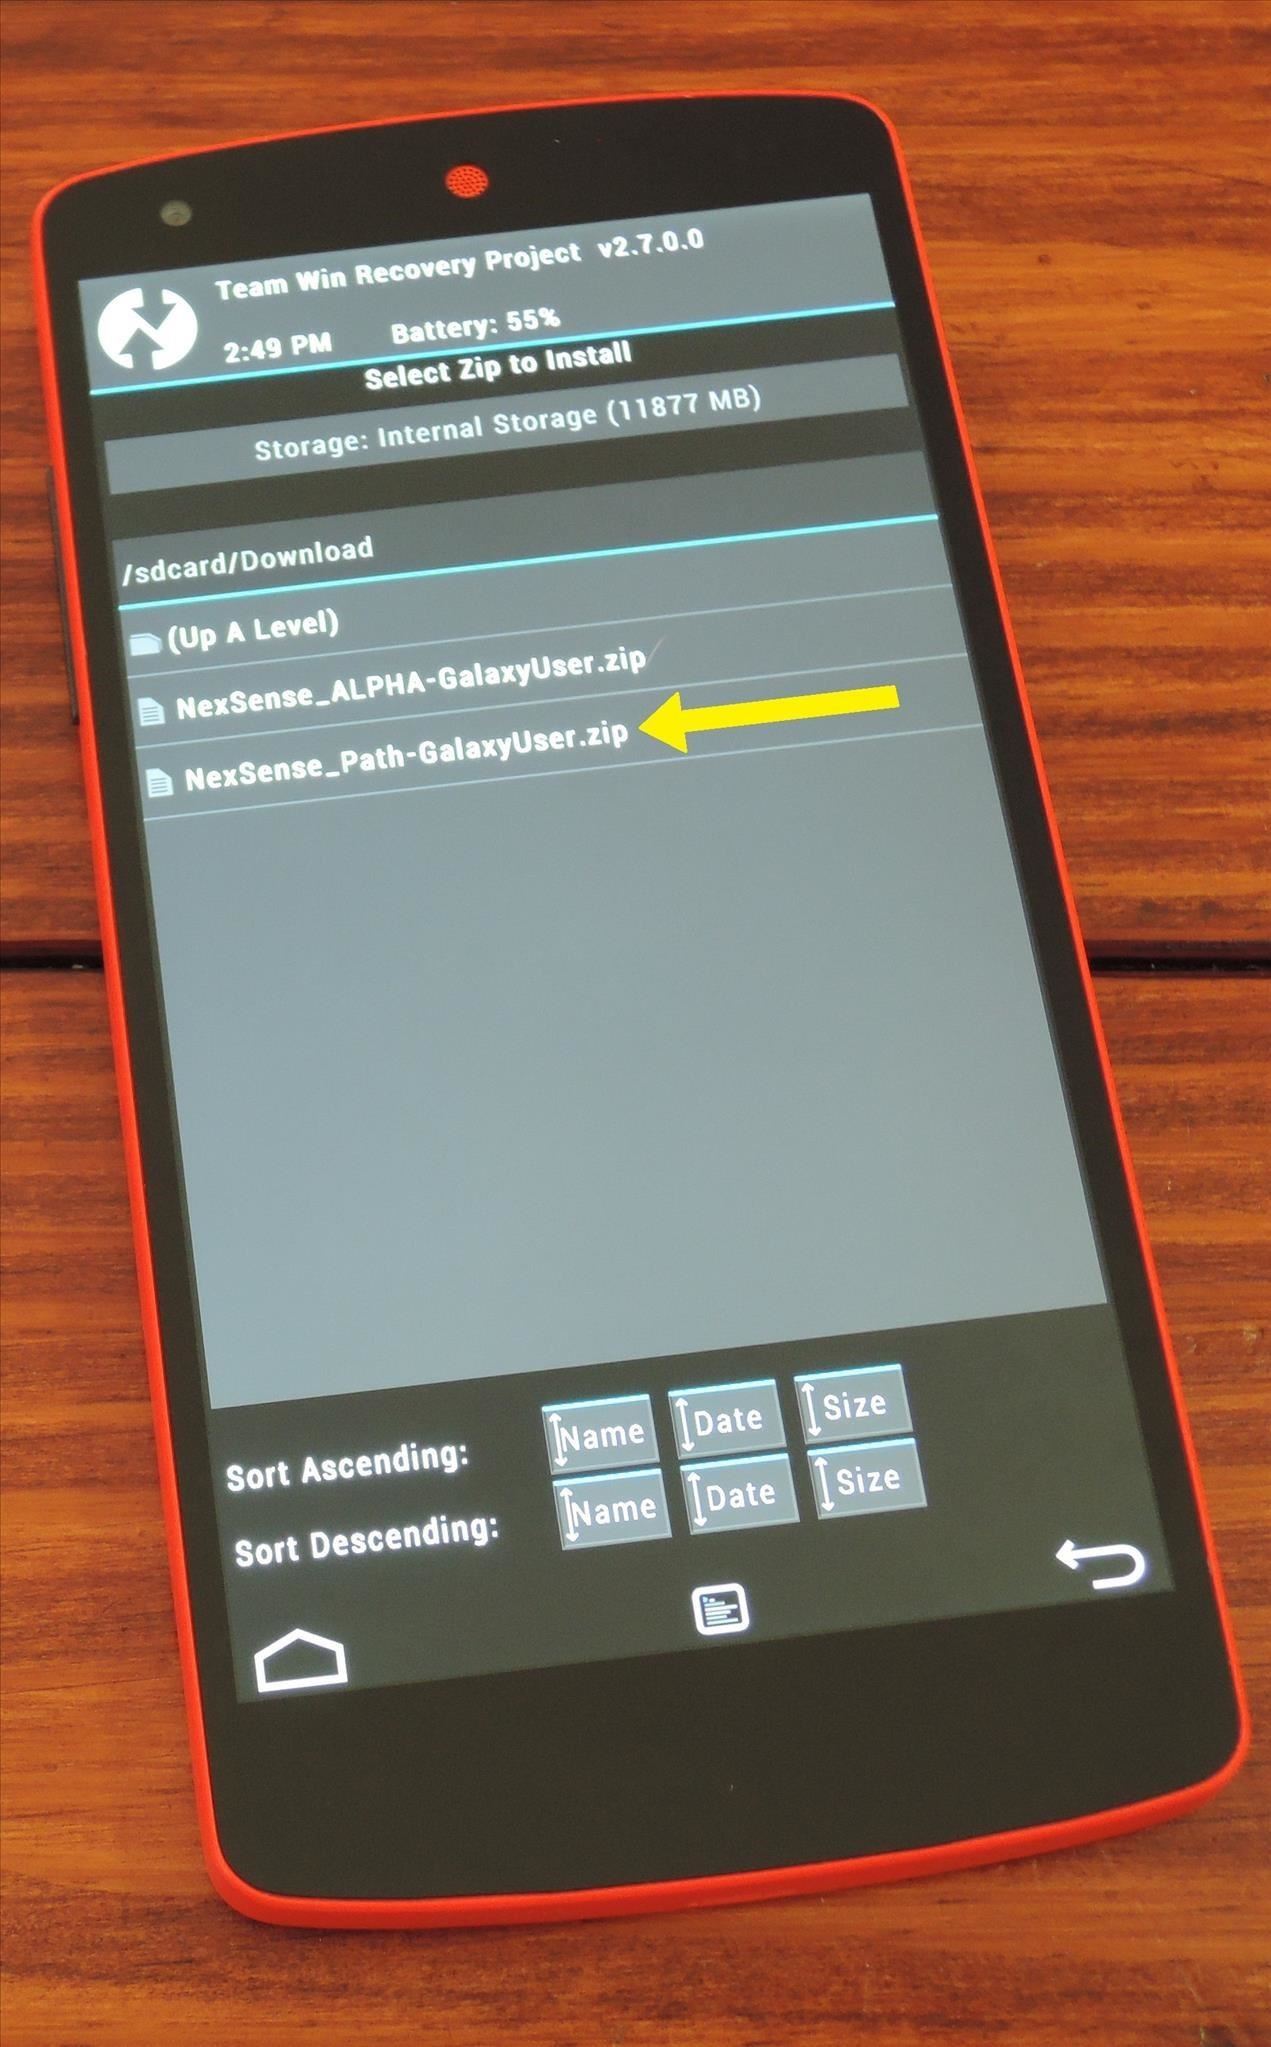
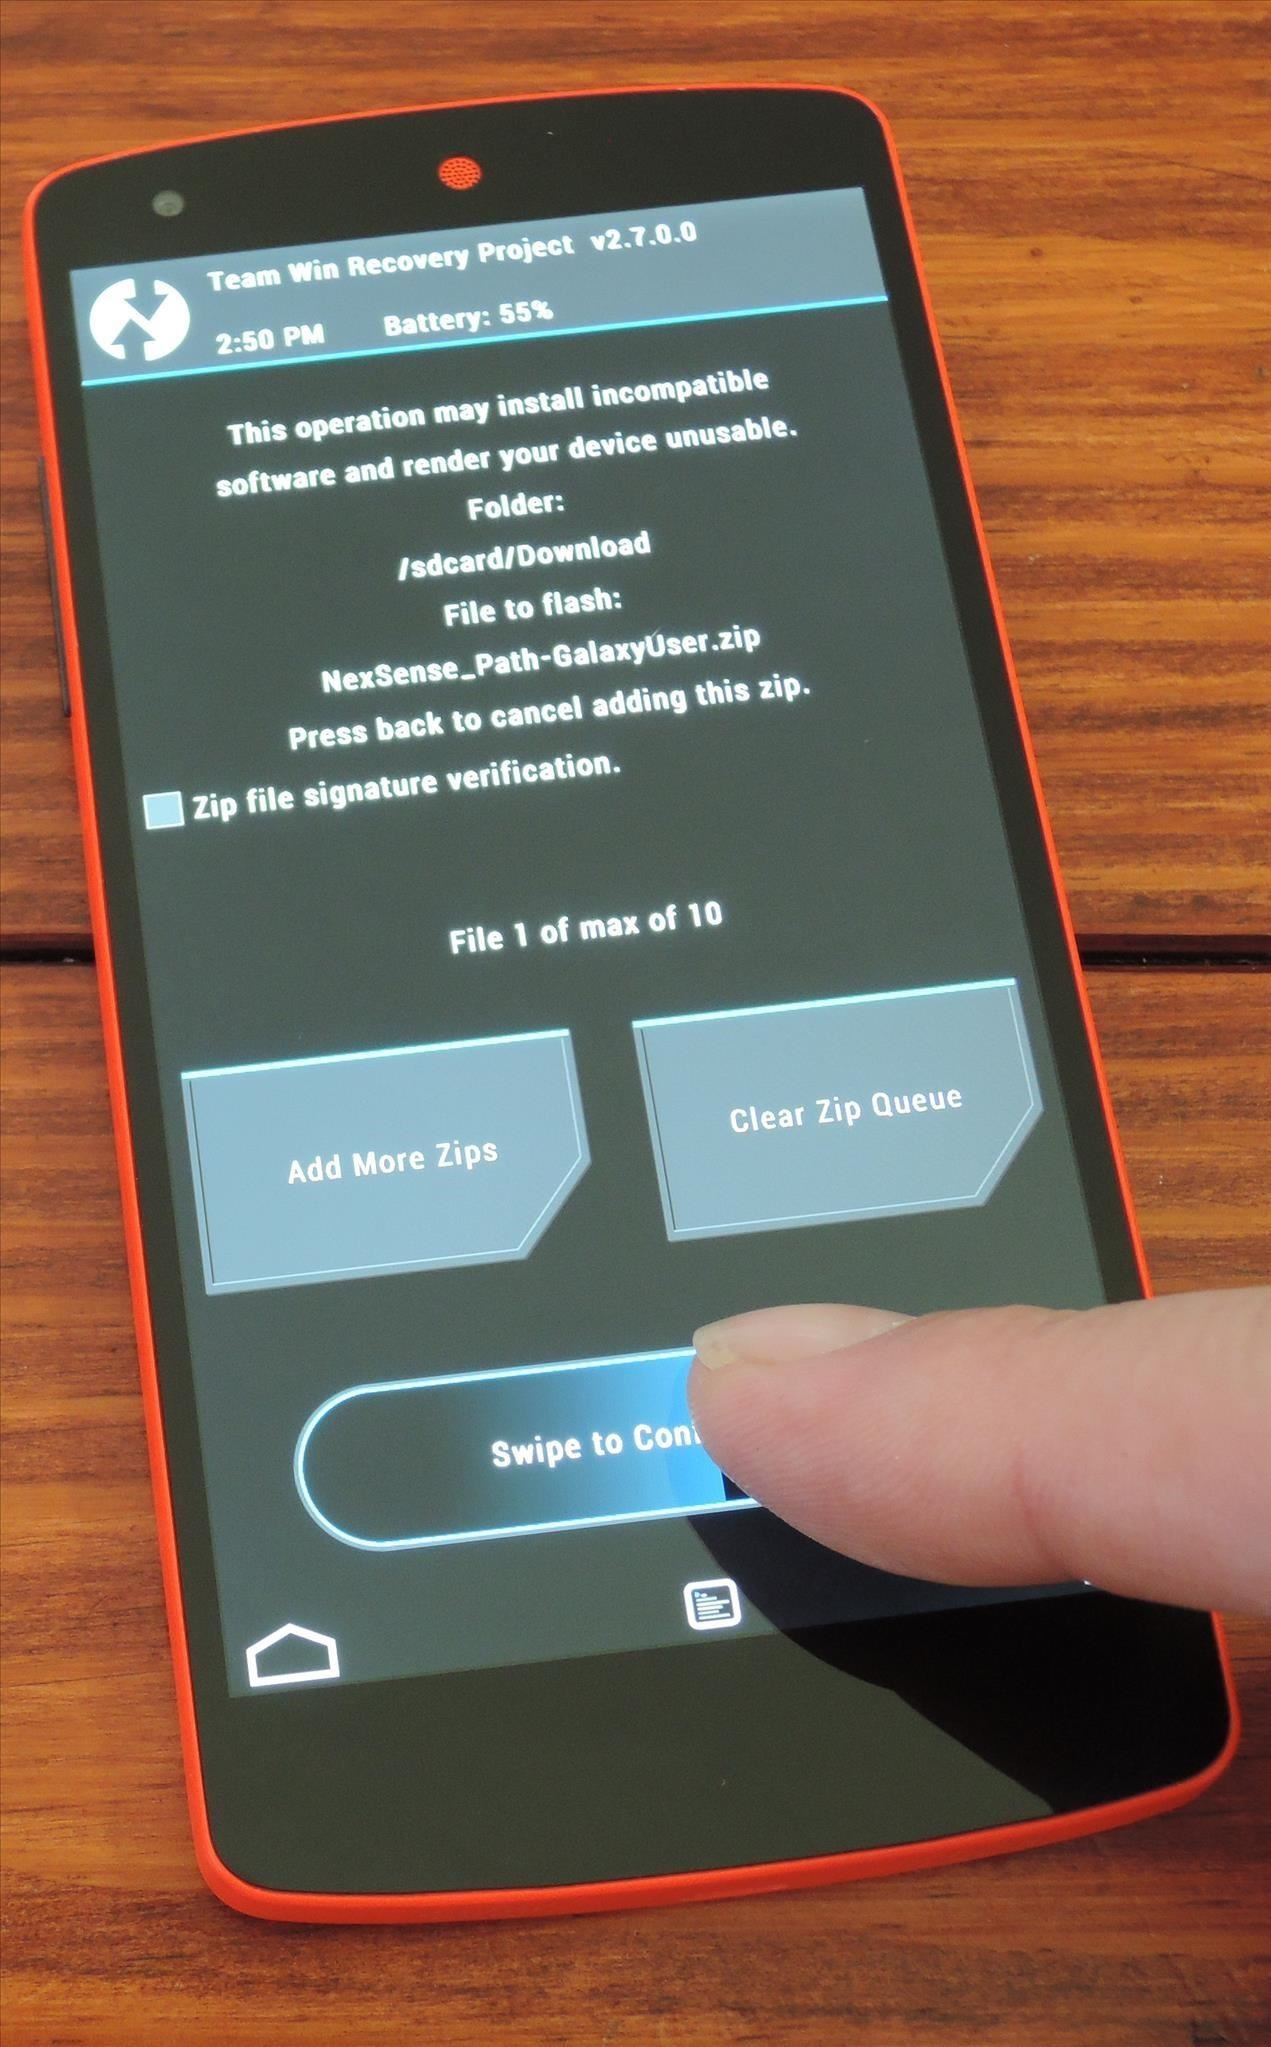
Step 6: Install the Patches
Tap the Install button again in TWRP, this time locating the file named NexSens Path-GalaxyUser. Select that, then swipe the slider at the bottom to install the fix.

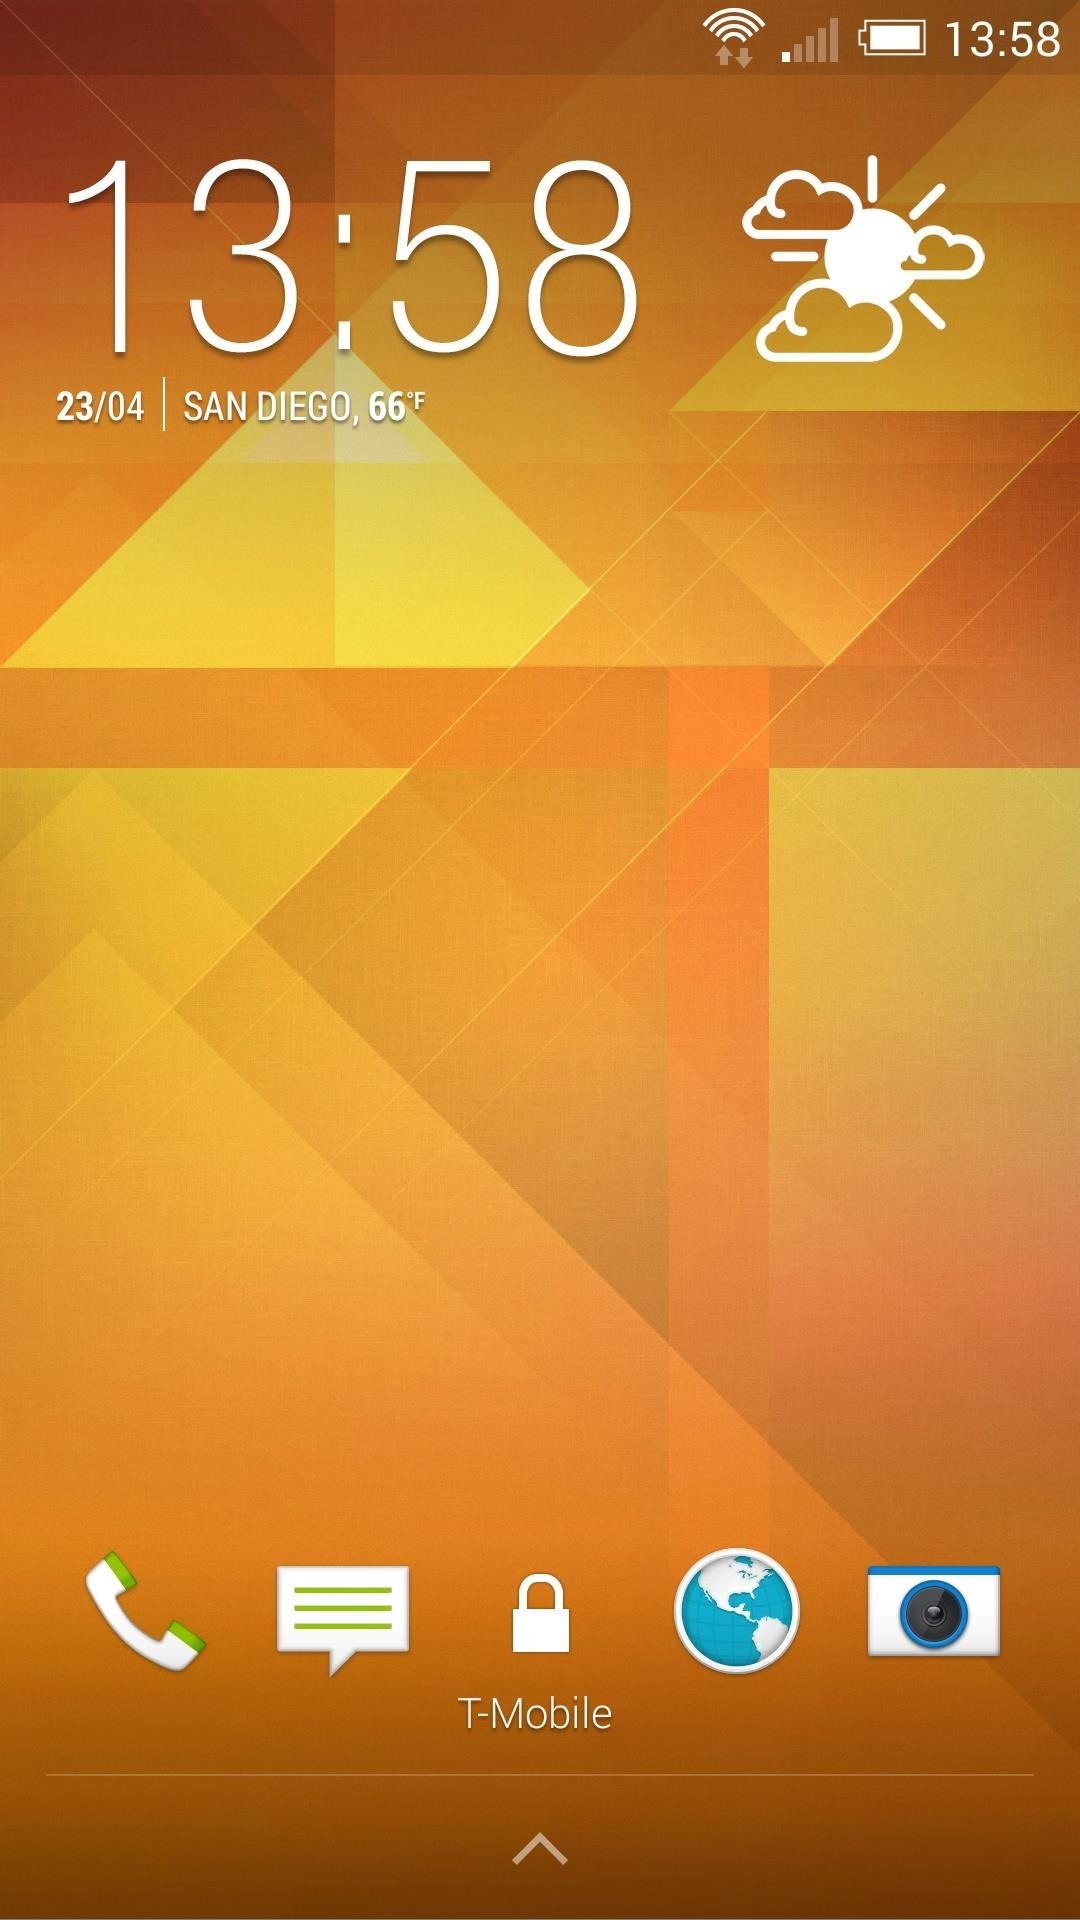
When finished, hit Reboot System. The first boot will take a few minutes, so be patient. When you're booted back up, your Nexus 5's software will look and feel exactly like an HTC One M8.
Make sure to check out Andrew's guide on Sense 6 and Jesse's walkthrough of its coolest features for a detailed look at your new OS, and let us know what you think about running the latest and greatest from HTC on your Nexus 5.
Just updated your iPhone? You'll find new emoji, enhanced security, podcast transcripts, Apple Cash virtual numbers, and other useful features. There are even new additions hidden within Safari. Find out what's new and changed on your iPhone with the iOS 17.4 update.


1 Comment
can tis b done on xiao mi mi3
Share Your Thoughts